forward improving your printer and slowly discover its capabilities, just skip this and
move to the next step.
If you want to know what manual mesh levelling is about, please read the
documentation on this topic, starting from there:
http://marlinfw.org/docs/gcode/G029-mbl.html
I personally recommend keeping printing on a small area in the front left corner of
this printer for the time being, with the already improved bed levelling knob, and wait
for a few more steps before getting to larger prints. Walk before run.
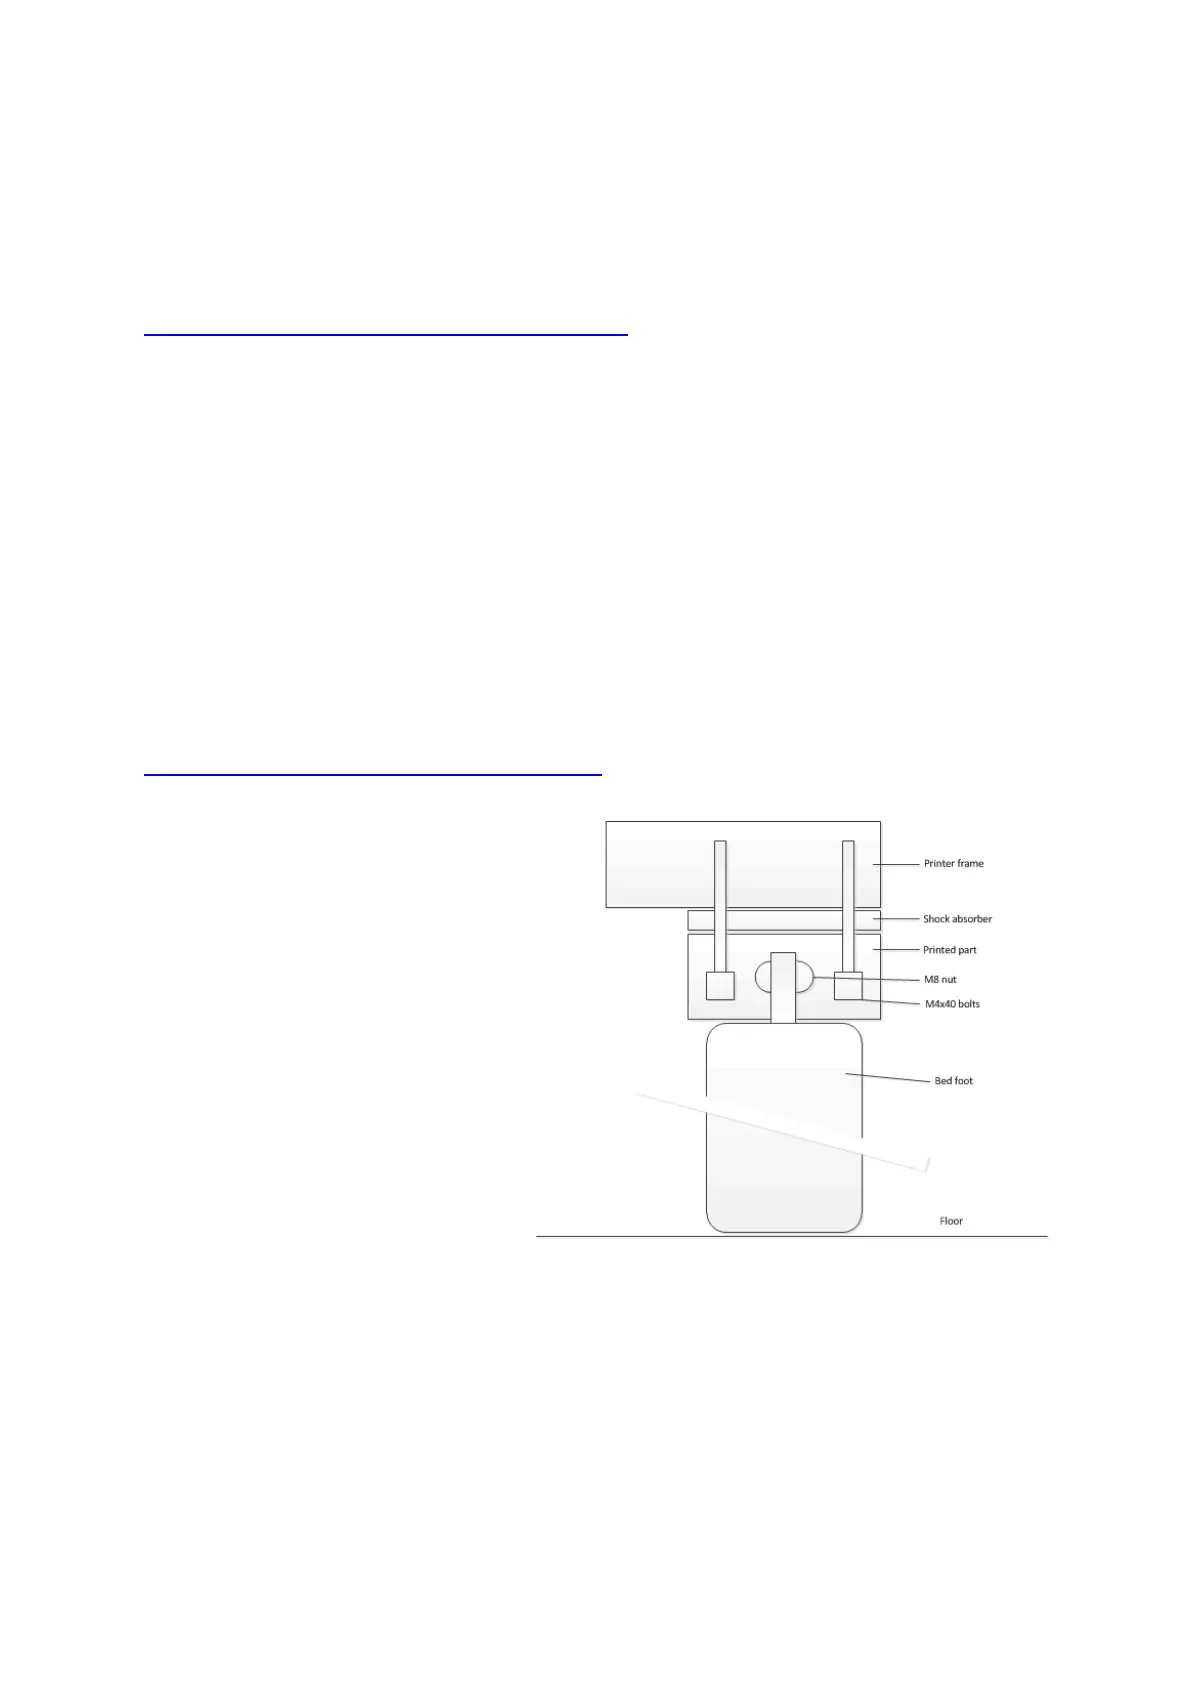
Optional – put your printer on feet
As you’ve witnessed already with the bed levelling exercise, access to parts under
the bed is not too easy. In addition, the printer is vibrating significantly, considering
the energy of the big bed with glass when reverting direction.
I saw several mods online for adding higher feet to the printer. I personally made an
upgrade here:
https://www.thingiverse.com/thing:3762782
This raises the height of the
printer, composed of a top printed
block replacing the stock block, a
layer of shock absorbing material,
and a locking hole for an M8 nut
for adding any size of standard
bed feet with M8 rod.
Bed feet (in wood, metal, etc.) are
inexpensive, very sturdy, and
available in almost any height as
you need.
Additional benefit is that the space
below the printer can be used to
create (well accessible) cable
paths as well as to store spare parts. Around 20cm high bed feet will allow storage
box about the size of shoe boxes. The higher, the more vibrations, so find a balance.
IMPORTANT RECOMMENDATION: with or without extended feet, I recommend
that you take the time to level your printer frame when you put it in location.
Especially in the case where you add bed feet and place the printer on the ground, it
is important that you add spacers under the feet so that the frame is well level in both
X and Y directions. This will greatly diminish bed warping, friction on the cart wheels,
etc. However, this will not replace a good bed levelling assistance later on.

 Loading...