Page 19
FULL LCD KEYPAD MENU PROGRAMMING
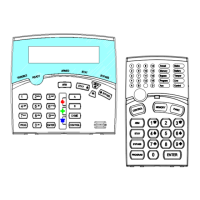
The FULL LCD Keypad enables “Menu” programming of the RUNNER 48/6 panel. Easy to follow plain text Menus
will be displayed on the keypad to enable selection of the desired programming options.
<ENTER> key selects the Menu you wish to work in or the option in a Sub-Menu you wish
to use.
<PROG> key will step you back to the previous Menu level.
ÇÈ <Up> or <Down> arrow keys will allow you to cycle through the Menu options (Main & Sub Menus).
ÅÆ <Left> or <Right> arrow keys can be used when in the Data Entry-Menus to cycle through the
options (eg if in “USERS” Data Entry-Menu, the options would be Users 1-2000, if in “ZONES” the
options would Zones 1-64, etc).
SELECTING THE MAIN-MENU HEADINGS (“Ç Up” or “È Down” Arrow Keys)
Ente
r “INSTALLER” Program Mode eg <PROG> - <INSTALLER CODE (000000)> - <ENTER>.
The LCD will display “INSTALLER:USERS”. This is the default Main-Menu heading.
To access a desired program location you first navigate to the desired Main-Menu by using the “Ç Up” button to cy-
cle forward through the menu headings (the “È Down” button moves backwards through the menu headings). Each
press of “Ç Up” button will advance the display to the next Menu heading.
The Main-Menu h
eadings are shown on the top line of the LCD display.
To access the Sub-Menu options from a Main-Menu press the <ENTER> button.
SELECTING THE SUB-MENU HEADINGS (“Ç Up” or “È Down” Arrow Keys)
Ha
ving pressed the <ENTER> button at the selected Main-Menu heading the keypad will now show Sub-Menus for
that
heading.
The Main-Menu heading will remain on the top line of the LCD display and the Sub-Menus will appear on the bottom
line.
E
ach press of “Ç Up” or “È Down” arrow keys will advance the Sub-Menus displayed on the bottom line either up or
down by one location.
To access the Data Entry-Menu options from the Sub-Menu press the <ENTER> button.
SE
LECTING THE DATA ENTRY-MENU HEADINGS
Having pressed the <ENTER> button at the desired Sub-Menu heading, the keypad will now be in the Data Entry-
Mode.
The Main-Menu heading on the top line of the display will be replaced with the actual data entry field description, eg if
you had gone from “USERS” to “CODES” then to the data entry field of codes the display will show “USER CODE 1”
on the top line of the display and the code “123” on the bottom line (“123” being the default User 1 code).
Y
ou can now change the code, eg to change Code # 1 to 4567 press <4567> <ENTER>. The bottom line will now
show
the new code of “4567”.
At this point you can use the “Ç Up” or “È Down” arrow keys to cycle through the other Sub-Menu options for User
Code 1 to program all of the options for code 1, or;
You
can use the “Å Left” or “Æ Right” arrow keys to cycle through all of the User codes. This allows you to program
a
ll of the user codes from 1-2000. The “Æ Right” arrow key when pressed will take you up one User at a time and the
“Å Left” arrow key will take you down one User, eg if the display was currently showing “USER CODE 10”, pressing
the “Å Left” arrow key will take the display to “USER CODE 9”, pressing the “Æ Right” arrow key will take the
display to “USER CODE 11”.
You can also use the “Å Left” or “Æ Right” arrow keys to move through all of the User codes, and while at a particular
Us
er, you can also use the “Ç Up” or “È Down” arrow keys to program all options for that User.
ENTER
PROG