Vortex
14
3.3 Installation of a pre-configured Vortex system
This section describes how to get started with any Vortex system that has been pre-
configured for the detectors that were supplied with it.
See the Specification Sheet provided with your system for full details of its configuration.
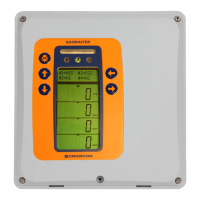
Figure 1 shows the layout of the modules within the Vortex system. The number and
arrangement of the modules will vary depending on your Vortex configuration.
INSTALLATIO
N
1. Ensure that the power supply is correct for the system (see section 4.3 and Table 16).
If your Mains Power Supply Unit has a voltage switch, ensure it is on the correct
setting for your mains supply.
2. Ensure that a circuit breaker that complies with regulations is installed for the system
power supply. See section 3.7.
3. Place the enclosure or cabinet in its working position. Consider issues of location,
cabling, and earthing discussed in sections 3.6 and 5.2 and Appendix F. The standard
enclosure is supported on screws through the two top lugs, and held against the wall
with the two bottom lugs. (see Figure 2)
4. Install the detectors. See section 5.2.1 for information on gas detector location, and
section 5.3.1 for fire detectors.
5. Install the output devices. See section 5.4.
6. Connect the RS485 port to external equipment, as required.
7. If battery backup is installed, insert the battery connector at the top right of the Power
Monitoring Module (see Figure 11). This connects the system to the battery backup.
Ensure that the Power Monitoring Module is connected to the Bus Rail with the cable.
If the battery has enough charge, power-up may occur at this point (see step 8).
8. Connect the external power supply. The green LED on the Power Monitoring Module
is illuminated. The system performs a lamp test and audible alarm test within a few
seconds. After this test, it is normal for fault conditions to occur because devices are
not yet connected. Press ACCEPT/RESET to silence the audible alarm.
9. Connect and power up the detectors one at a time by inserting the terminal plugs into
the sockets at the top and bottom of the Quad Channel Input Modules. The wiring
diagram is shown in Figure 18, Appendix B.
10. Write the detector locations on the label inside the enclosure or cabinet.
11. Connect the output devices one at a time attaching them to the Relay Output Modules,
as shown in the wiring diagram in Figure 19, Appendix B.
12. Ensure that the display is cycling through the channels by pressing the RUN button.
13. Calibrate the detectors, according to the instructions supplied with them.
14. Calibrate the channels on the Quad Channel Input Module, as described in section 3.8.