Vortex
53
9. For an oxygen detector, expose the detector to free mobile air. Ensure that the display
is showing GL and the current gas level reading. Allow this reading to stabilise. For
other gas detectors, apply calibration gas to the detector (normally half scale, but must
be greater than 20% of full scale). Allow enough time for the detector to settle
(typically two minutes). Ensure that the display is showing GL and the current gas
level reading. Allow this reading to stabilise. For a fire detector, connect an ammeter
into the channel circuit. Ensure that the display is showing FL and operate a manual
call point. If the circuit has no manual call point, put a detector into alarm with a
smoke canister.
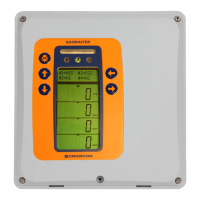
10. Press the PEAK HOLD CAL button.
11. Use the – (HOLD) and + (STEP) buttons to adjust the Reading display to the correct
reading:
For an oxygen detector in free mobile air calibrate to a reading of 20.9% Vol.
For other gas detectors, this should be the level for the applied calibration gas.
For other 4-20mA devices this should be the level for the applied condition.
For a fire detector, this should be the same reading as the ammeter in the circuit.
12. Press ACCEPT/RESET. The display should read the calibration gas concentration
(for a gas detector)or the current in mA (for a fire detector).
MAINTENANCE
If there is an E009 fault, it indicates that the mA output from the detector and the
required reading are too far apart to allow compensation. The detector calibration
should be checked.
13. The detector and Quad Channel Input Module are now configured and calibrated
correctly.
For a gas detector (other than oxygen), remove the calibration gas.
For a fire detector, remove the ammeter and reconnect the fire loop.
14. Press the RUN button on the front of the Display Module to release the Channel Test
Mode.
15. Release any Inhibit Conditions by pressing the appropriate ZONE INHIBIT button.
16. If necessary select another channel and repeat the procedure until all channels
requiring calibration are complete.
7.4 Channel Test Mode
Channel Test mode is used to view and modify the alarm level settings for a channel, using
the Display Module, and to test the configuration of relay outputs.
Channel Test mode is also needed in order to carry out calibration and re-calibration
operations (see sections 3.8 and 7.3).
7.4.1 Channel Test Mode procedure
During Channel Test mode, all gas detection and relay functions are unaffected, except for
the selected channel. The internal sounder is not used to sound alarms during Channel Test
mode. The detector level readings transmitted over the MODBUS communications link are
affected in this mode, contact Crowcon for more details.
If you wish to test simple relay configurations, you can use this procedure with the zones not
inhibited. Note that the fault condition step in Channel Test mode does not cause any relays
to be triggered.