Vortex
15
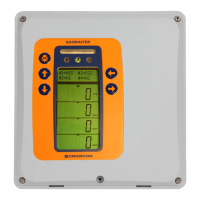
Figure 2: Vortex system in Standar d Enclosur e
3.4 Installation of an un-configured Vortex system
3.4.1 General
This section describes how to get started if your Vortex system was not supplied ready-
configured, and you need to configure it for your own detectors.
It also applies if you wish to reconfigure an existing system, for example, if you are installing
new detectors or alarms, or if you are adding new Quad Channel Input Modules or Relay
Output Modules to your system, or changing them.
1. Ensure that the power supply is correct for the system (see section 4.3 and Table 16).
If your Mains Power Supply Unit has a voltage switch, ensure it is on the correct
setting for your mains supply.
2. Ensure that a circuit breaker that complies with regulations is installed for the system
power supply. See section 3.7.
3. Place the enclosure or cabinet in its working position. Consider issues of location,
cabling and earthing discussed in sections 3.6 and 5.2 and Appendix F. The standard
enclosure is supported on screws through the two top lugs, and held against the wall
with the two bottom lugs.
4. Install the detectors. See section 5.2.1 for information on gas detector location, and
section 5.3.1 for fire detectors.