Vortex
30
VORTEX TECHNICAL
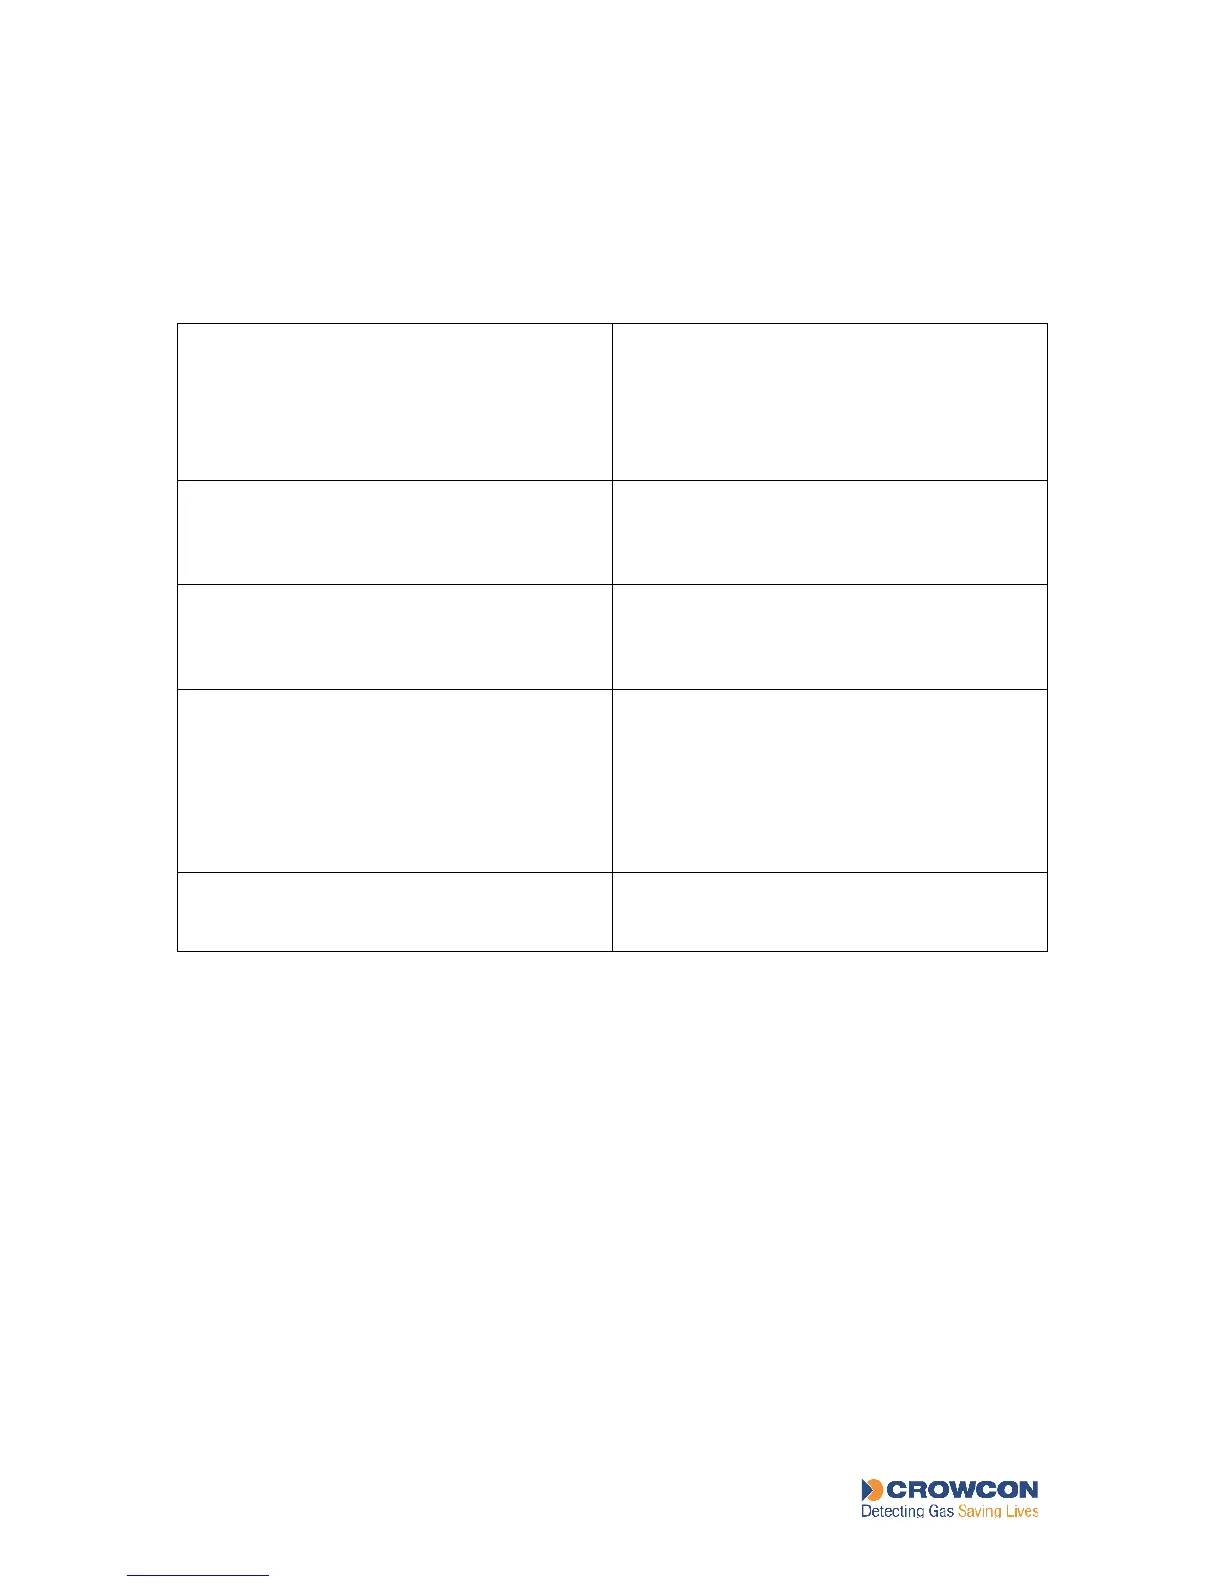
Table 10: Features of the Relay Output Module
Letters refer to the labels in Figure 7.
Relays 8 Single-Pole-Change-Over (SPCO) relays
rated at 6A 250Vac. These relays are
configurable separately for channel, alarm,
voting, time delays and relay type.
Configuration is done through the VortexPC
software.
Relay Outputs
and H to K)
Connection to each relay 1 to 8. Normally
open, normally closed and common
connections are defined in appendix B Figure
19
Yellow LED for each
relay (E)
Indicates the relay status (LED on =
energised, LED off = de-energised). The
relay coils are continuously monitored in
both energised and deenergised states.
Fault LED
Indicates a fault condition. This is also shown
on the Node Controller Module LED and the
Display Module System Fault LED (if fitted).
This LED also indicates when a relay module
is unconfigured e.g. at power up the Led in
on until the node controller has sent the relay
configuration to the relay module.
Relay Lamp Test
switch (G)
When pressed, checks that all the LEDs on
the Relay Output Module are functioning
.
4.5.2 Configuring the Relay Output Module
The physical order of the modules on the Bus Rail is not important, but, in order to reduce
interference with the input channels when switching heavy loads, we advise you to place
Relay Output Modules at the right-hand end of the DIN Rail.