Vortex
17
7. The backup batteries, if fitted, must be mounted in an upright position and the safety
valves must not be covered. The batteries must not be enclosed in an unventilated
space to avoid the build-up of any gas as the result of malfunction.
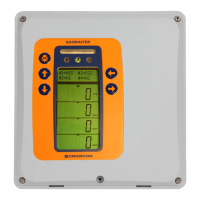
8. Mount the Display Module in an appropriate position.
a. For Vortex Rack this is simply a matter of fixing the display into a 19 inch
rack system.
b. For Vortex Panel the template supplied should be used to make the holes in
the panel. Then the display and associated metal work is fitted to the rear of
the panel with countersunk screws. The label is fitted to the front of the panel.
Care is required when fitting the label because the adhesive is very strong and
any misplacement of the label cannot be corrected without risking the quality
of the seal from the label to the panel.
9. Make the electrical connections, as shown in the schematic of Appendix B Figure 16:
Connection schematic for the Vortex system. For essential information about earthing,
see Appendix F.
Every effort has been made to provide instructions which result in a system that
maintains compliance with the LVD and EMC standards (see section 2.2.5).
Ultimately it is the customers responsibility to follow these instructions in order that
the final system remains compliant with the standards.
3.5.2 Installing the system
1. Place the system in its working position. Consider issues of location, cabling and
earthing discussed in sections 3.6 and 5.2 and Appendix F.
2. Ensure that a circuit breaker that complies with regulations is installed for the system
power supply. See section 3.7.
3. Install the detectors. See section 5.2.1 for information on gas detector location, and
section 3.6 and 5.3.1 for fire detectors.
4. Install the output devices. See section 5.4.
5. Connect the RS485 port to external equipment, as required.
6. If battery backup is installed, insert the battery connector at the top right of the Power
Monitoring Module (see Figure 11). This connects the system to the battery backup. If
the battery has enough charge, power-up may occur at this point (see step 7).
7. Connect to the power. The system does a lamp test and audible alarm test. After this
test, it is normal for fault conditions to occur because devices are not yet connected.
Press ACCEPT/RESET to silence the audible alarm.
8. Connect and power up the detectors one at a time by inserting the terminal plugs into
the sockets at the top and bottom of the Quad Channel Input Modules. The wiring
diagram is shown in Figure 18, Appendix B. Configure the channels. See section
4.4.2. Calibrate each detector according to the instructions supplied with the devices.
Calibrate the channels on the Quad Channel Input Module, as described in section 3.8.
9. Write the detector locations on the label inside the enclosure or cabinet.
10. Connect and power up the output devices one at a time. Attach them to the Relay
Output
11. Modules, as shown in the wiring diagram in Figure 19, Appendix B. Configure the
relays. See sections 4.5.2 and 4.5.3.
12. Ensure that the display is cycling through the channels by pressing the RUN button.