Engine
Installation
1.
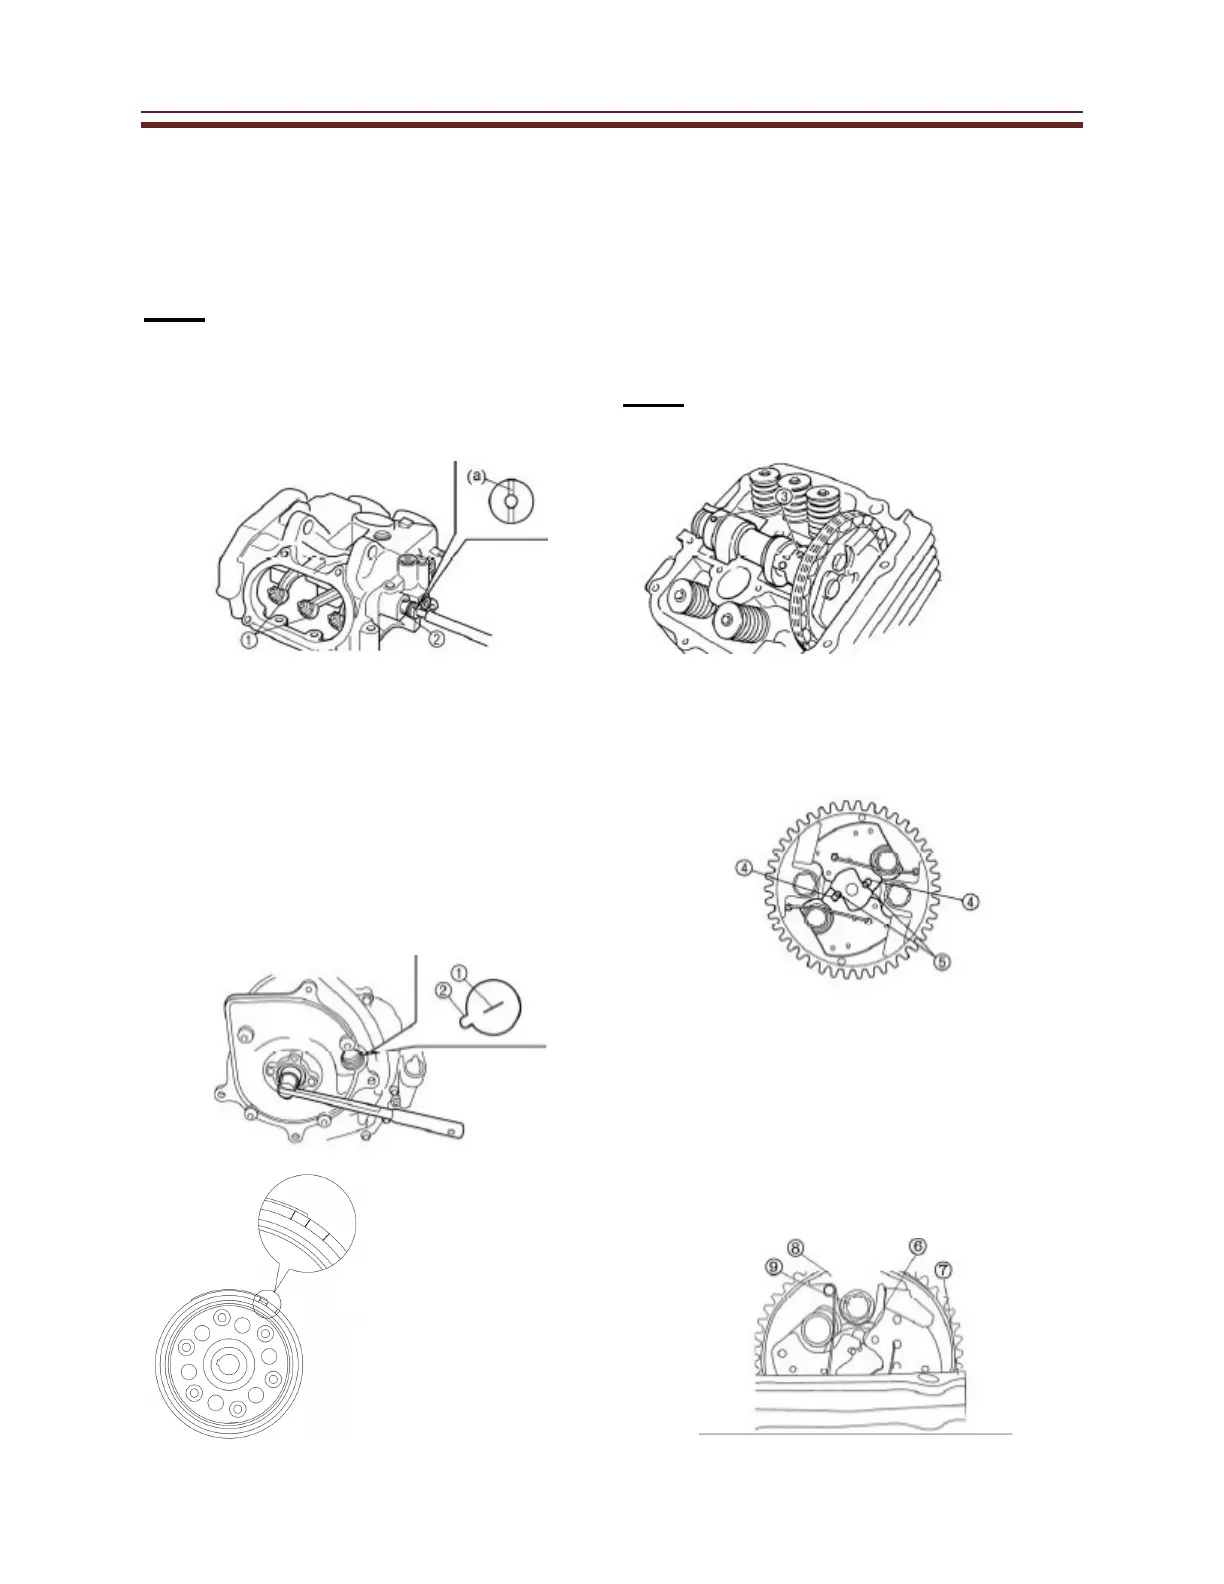
Installing the rocker arms
•
Rocker arms(1)
•
Rocker arm shafts(2)
Note:
The thread hole (a) of the rocker arm
shaft must face the outside. After
installation make sure (a) is correctly
positioned.
2.
Installing the camshaft
•
camshaft
•
camshaft sprocket
Turn the crankshaft counterclockwise to
align the 2
nd
or middle mark (1) with the
stationary pointer (2) on the A.C. magneto
cover. This will set the motor at Top Dead
center.
Caution:
Do not turn the crankshaft during the camshaft
installation.
Temporarily install the camshaft sprocket on the
camshaft. (Do not install the bolts) Install the timing chain
on the sprocket.
Note:
Make sure the small holes (3) on the
camshaft face upward.
Align the notches (4) on the decompression
cams with the projections (5) on the
decompression spring lever, then install the
camshaft sprocket on the camshaft.
Check the position as shown in the
diagram
(6) Punch mark on spring
lever (7) Top front of cylinder
head
Install decompression cam guide plate
(8) and camshaft sprocket bolts (9).
Camshaft sprocket bolt (20 Nm or 15 ft lbs)
 Loading...