EasyManuals Logo

D-Link DNS-313 User Manual

D-Link DNS-313
92 pages
To Next Page IconTo Next Page
To Previous Page IconTo Previous Page
Page #16 background imageLoading...
Page #16 background image
13D-Link DNS-313 User Manual
Section 3 - Configuration
Click n’ Connect Utility
New Hard Drive Install
If selecting the New Hard Drive Install Click n’ Connect menu option, carry out the following steps to install the new
hard drive:
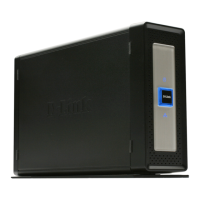
1. For new hard drive installs, the Click n’ Connect
menu illustrates how to install the SATA hard
disk. If you have not already done so, install the
drive as shown. If you have already installed the
hard disk, connected and powered on the device,
ignore the hardware setup menus.
Click on the Next button to proceed.
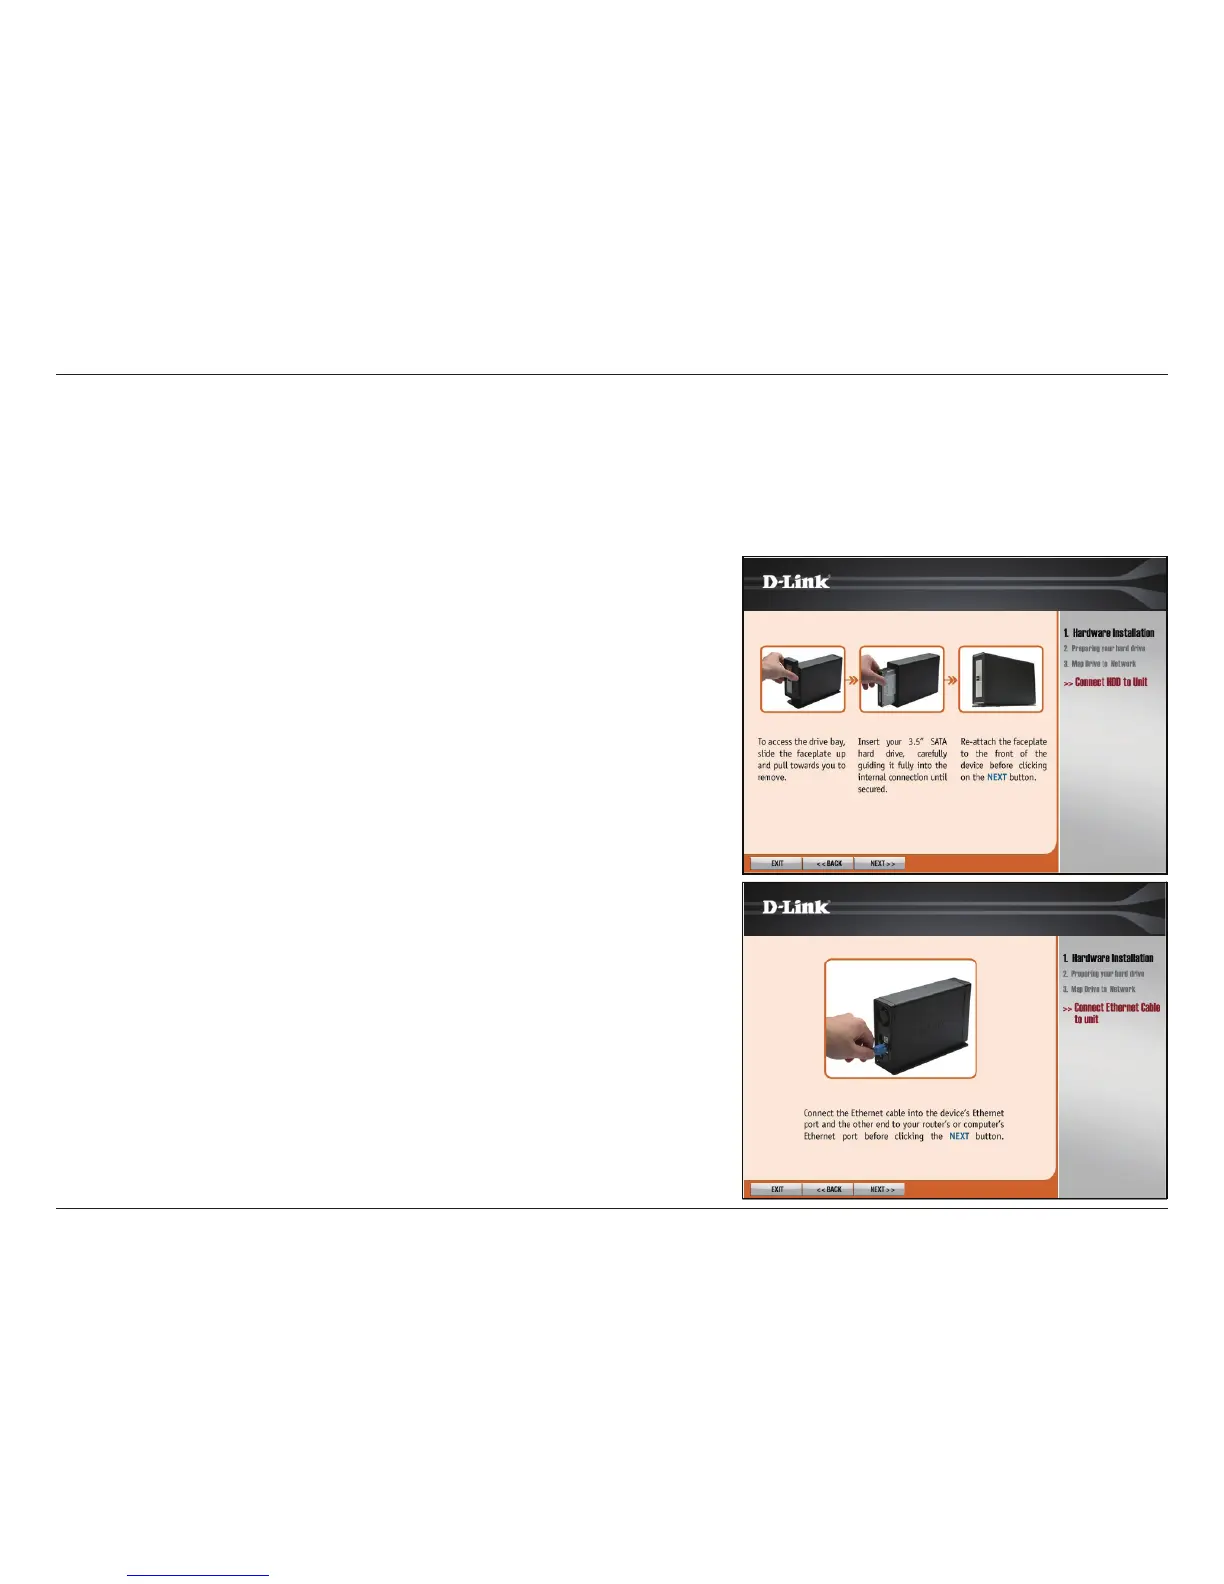
2. Connect the DNS-313 to the Ethernet port on your
computer or router and click on the Next button
to proceed to the last hardware setup illustration.

Other manuals for D-Link DNS-313

Questions and Answers:

Question and Answer IconNeed help?

Do you have a question about the D-Link DNS-313 and is the answer not in the manual?

D-Link DNS-313 Specifications

Device Interfaces IconDevice Interfaces
Gigabit Ethernet port1 10/100/1000
USB port1 USB 2.0
Power socketexternal power adapter
Operating Environment IconOperating Environment
Operating temperature0˚ to 55˚ C (32˚ to 131˚ F)
Storage temperature-20˚ to 70˚ C (-4˚ to 158˚ F)
Operating humidity5% to 90% (non-condensing)
Weight and Dimensions IconWeight and Dimensions
Dimensions200 (L) x 124 (H) x 49 (W) mm
Weight1.29 Kg
Supported hard drive type3.5-inch internal SATA

Related product manuals