●Replacement Procedure
149
Replacement
Procedure
9
Replacement Procedure
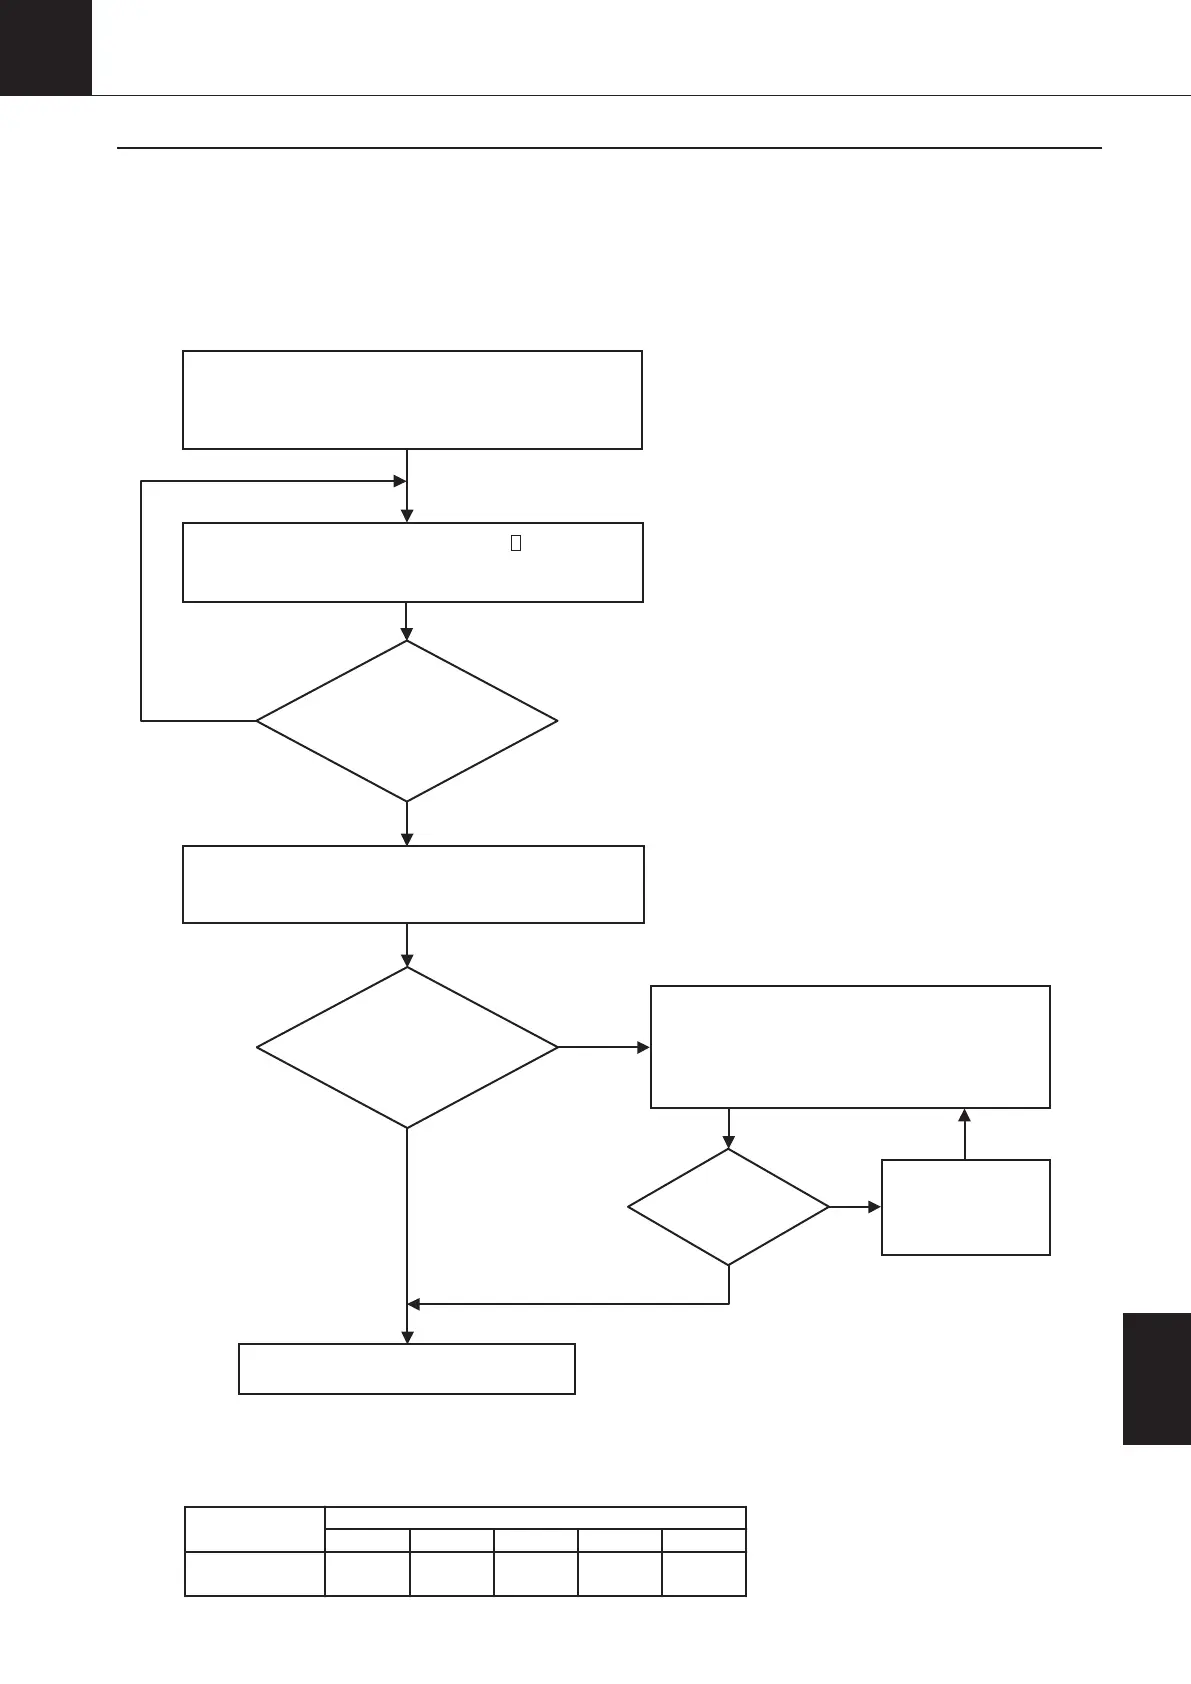
Replacing Control Board
1
For the replacement of the control board, check to be sure the model name of Oil Cooling Unit corresponds to the
applicable model of the board*, and then, follow the procedure shown below.
*
Models AKZ14A, 32A and 43A, and models AKZ14A-500, 32A-500 and 43A-500 use the same inverter board, so even if a non-applicable
board is used, the compressor will still operate. In such a case, however, the revolutions may be unstable (reduced compressor operation),
or step-out may occur. Thus, when replacing the control board, be sure to confirm the rom seal on the board and execute test running.
The replacement is complete with test run [*3] and check.
YES
NO
NO
YES
NO
Are all LEDs
on the board blinking?
Control board-LED 140, LED_A
Inverter board-
LED 300
YES
Can the
“minimum EE valve
(MO valve) pulse value”
be input while in parameter
setting mode?
Input the setup data, the note of which is taken at the beginning of the replacement.
①
Operation setting mode (For setting procedure, refer to page 61.)
②
Parameter setting mode (For setting procedure, refer to page 64.)
Input “0” as data of parameter n024 in parameter
setting mode. (Setting procedure: refer to page 64.)
↓
The “pulse detection operation with EEV (MOV) fully closed” will be
automatically initiated, and completed in approximately five minutes.
Using the control panel, check all data currently set up [*1]
and then, take a note of the data.
①
Operation setting mode (For checking procedure, refer to page 61.)
②
Parameter setting mode (For checking procedure, refer to page 64.)
Is the
malfunction code “ E9 ”
displayed?
In the operation mode 9,
set to “1%” (*2), and run
for approximately five
minutes. Then, retry.
<Replacing board>
<Inputting setup data>
<Pulse detection operation with EEV
(MOV) fully closed>
*1: The check shown on the left side cannot
be made by using the control panel, check
with the service company or customer.
*3: Make sure that the board is applied to the proper model.
<Procedure>
①Mode 9: Set to 100% (setting procedure: refer to page 61.)
②
Check to be sure the compressor rpm is increased to the levels shown in the table below in the monitor mode No. 7. (Monitor mode checking procedure: refer to page 63.)
It will take 90 seconds from the supply of power to running of the compressor.
*2: For setting procedure, refer to page 61.
1. Turn OFF the power supply and then, remove the board. (For details, refer to “ 8 Disassembling Procedure”.)
2. Mount the spare board.
3. Reinstall wirings, and turn ON the power supply.
56A
71
90A
75
32A
70
14A
43
43A
88
AKZ
Compressor
(rpm)
00_PB00540A_M10.indb 149 2023/08/09 12:59:25