●Troubleshooting
91
7
Troubleshooting
Troubleshooting
5
Troubleshooting
Diagnosis Countermeasures
1
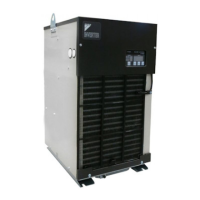
Applicable Models
AKZ**A (All series)
2
Methods of Malfunction Detection
1. Detect with the discharge
thermistor (Th-6).
2. Detect the compressor
protection thermostat (S2T).
3
Malfunction Decision Conditions
Class Conditions
10
When the discharge
thermistor detects a
temperature of the following.
Operating temperature:
100℃ (AKZ14A–43A)
115℃ (AKZ56A, 90A)
50
When the compressor protection
thermostat is actuated.
Actuating temperature: 125℃
Resetting temperature: 110℃
4
Supposed Causes
1Obstacle around the
equipment
1Dirty air filter
1Room temperature too high
1Oil inlet temperature too high
1Faulty discharge thermistor
(Th-6)
1Faulty compressor (M2C)
1Inadequate refrigerant quantity
(including slow leakage)
1Heat generated due to worn
compressor shaft
1Faulty EE valve (Y1E) or
MO valve (Y2E)
1Dirty or clogged condenser
1Short circuit of intake and
exhaust
1Faulty compressor protection
thermostat (S2T)
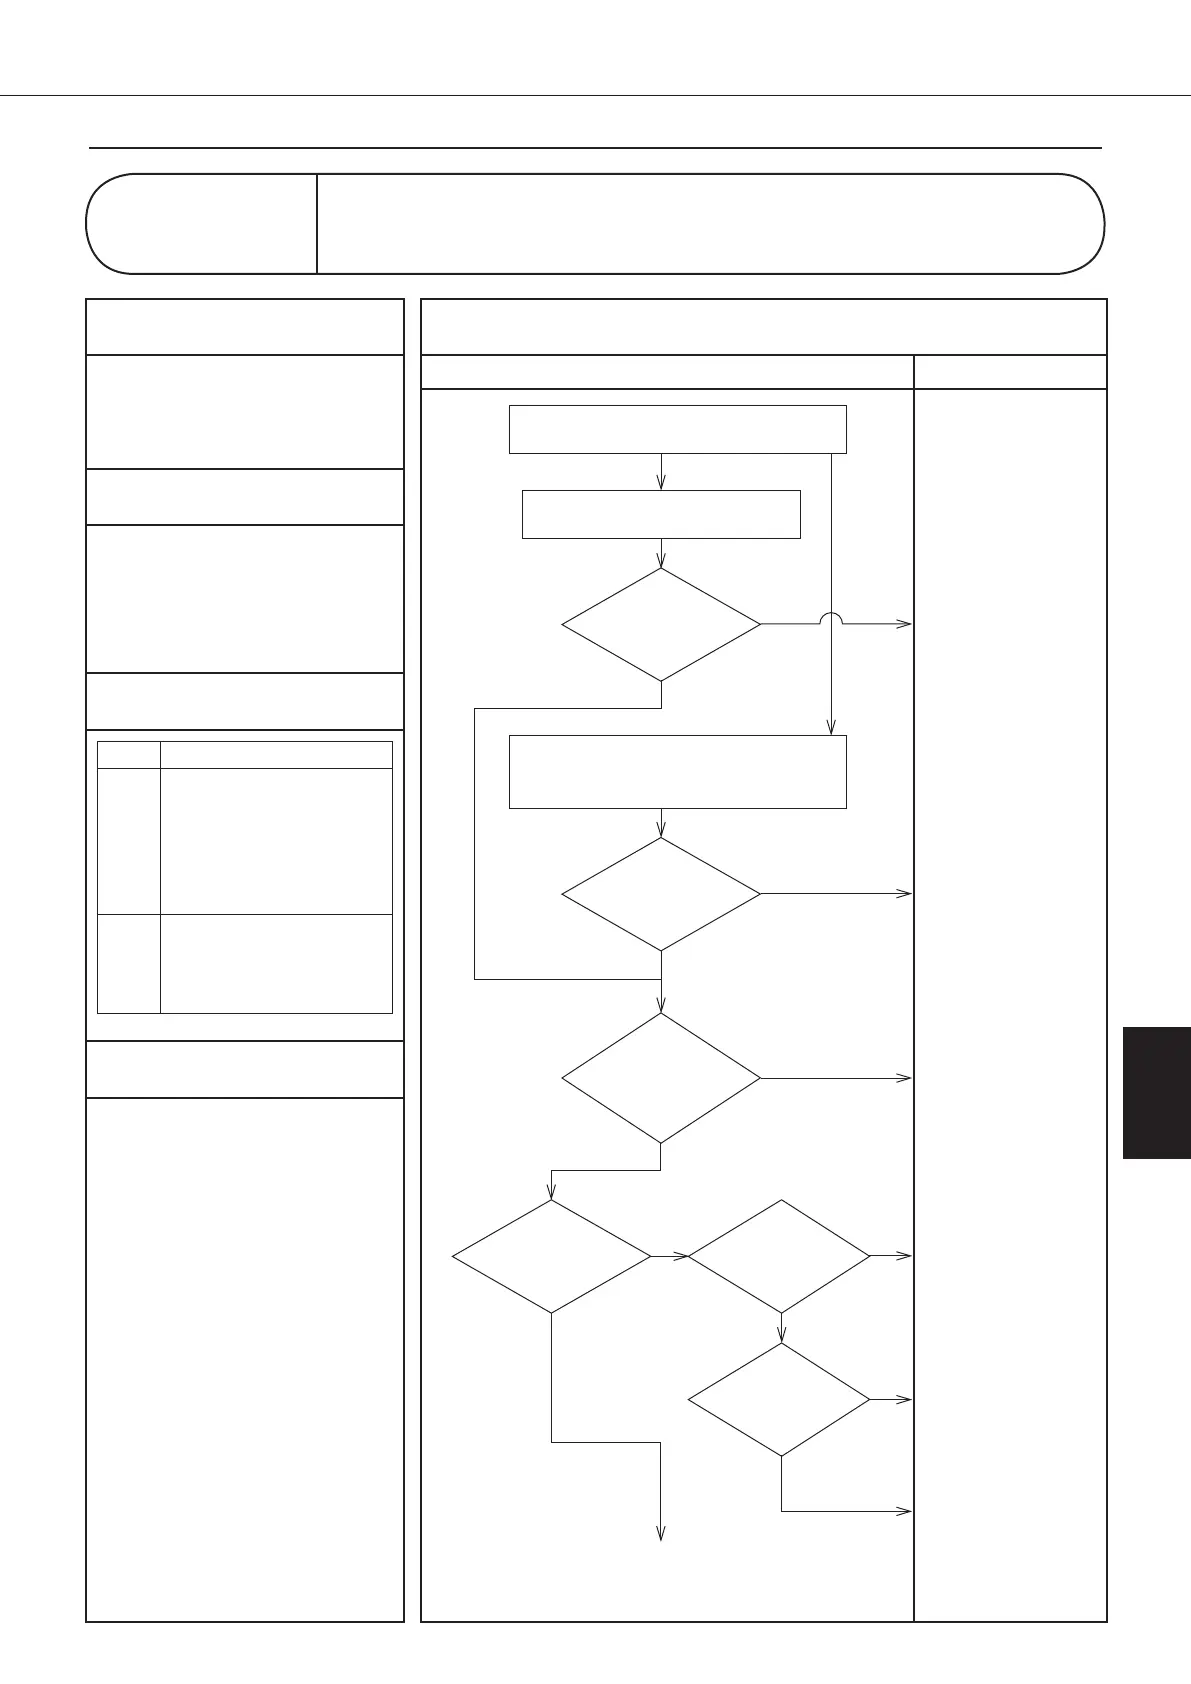
Control panel display
E5
Malfunction due to Discharge Pipe Temperature or
Overheated Compressor
Is the coil
resistance of the EE valve
(Y1E) and MO valve (Y2E) normal?
"Check 2"
(See page 116)
NO
YES
To the next page
A
○
Replace the faulty EE
valve (Y1E) coil or MO
valve (Y2E) coil.
(See page 128/143/150)
YES
NO
Is the
discharge thermistor
normal?
YES
NO
Is there conduction?
Replace the compressor
protection thermostat
(S2T).
(See page 132/148)
After a lapse of 10 minutes with the compressor in stop state,
disconnect the connector S172 of the control board (A1P), and
check the conduction of the compressor protection thermostat.
Replace the discharge
thermistor (Th-6).
(See page 130/147)
E5.10 E5.50
Measure the resistance of the discharge thermistor.
"Check 1" (See page 116)
Check the alarm code in service monitor mode.
NO
NO
Replace the EE valve
without latch noise.
(See page 128/143/150)
Replace the control
board (A1P).
(See page 122/137)
YES
YES
LED lamp is
blinking (Control board (A1P))
"Check 4"
(See page 117)
Replace the control
board (A1P).
(See page 122/137)
NO
Latch noise
comes from EE valve
and MO valve.
YES
No latch
noise comes from EE valve
and MO valve.
00_PB00540A_M10.indb 91 2023/08/09 12:59:06