System Installation and Configuration
96-30051-001 Rev. D3 DDN SFA12K (SFA OS 2.3.1) Hardware Installation & Configuration Guide | 39
To let SFA OS determine optimal enclosure/disk selections, click CREATE STORAGE
POOL. However, if you want to specify the disks to use, you may do so using one of the
three selection methods.
3. Repeat the above steps to add more storage pools as needed.
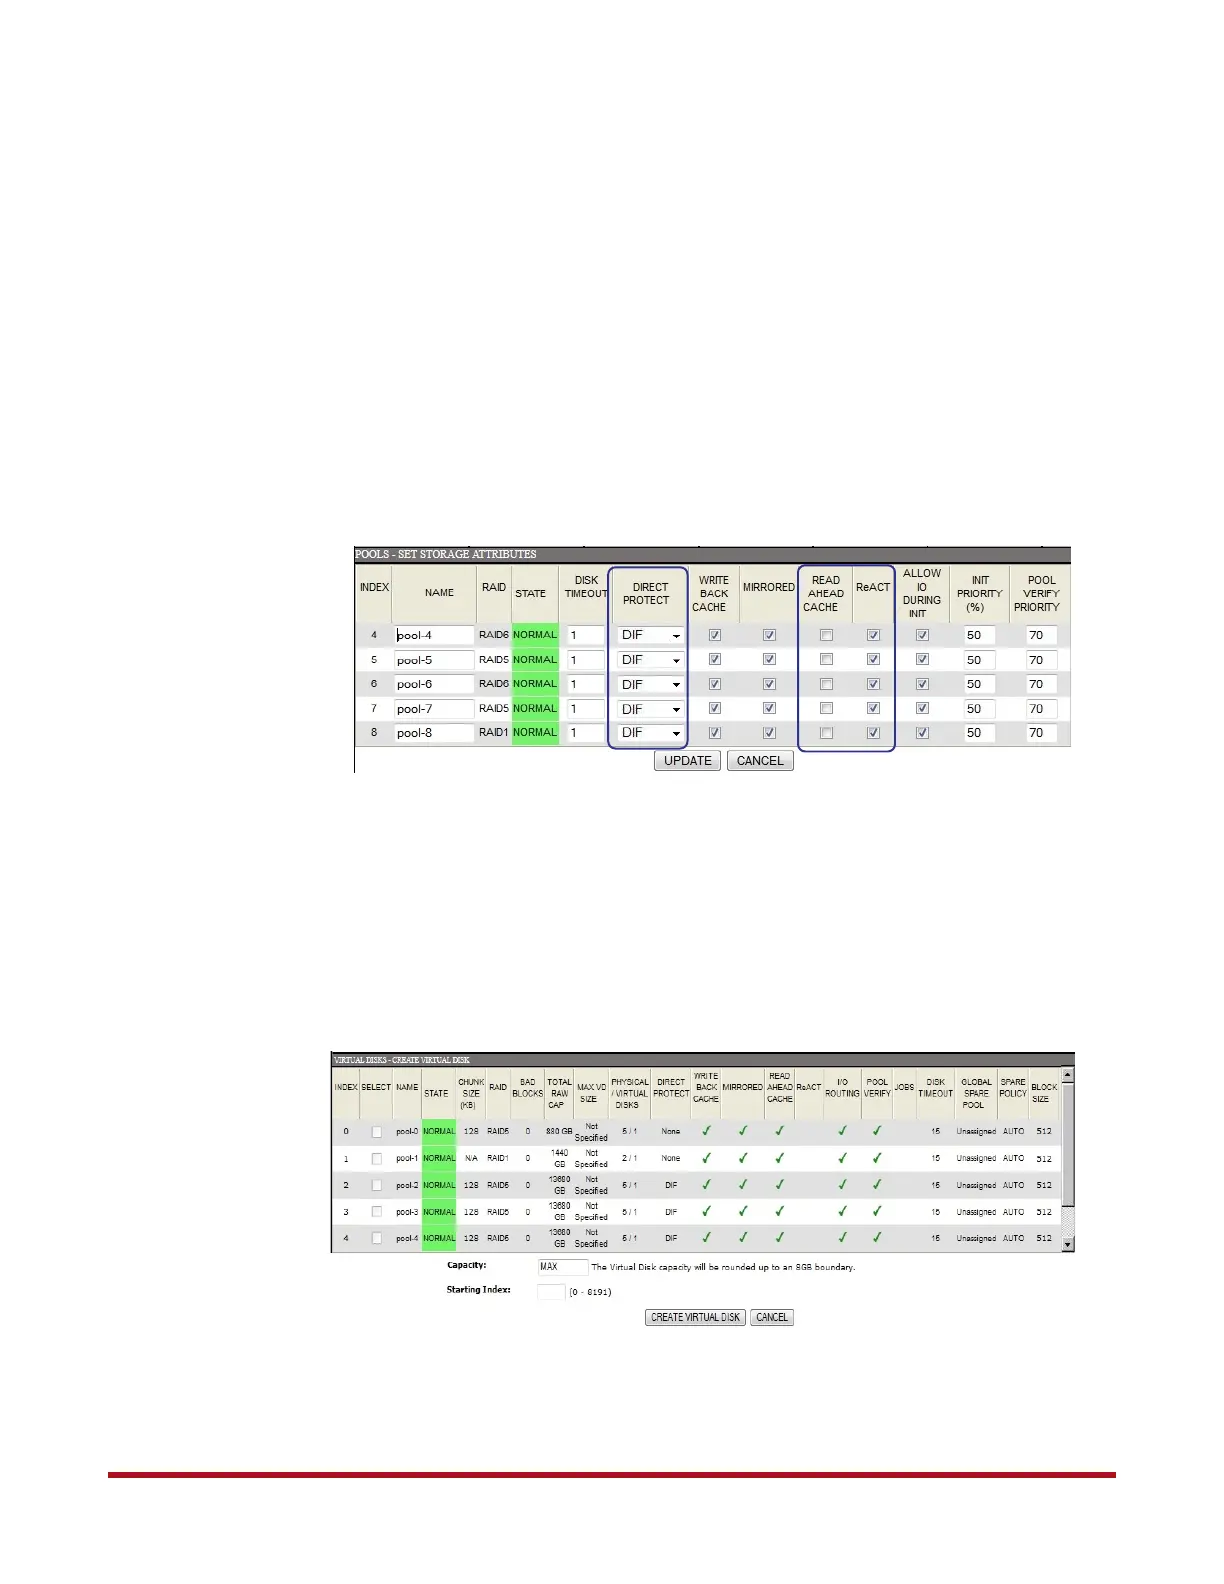
4. For optimal performance and data protection on Legacy pools (512-byte block size),
disable Read Ahead Cache, and enable the DirectProtect and ReACT features. Since
changing the DirectProtect setting may require an initialization, it is recommended that
you select the DirectProtect method at the time of pool creation. Also refer to the SFA
OS User Guide for additional information on all the pool attributes which may also be
changed later.
Select Pools > Set Storage Attributes (Figure 40). Change the settings for each pool.
Click UPDATE to save the changes.
19.2 Create Virtual Disks
A virtual disk can span a portion or utilize the entire capacity of a single storage pool. Up to
8192 virtual disks are supported.
1. Select Virtual Disk > Create Virtual Disk. The Create Virtual Disk screen displays
(Figure 41), showing all the existing storage pools.
2. Select the storage pool(s) that the virtual disk will be created on.
3. Enter the capacity in GiB or type MAX to use all available capacity.
Figure 40. Set Storage Pool Attributes Screen
Figure 41. Create Virtual Disk Screen