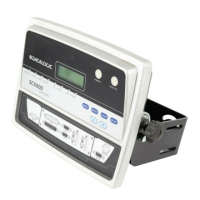
2.7.3 Auto PackTrack Setup
After setting the initial parameters in the PackTrack menu the Auto PackTrack setup
procedure can be started:
1. Press Enter at the Start item in the PackTrack menu.
2. Press Enter to confirm the action. The SC6000 sends the message to the Slave
scanners and the Display shows the Wait message.
After receiving the answer from all of the Slaves, the SC6000 shows the status of
each node (of each scanner of the cluster) as in the example below.
The slave scanners are listed as letters only (A, B, C, etc.) independently from the
selection in the System Information Section>User Interface Style configuration
parameter in Genius™.
Above each scanner position a symbol indicates the scanner status according to the
following convention:
not supported by scanner software version
can be calibrated but the calibration procedure fails
either barcode reading or verification
scanner stops responding during the procedure
scanner ready to be calibrated
scanner calibrated but not verified
3. At this point the SC6000 display allows to Continue or to Stop the procedure. You
can switch between the previous display windows using the Up or Down arrow keys.
If there are any nodes that show as U or L, then you should Stop the procedure and
correct the problem.
If the nodes respond with I, N, or C then you can Continue with the procedure.
4. Press Enter to Continue the procedure. The SC6000 shows message Let the parcel
run.
5. Place the PCT-8000 onto the moving conveyor, before the PS Line (reference point)
and parallel to a conveyor edge (i.e. right-hand edge) with its arrow in the same
direction as the conveyor movement. Let it pass through the reading station. The
SC6000 shows the Wait message.