AP20 Installation and Operating Guide Page 87
AP20 Installation & Operating Guide Document # 9301H39200 Ver. 1.25
Profile” box to bring up the virtual keyboard and enter a name for the new profile. Press the
Copy button to complete the process, or press Cancel to quit.
Copy Default to Profile – Select the default audio profile and use it as a template for a
new one. Select the profile you wish to copy from by selecting it from the drop down box.
Then, touch the “to Profile” box to bring up the virtual keyboard and enter a name for the
new profile. Press the Copy button to complete the process, or press Cancel to quit.
Rename Profile – Give an existing audio profile a new name. Select an existing profile
from the drop-down list on the right side of the screen. Touch the “To” box to bring up the
virtual keyboard and enter a new name for the profile. Press the Rename button to
complete the process, or press Cancel to quit.
Note: The Channel Profile name is changed for all Formats that use the Channel Profile.
Delete Profile – Select an existing audio profile from the drop-down list on the right side
of the screen. Press the Delete button to complete the process, or press Cancel to quit.
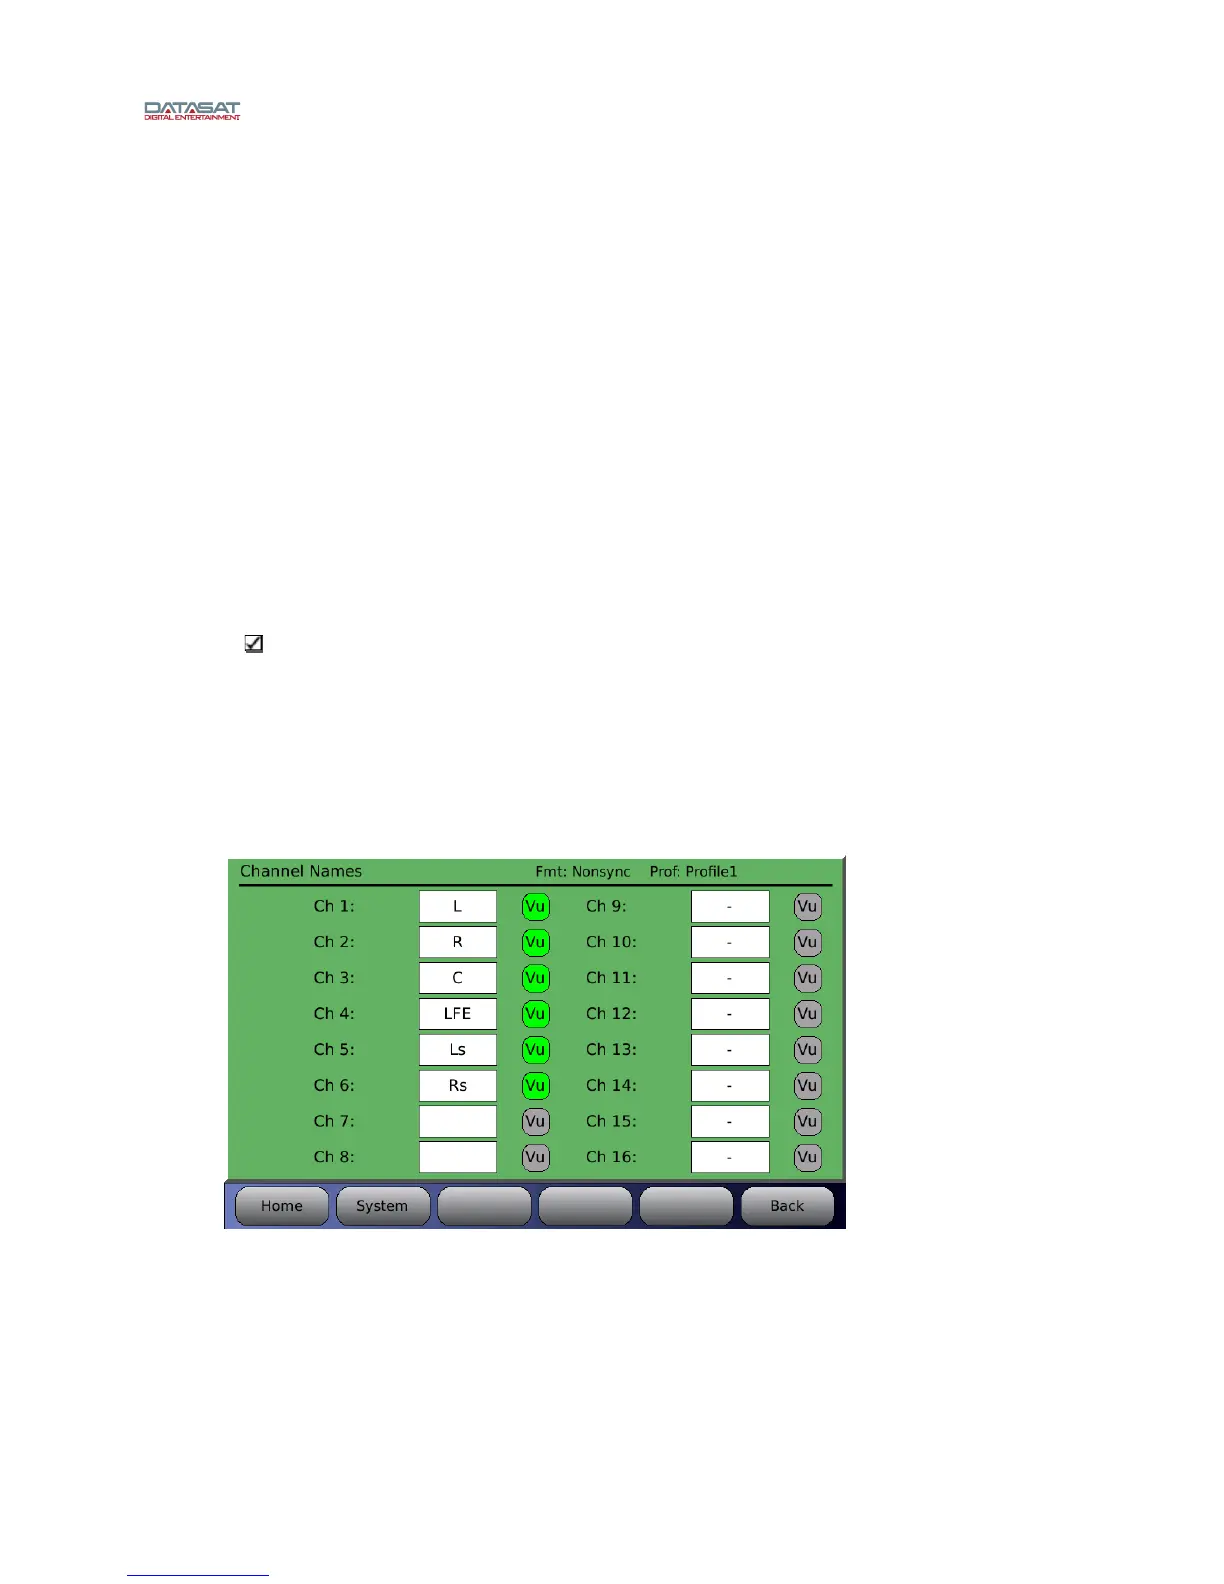
4.3.8.3 Channel Names
Depending how the AP20
is connected, sixteen channels are available. Channel assignments can
be different in other profiles. The top title bar displays the current format and profile.
Note: In general, the default assignments must be preserved for the first 6 channels in
order to maintain compatibility with the HDMI input channel assignments, and with the
Hearing Impaired output channel. Default channel names are indicated in Table 8 page
37.
The profile channel nam
e refers to the input channel only. The channel name for the output
channel (if used) will be a combination of the corresponding input and the crossover letter (for
example, Left-H).
Menu (System) > Formats > Channel Profile > Channel Names
Figure 65. Assign Channel Names Screen (with Presets)
To change or enter a new channel name select the white field next to the desired channel. A
keyboard will appear allowing you to enter text. Type in the channel name then select OK. The
channel name will now appear in the field and in the Home Screen (in yellow text just below the
channel numbers).
When a Vu button is highlighted green, that channel will display Vu bars on the Home screen.