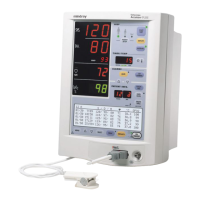
Accutorr Plus Service Manual 0070-10-0691 3 - 13
Repair Information Disassembly Instructions
3.6.7 Removal of the LCD Display (Advanced Model)
1. Remove the right side support bracket for the LCD. Disconnect data ribbon cable.
2. Disengage LCD circuit board from left side support bracket and disconnect backlight
cable from the CPU / NIBP board.
3.6.8 Removal and replacement of the Internal Li-Ion Battery
To remove the externally accessible battery, press the quick release tab on the battery
access door and open door. The battery is retained internally in a sliding compartment,
captured by a spring loaded release tab. Press the tab away from the battery; the battery
will eject with a spring assist mechanism.
Reverse the process to install the replacement battery.
NOTE: New batteries are shipped in a discharged state
for safety reasons. A new battery must be
charged for 4 hours for Li-Ion before first use. The
monitor may be used with AC mains power during
the charge cycle but battery operation could be
limited during this time.
3.6.9 Removal of the AC Input Receptacle Assembly
1. Press the plastic locking tabs on the rear of the AC receptacle. A small screwdriver
may be inserted at the cut out on the left of the AC connector, to release the locking
tabs.
2. From the front side of the receptacle, starting at the edge closest to the Interface
connector, press upwards, while pulling the connector out.
3. Disconnect the cable end from the Power Supply circuit board.
4. Remove the locking nuts from the safety ground terminal stud; remove ground
conductor.
3.6.10 Thermal Printer (optional module)
1. Detach the complete module from the main NIBP section, by removing the two
screws in the plastic housing. Grasp the plastic housing and pull to the rear to
disengage the Interface connector.
2. Remove the two screws retaining the circuit board and the anti static shield assembly.
Remove the shield.
3. Remove the remaining two screws and lift the circuit board out.
3.6.11 Thermometer, Predictive (optional module)
1. Detach the complete module from the main NIBP section by removing the two screws
in the plastic housing. Grasp the plastic housing and pull to the rear to disengage the
interface connector.