SpO
2
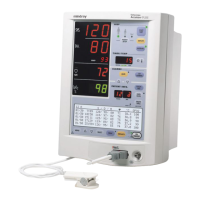
Normal Operation (Accutorr Plus model with SpO
2
)Calibration
5 - 20 0070-10-0691 Accutorr Plus Service Manual
5.10 SpO
2
Normal Operation (Accutorr Plus model with
SpO
2
)
The purpose of this test is to verify that an SpO
2
signal is recognized, alarm limits are
captured and the data is trended. A full operational test may be conducted, if so warranted,
within the limits of the published specification. See chapter 3 of this manual for
specifications.
1. Set the simulator to an SpO
2
saturation level of 98%, pulse rate of 60 bpm, and a
pulse amplitude of 100%.
2. Set the Accutorr Plus SpO
2
HI alarm limit to 95% and the pulse rate HI alarm limit to
55 bpm.
3. Connect an NIBP cuff or a suitable simulator to the Accutorr Plus and start a
measurement.
4. Confirm that the Accutorr Plus has determined an SpO
2
saturation level and has
violated the SpO
2
HI alarm and the pulse rate HI alarm (flashing digits and alarm
tone). Press the MUTE key to silence the alarms.
5. Check the trend screen to confirm that the measurement information has been saved.
6. Set the SpO
2
HI alarm to OFF and SpO
2
LOW alarm to 86.
7. Set the simulator to an SpO
2
saturation level of 90%, pulse rate of 95 bpm, and the
pulse amplitude to approximately 10% (low perfusion Masimo® SpO
2
only).
8. The Accutorr Plus may intermittently determine SpO
2
values or indicate a status code
of 8853 (Pulse Search) or 8854 (Weak Pulse / Low Perfusion will display). Adjust the
simulators pulse amplitude up and down until either status code of 8853 or 8854
displays.
9. Restore normal simulation parameters as described in step 1.
10. Remove the sensor from the simulator to induce a status code of 8851 (Sensor Off)
(Masimo® SpO
2
only).
11. Disconnect the sensor from the Accutorr Plus to produce a status code of 8850 (No
Sensor).