Technical Manual
54
2. Remove all the cables from the pod’s connectors, and fit dummy
connectors or caps to the connectors,
3. Remove the M6 cap bolts from around the top-cap,
4. Fit two of the M6x35 cap bolts to the jacking holes, and systematically
turn them, jacking the entire top-cap out of the vessel,
5. Slowly remove the cap
6. If the top-cap is removed with the pod outside, place an appropriate
blanking plate over the open vessel to keep any water out. It should be
noted that the pod should not be left like this outside for very long due
to the high risk of moisture ingress.
Pot Top-Cap Refitting
Refitting the top-cap is simply the reverse process of removal, but special care
should be taken with ensuring the o-rings are in good condition and lightly
lubricated with silicone grease.
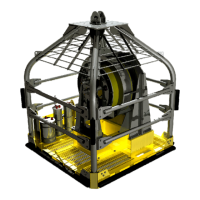
Pod Disassembly
It is not considered necessary to disassemble the inverter pod for the majority
of work undertaken. It is however necessary to fully disassemble the pod if the
inverter or filter requires replacement. Disassembly should only be carried out
in a dry workshop environment.
Electrical Installation
A wiring schematic diagram of the inverter pod is shown in Error! Reference
source not found..