Upgrade Procedure
Step 4:
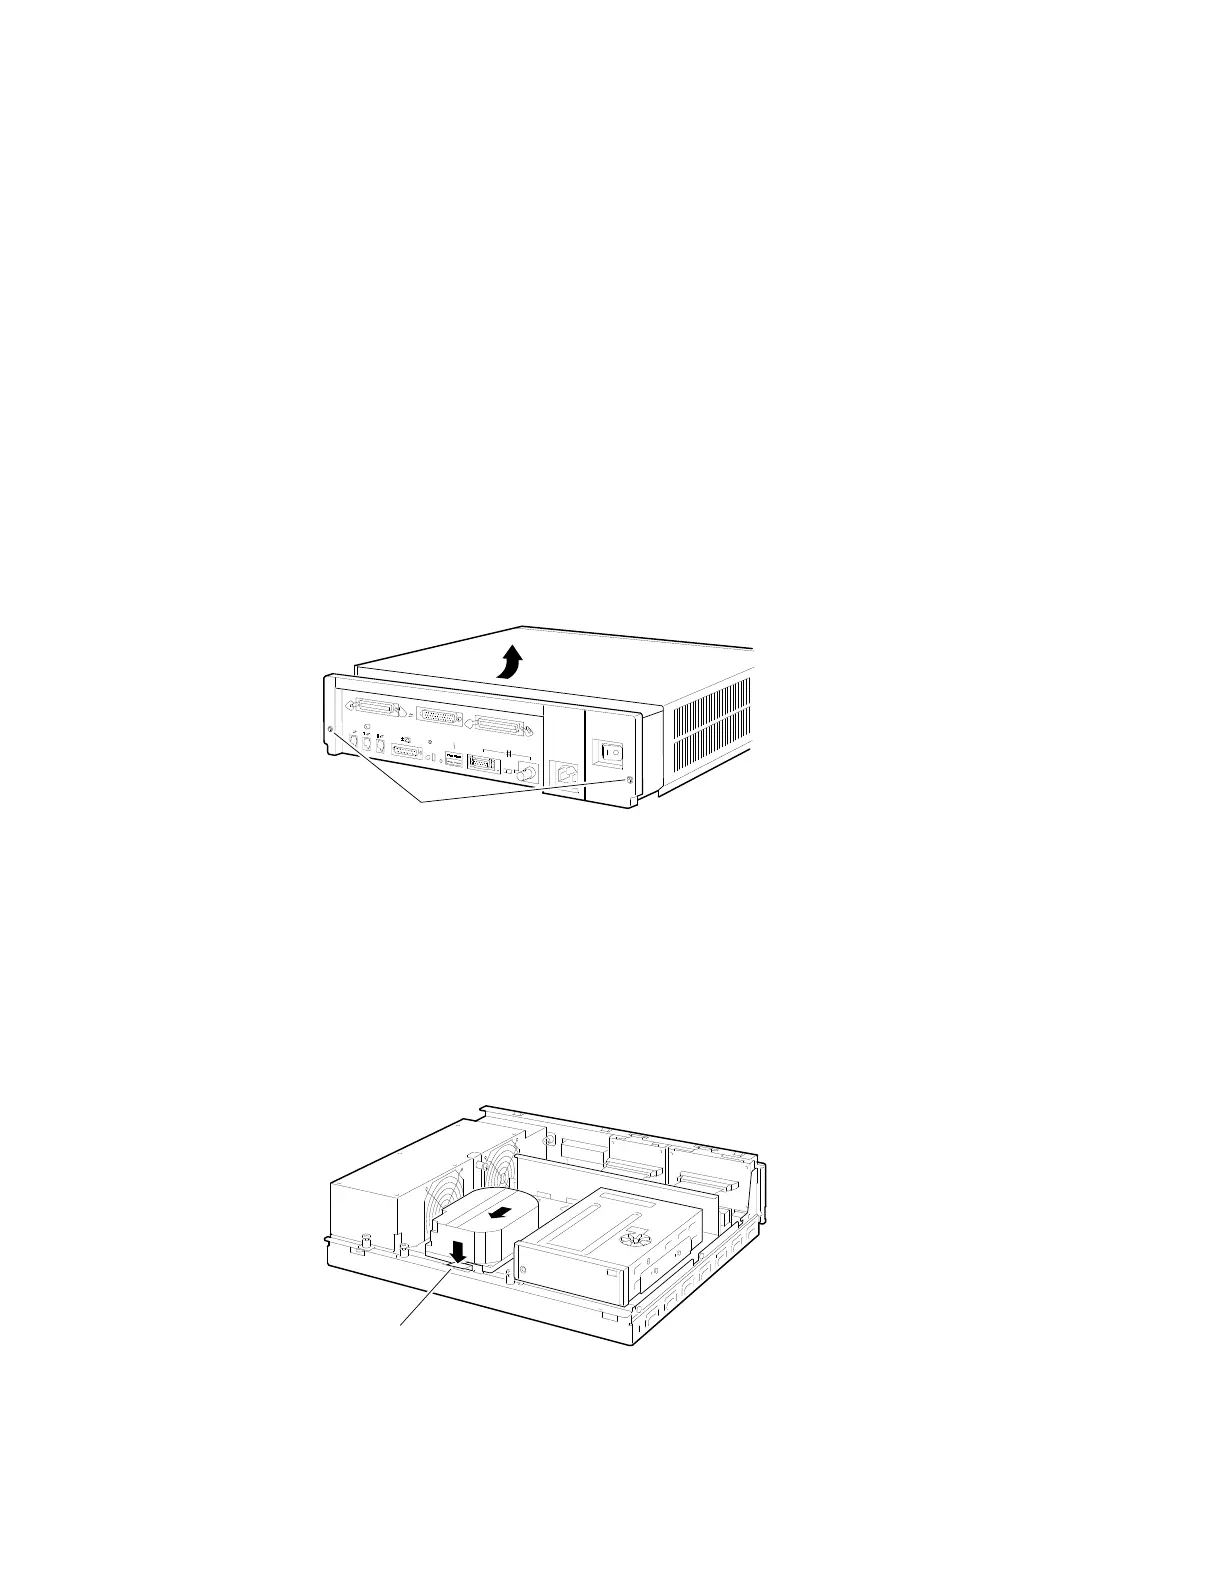
Remove
System Cover
1. Loosen the two captive screws on the back of the system
unit. These screws can be loosened but not removed.
2. Slide the cover forward and lift it up from the system unit.
Set the cover aside.
0
A
0
Captive
Screws
MLO-010741
Step 5:
Remove Fixed
Disk Drives
1. Press and hold the spring clip that locks the disk drive in
position.
2. Refer to the figure, and push the disk drive towards the
spring clip until the rubber grommets on the bottom of the
disk drive release from the cutouts in the drive mounting
shelf.
MLO-010742
Spring Clip
3. Lift the disk drive up from the drive mounting shelf and
release the spring clip.
4. Disconnect the SCSI and power cables from the back of the
drive.
Upgrading a MicroVAX 3100 Model 30 7–3