5. Commissioning
5.1 Commissioning preparation
Do not remove the protective plastic from the front window before the installation is approved by the class surveyor.
When the indicator is without power, the pointer position is random. When power is applied to the indicator, the pointer
moves randomly for a few seconds. When the pointer settles position adjustment and commissioning can begin.
5.2 Commissioning analogue indicators
The XL and indicators are equipped with an amber LED indicator located in the corner of the scale.
After power-up, the LED flashes once per second, and after two seconds the LED turns off. If there is an internal error (for
example, the microprocessor stops) the LED continues flashing. Contact DEIF Customer Service if an internal error occurs.
After power-up and in case of incorrect input signal connected to the indicator (for example, the input signal is below
minimum or above maximum) the pointer indicates the out-of-range condition after two seconds by moving pointer to the
error position. This continues until the input is adjusted to be within the nominal input range. If the indicator has a 360°
scale, the faulty input is also indicated by a flashing error LED.
The working range is % to 102 % of the nominal input range. If the input is outside of the working range the pointer
indicates “out of range”.
More information
See Error handling for more information about fault indication.
5.2.1 Special 4 to 20 mA functionality
The 4 to 20 mA single version has a special feature that makes it possible to change the pointer deflection from CW to
20 mA on terminals to CCW to 4 mA on terminals
The selection between the two inputs happens during each power-up of the indicator. During power-up, the two inputs
search for a valid input signal. A valid input isgnal is in the range of 5 to 20 mA. When a valid input signal is detected on one
of the inputs, the input is used until the indicator is powered off.
Note that:
• Due to product tolerances, the minimum input for valid detection is between 4 and 5 mA.
◦ Use 5 mA to ensure detection
• When a valid input is present at both inputs simultaneously, no selection is made.
◦ Only attach the input to the desired input terminals.
• At each power-up, the product searches for valid input.
• Even if input terminals are used, the indicator always starts up with a pointer position at the minimum error
position, until the input value is greater than 5 mA.
5.2.2
Adjustment of single analogue input indicators
The zero point can be adjusted by means of the potentiometer named B. With a signal close to minimum input, e.g.
V input, the corresponding point on the scale is adjusted using V as input signal. Then connect V to the input
and adjust to correct reading by means of the potentiometer named A. Indicators with scale zero at scale midpoint must be
adjusted to scale zero with B (zero) adjustment.
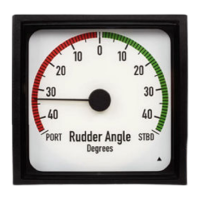
When the XL instrument is connected to a rudder transmitter, some adjustment may be necessary to match the indicator
precisely to the transmitter. First, turn the rudder to give an input signal close to minimum and adjust the reading on the
Installation and commissioning guide 4189350024O EN
Page 27 of 39
 Loading...