Procedure
1. Attach an ESD wristband to your wrist and the enclosure.
2. Note the number of the slot containing the disk that you are transferring.
3. Push down on the disk's orange release button to release the disk's latch.
4. Pull the latch and slowly pull the disk from its slot, and place it on a static-free surface.
Figure 31 Removing a disk
Installing a disk
About this task
Refer to Figure 32 on page 44 while performing the procedure that follows.
Procedure
1.
Attach an ESD wristband to your wrist and the enclosure in which you are installing the disk.
2. Align the disk with the guides in the slot.
3. With the disk carrier latch fully open, gently push the disk into the slot.
The latch begins to rotate downward when its tabs meet the enclosure.
4. Push on the orange latch tab until the disk is seated in the slot.
5. Push the handle down to engage the latch.
6. Remove and store the ESD wristband.
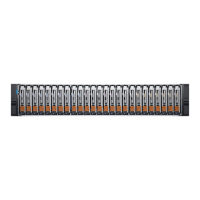
Replacing a 25-Slot Disk-Array Enclosure
Dell EMC FS25 SSD Shelf Guide Field Replacement Unit Guide 43

 Loading...


