EasyManuals Logo

Dell EMC Unity Series Replacement Manual

Dell EMC Unity Series
30 pages
To Next Page IconTo Next Page
To Previous Page IconTo Previous Page
Page #18 background imageLoading...
Page #18 background image
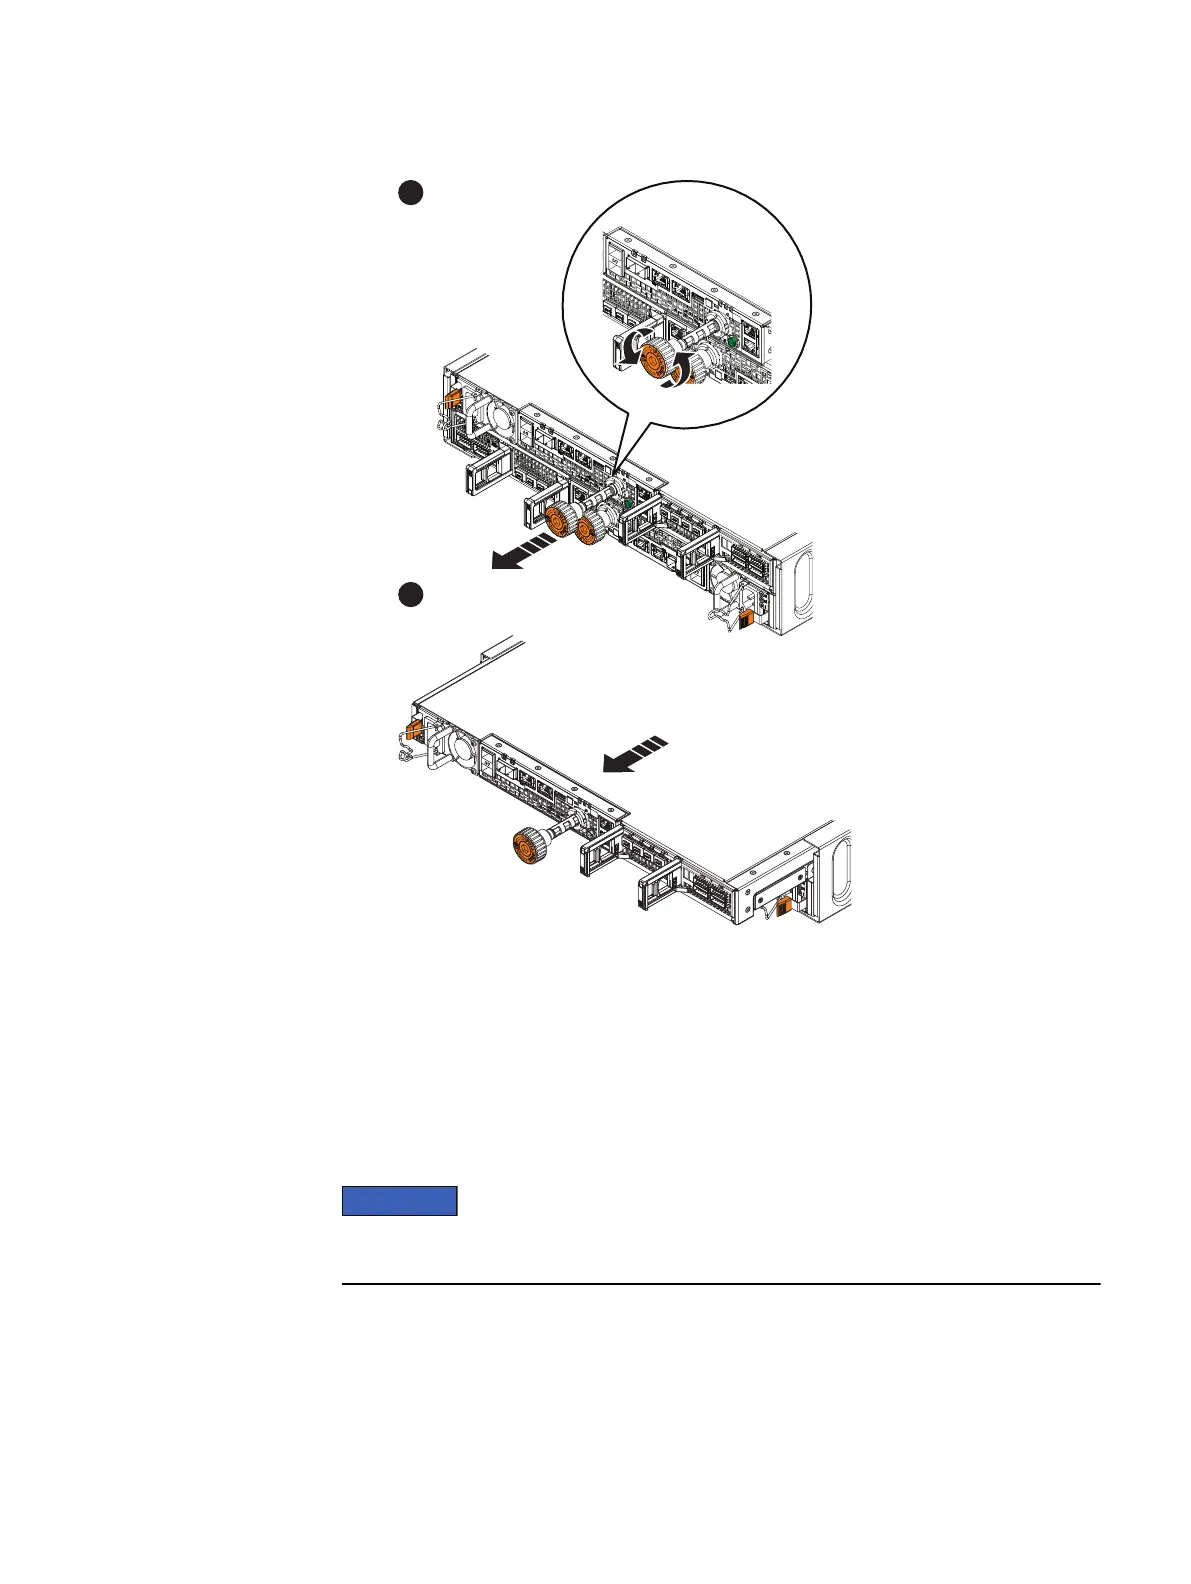
Figure 8 Remove an SP assembly
2
1
CL5720
3. Use the handle to pull the SP assembly outward enough to grasp the sides with
both hands (2). Then with both hands supporting the SP assembly, pull the SP
assembly fully out of the enclosure.
4. Place the SP assembly on a clean static-free work surface.
5. Repeat this procedure to remove the remaining SP assembly.
Installing an SP assembly
NOTICE
You must transfer the SP assembly to the exact corresponding slot in the replacement
chassis that it was removed from.
Procedure
1. Align the SP assembly with the enclosure slot and slide it into the slot until it
stops.
2. Turn the orange torque limit screw handle clockwise until you hear a click sound
from the handle (1). The click sound indicates the torque limit is reached and
the SP assembly is seated in the enclosure.
Field Replacement Procedure
18 Unity All Flash and Unity Hybrid Field Replacement Procedure

Table of Contents

Other manuals for Dell EMC Unity Series

Questions and Answers:

Question and Answer IconNeed help?

Do you have a question about the Dell EMC Unity Series and is the answer not in the manual?

Dell EMC Unity Series Specifications

General IconGeneral
Snapshot SupportYes
Storage TypeHybrid Flash, All-Flash
Drive SupportSAS, SSD
ProtocolsiSCSI, NFS, SMB
Data ServicesSnapshots, Replication, Thin Provisioning, Deduplication, Compression
ManagementUnisphere, REST API, CLI
Data Reduction FeaturesDeduplication, Compression
High AvailabilityRedundant components
Redundancypower supplies, fans
RAID Levels SupportedRAID 5, RAID 6, RAID 10
Replication SupportYes
Cloud TieringYes
Security FeaturesEncryption at rest, secure erase, role-based access control
ModelDell EMC Unity Series

Related product manuals