3. After the command completes, exit the root user session.
4. As the service user, clear the counters and restart both SPs into normal mode:
Issue both of these commands to each SP.
svc_rescue_state -c
svc_shutdown -r
Verifying the DPE status
Procedure
1. Verify that the DPE power LED is lit and that no fault lights on the DPE parts
are lit.
2. If a disk, power, or SP assembly part displays a fault LED, try re-seating the
part.
Transferring the product serial number tag
The product serial number tag (PSNT) is a serialized label allowing EMC service to
track nested hardware material in the field. When replacing a DPE, transfer the PSNT
of the faulted DPE to the replacement DPE.
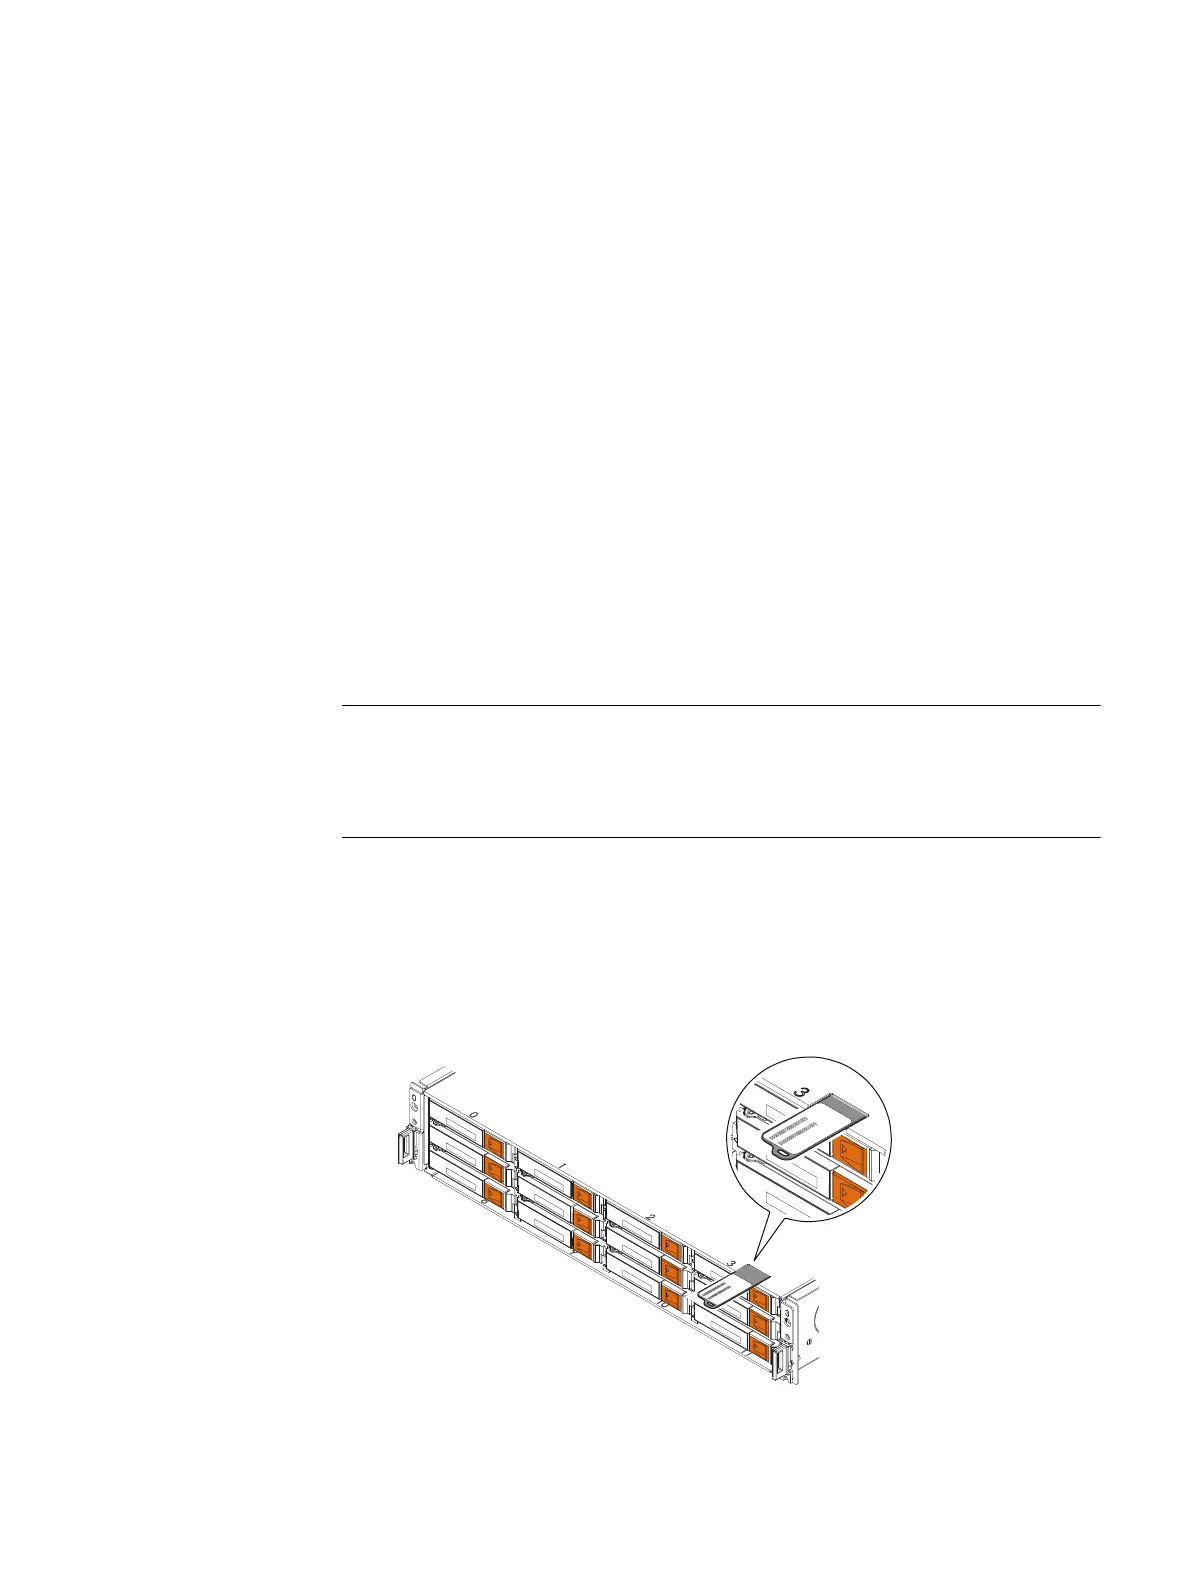
The PSNT for the DPE is a pull-out tag that is located on the front of the enclosure.
Two rear tabs on the tag secure it in the enclosure and allow in to slide. If you find it
difficult to remove or insert the tag, pinch the rear of the tag together as you attempt
to remove or insert it.
Procedure
1. Remove and retain the PSNT (product serial number tag) from the faulted DPE.
Retain this tag, you will insert this into the replacement DPE.
l
For the 12-slot DPE, pivot the tag from left-to-right to remove the tag from
the DPE.
Figure 18
12-slot DPE tag location
P
ROD ID/SN: FNM01234567891
P
N: 123-456-
7
89 (OBERON)
PR
OD ID/SN: FNM
0
1
2
3
4
5
6
7
8
9
1
PN: 1
2
3
-456-789 (O
BERO
N)
CL5779
Figure 19 25-drive DPE tag location
l
For the 25-slot DPE, pivot the tag from top-to-bottom to remove the tag
from the DPE.
Replacing a faulted 2U DPE
Verifying the DPE status 27

 Loading...


