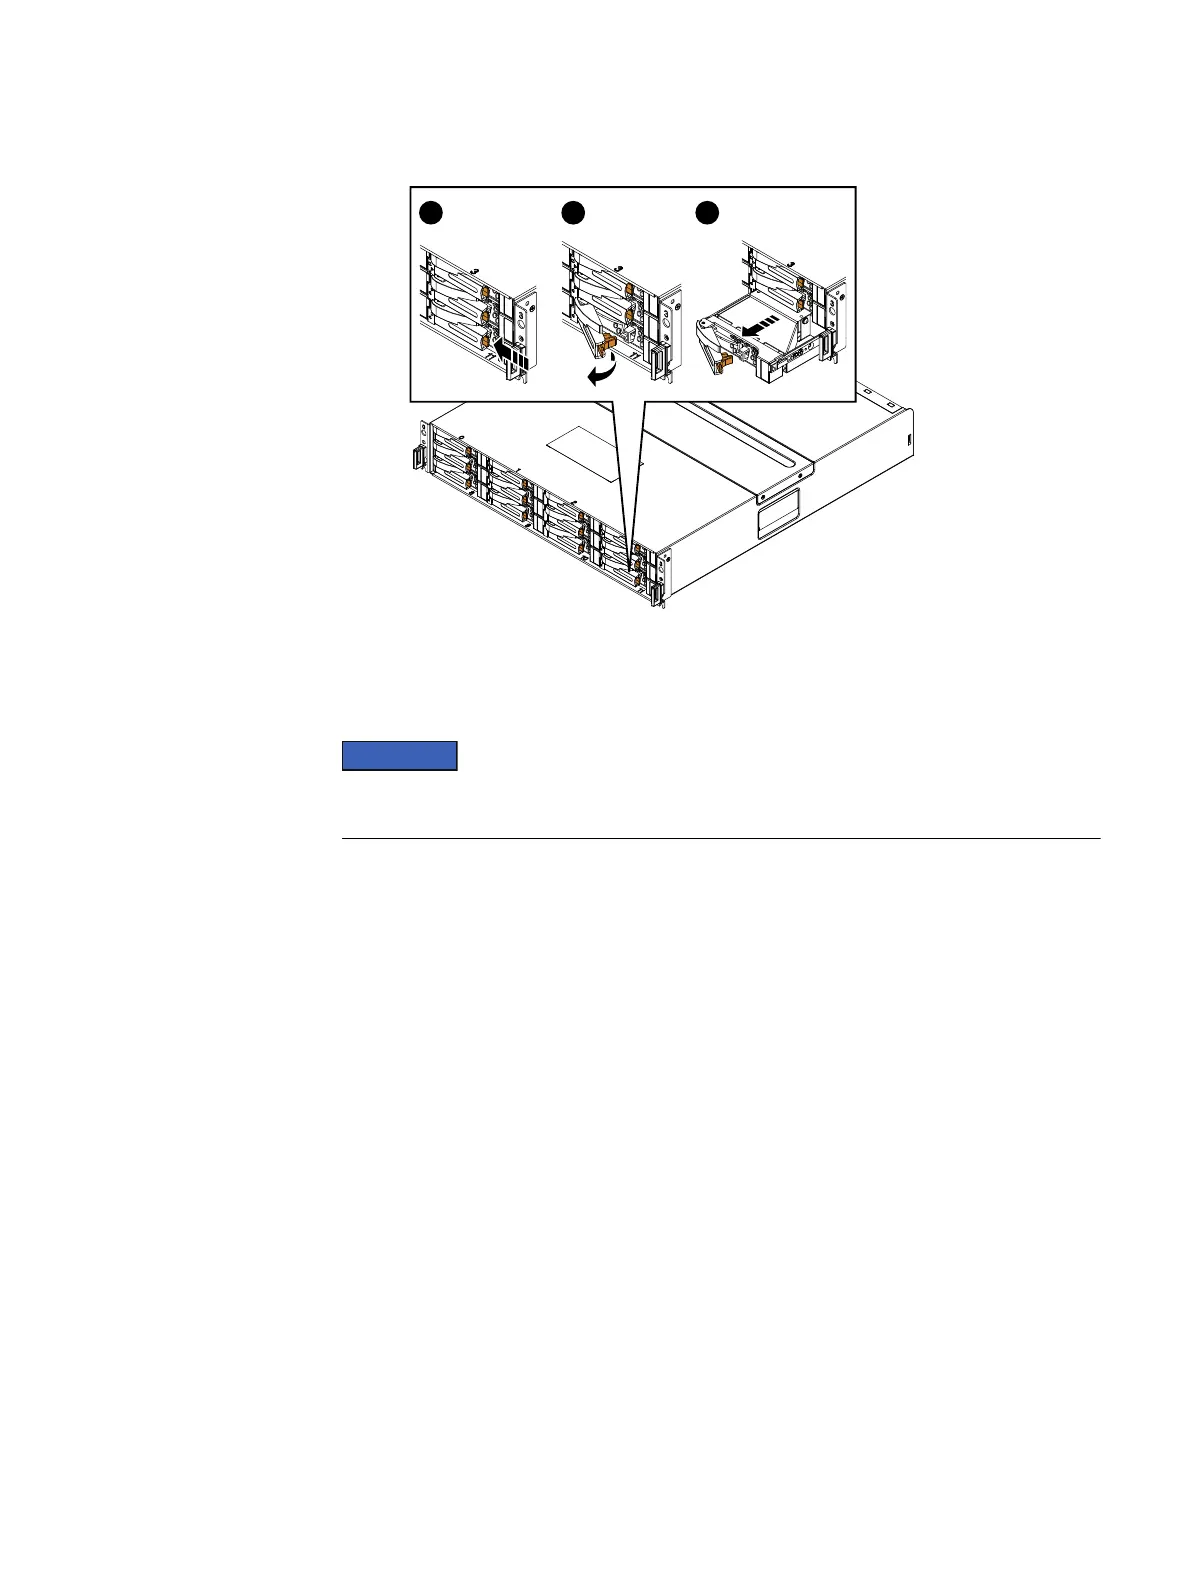
Figure 10 Removing a 3.5" disk
4. Place the disk on a static-free surface.
Installing a 3.5" disk
You must transfer the disk to the exact corresponding slot in the replacement chassis
that it was removed from.
Procedure
1. Attach an ESD wristband to your wrist and the enclosure in which you are
installing the disk.
2. Align the disk with the guides in the slot.
3. Ensure the ejector handle is open at a 45 degree angle from the drive.
4. Gently push the disk into the slot by pressing on the right-most thumb space.
5. Engage the ejector handle to fully seat the disk.
Field Replacement Procedure
20 Unity All Flash and Unity Hybrid Field Replacement Procedure

 Loading...


