Mini Tower Computer Parts 187
10
Configure the drives in system setup (see "Entering System Setup" on
page 79).
Installing an Optical Drive
1
Unpack the drive and prepare it for installation.
Check the documentation that accompanied the drive to verify that the
drive is configured for your computer.
2
Follow the procedures in "Before You Begin" on page 143.
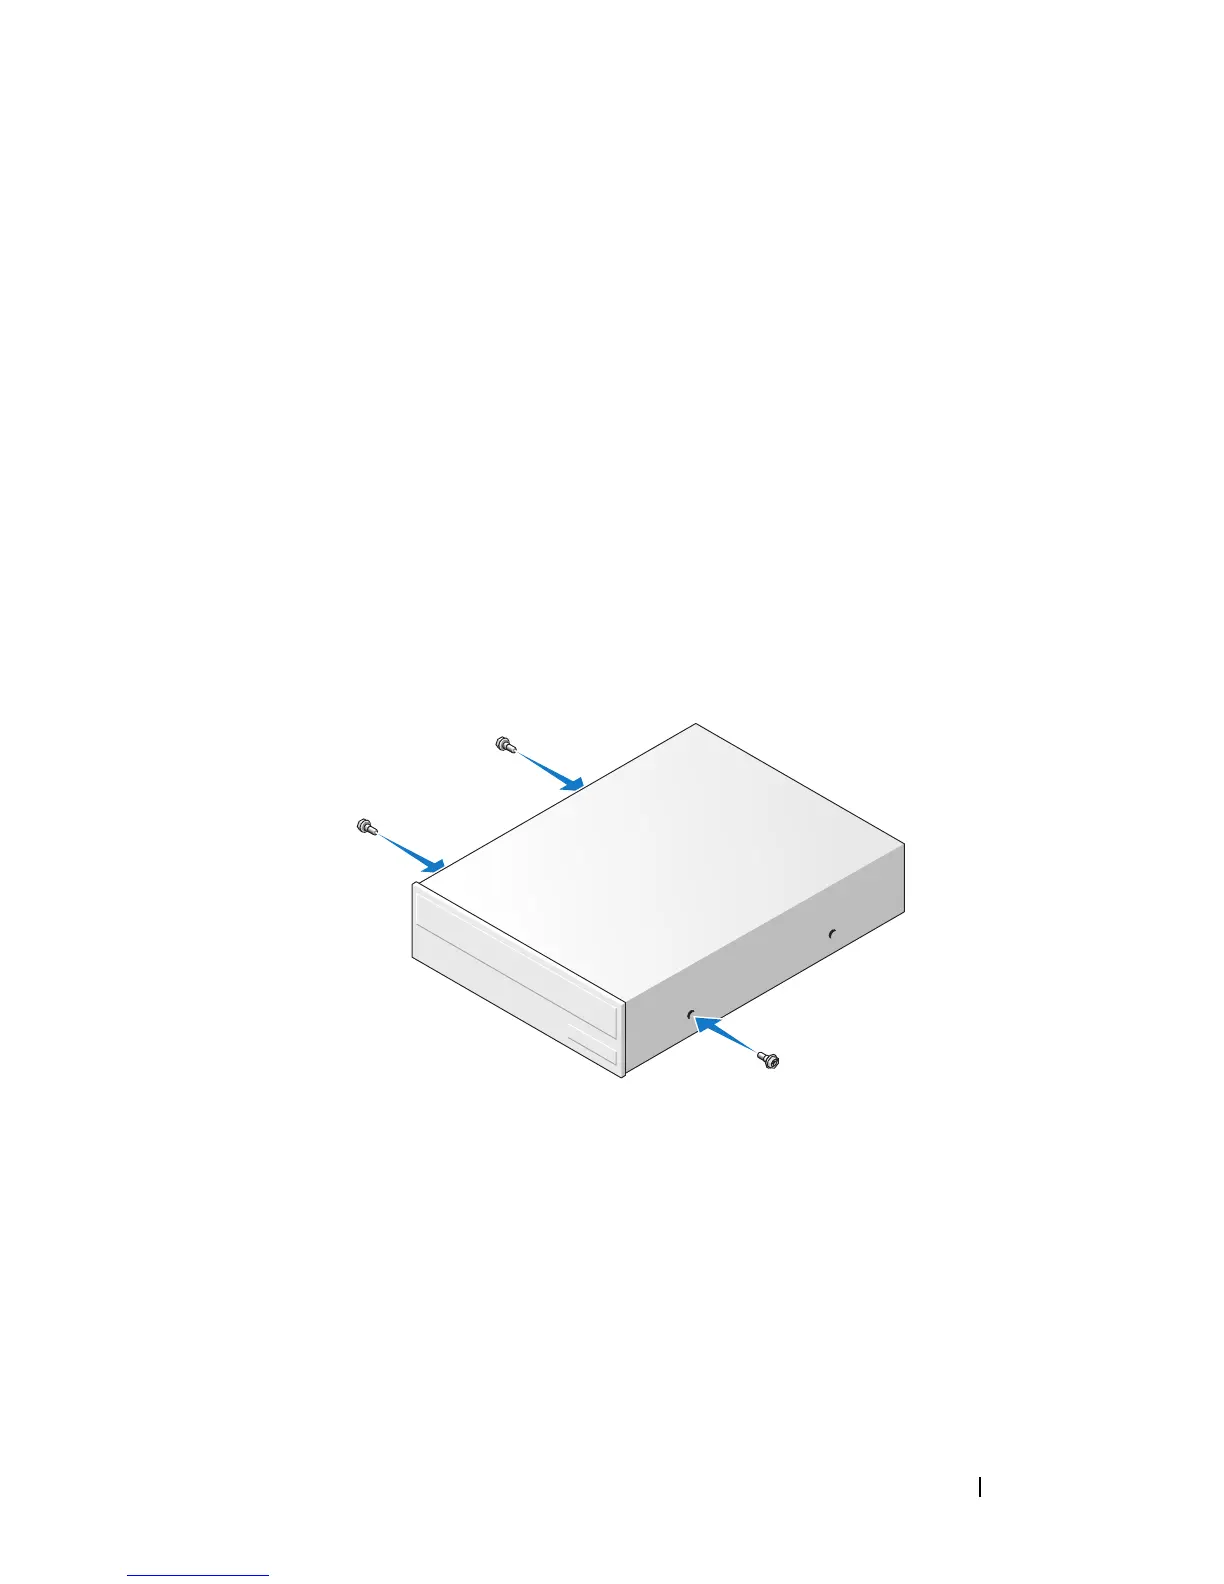
3
If you are replacing an optical drive, remove the shoulder screws from the
existing drive and attach the screws to the replacement drive.
4
If you are installing a new optical drive:
a
Remove the shoulder screws from the inside of the drive-panel insert.
b
Attach the screws to the new drive.
5
Align the shoulder screws on the optical drive with the shoulder screw
slots, and slide the drive into the bay until it clicks into place.