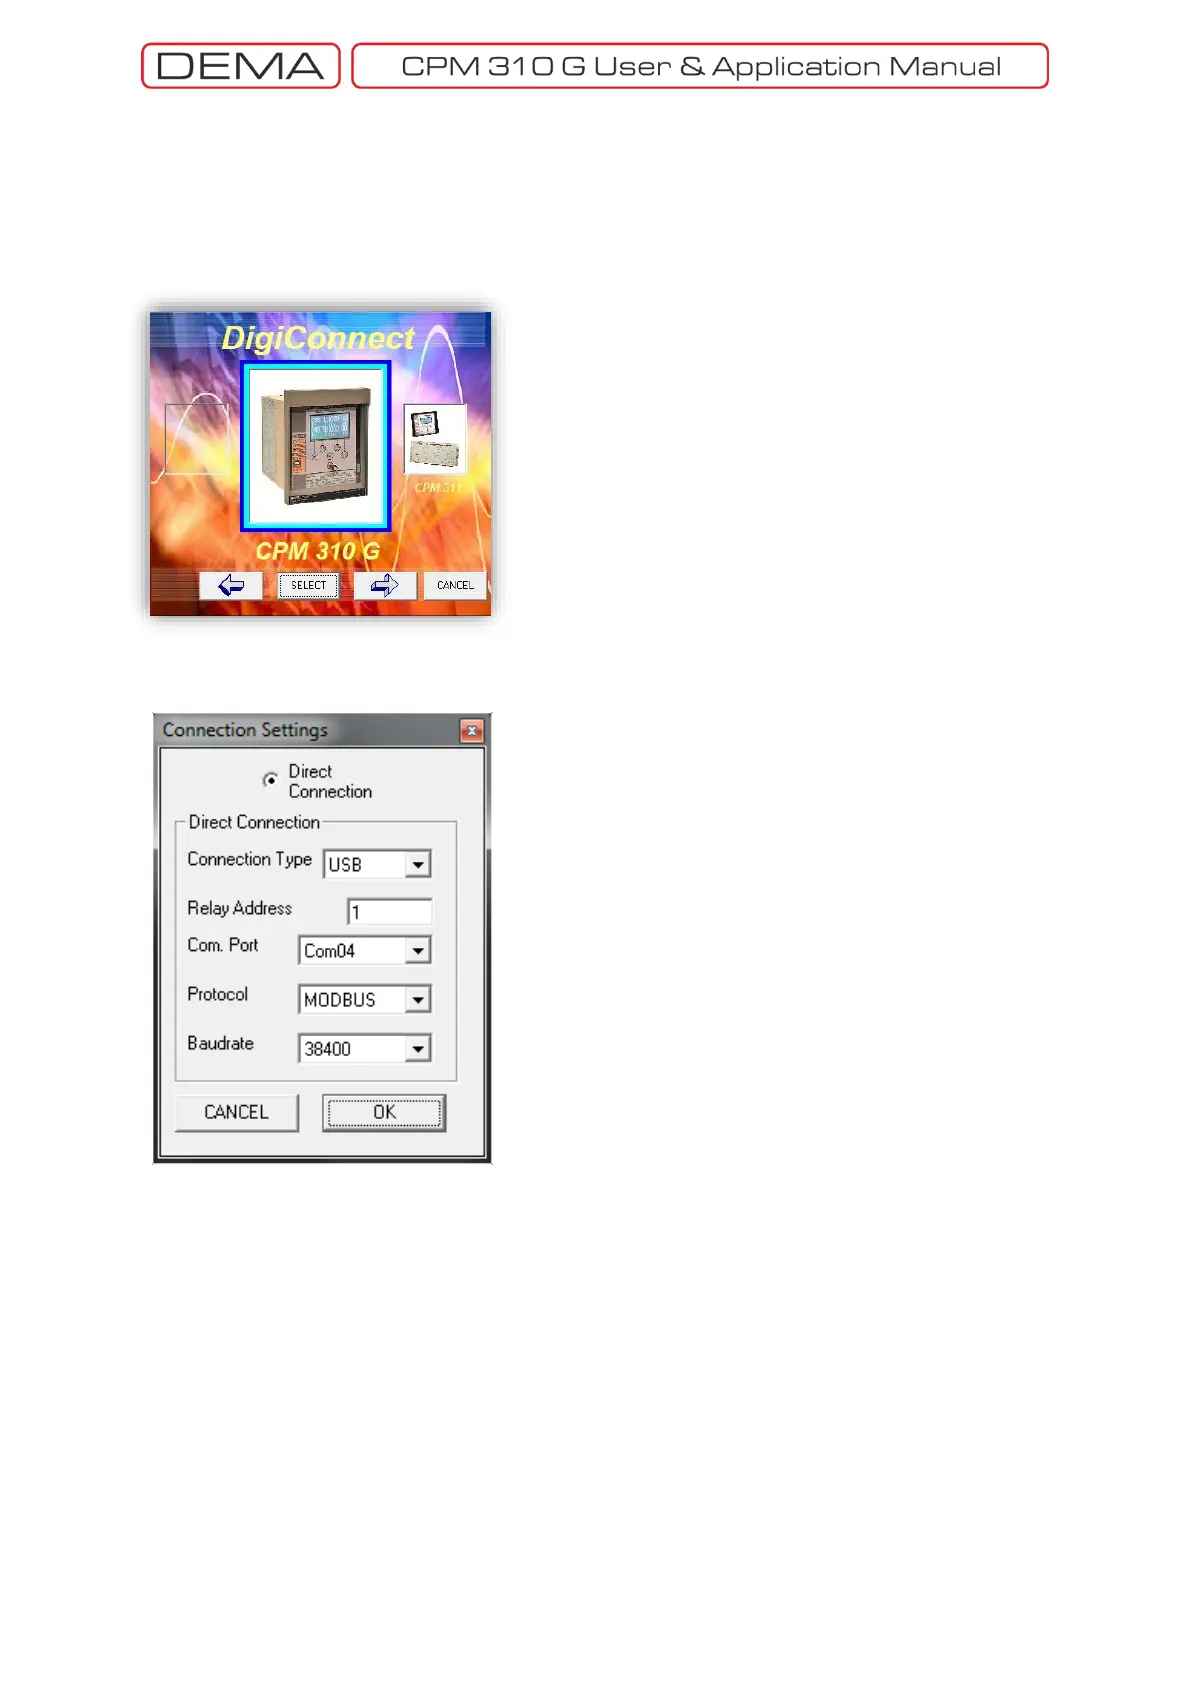
2. After the steps explained on the previous page have
been completed, the menu shown on the picture Startup
Screen 3 is reached. The menu shows and lets the user
select the relay types to be connected via DigiConnect
program. Since DigiConnect v3.1 program is designed to
communicate with CPM 310 G only, there are no options
on this screen. Press the Select button to continue or hit
Cancel button to exit startup.
3. If the startup is continued by pressing the Select button
as described above, Connection Settings menu as shown
in Startup Dialogue 4 is reached. Setting the parameters
correctly on this menu is essential for the establishment
of healthy communication with the relay.
Connection Type: This option must be selected as USB if
the physical connection is done from the USB port
located at the front face of CPM 310 G, or must be set to
RS485 if the connection is made via the RS485 port from
the terminal blocks located at the backside of CPM 310
G.
Relay Address: CPM 310 G relays can be addressed with
numbers 1≤n≤255. To read the actual address of the
relay to be connected to, read the value at the address
on the CPM 310 G menus:
MENU » Communication Settings » (Relay Address)
For further information on addressing a CPM 310 G unit,
please refer to Communications Settings Menu section of
Relay Menus Manual.
Communications Port: To obtain the address of the PC port that is physically connected to CPM 310 G,
go to the following address on the PC.
Start » Settings » Control Panel » System » Hardware » Device Manager.
At the menu with the given address (shown as Device Manager Menu picture on the next page), find the
port that is to be used under the submenu: Ports. On the picture in the next page, the USB connection
port of PC to CPM 310 G has been located. Notice that, according to the picture, the communication
port address is COM4. Once the port address is obtained as described, set the Communication Port
parameter to the obtained address. ↘
 Loading...