- 171 -
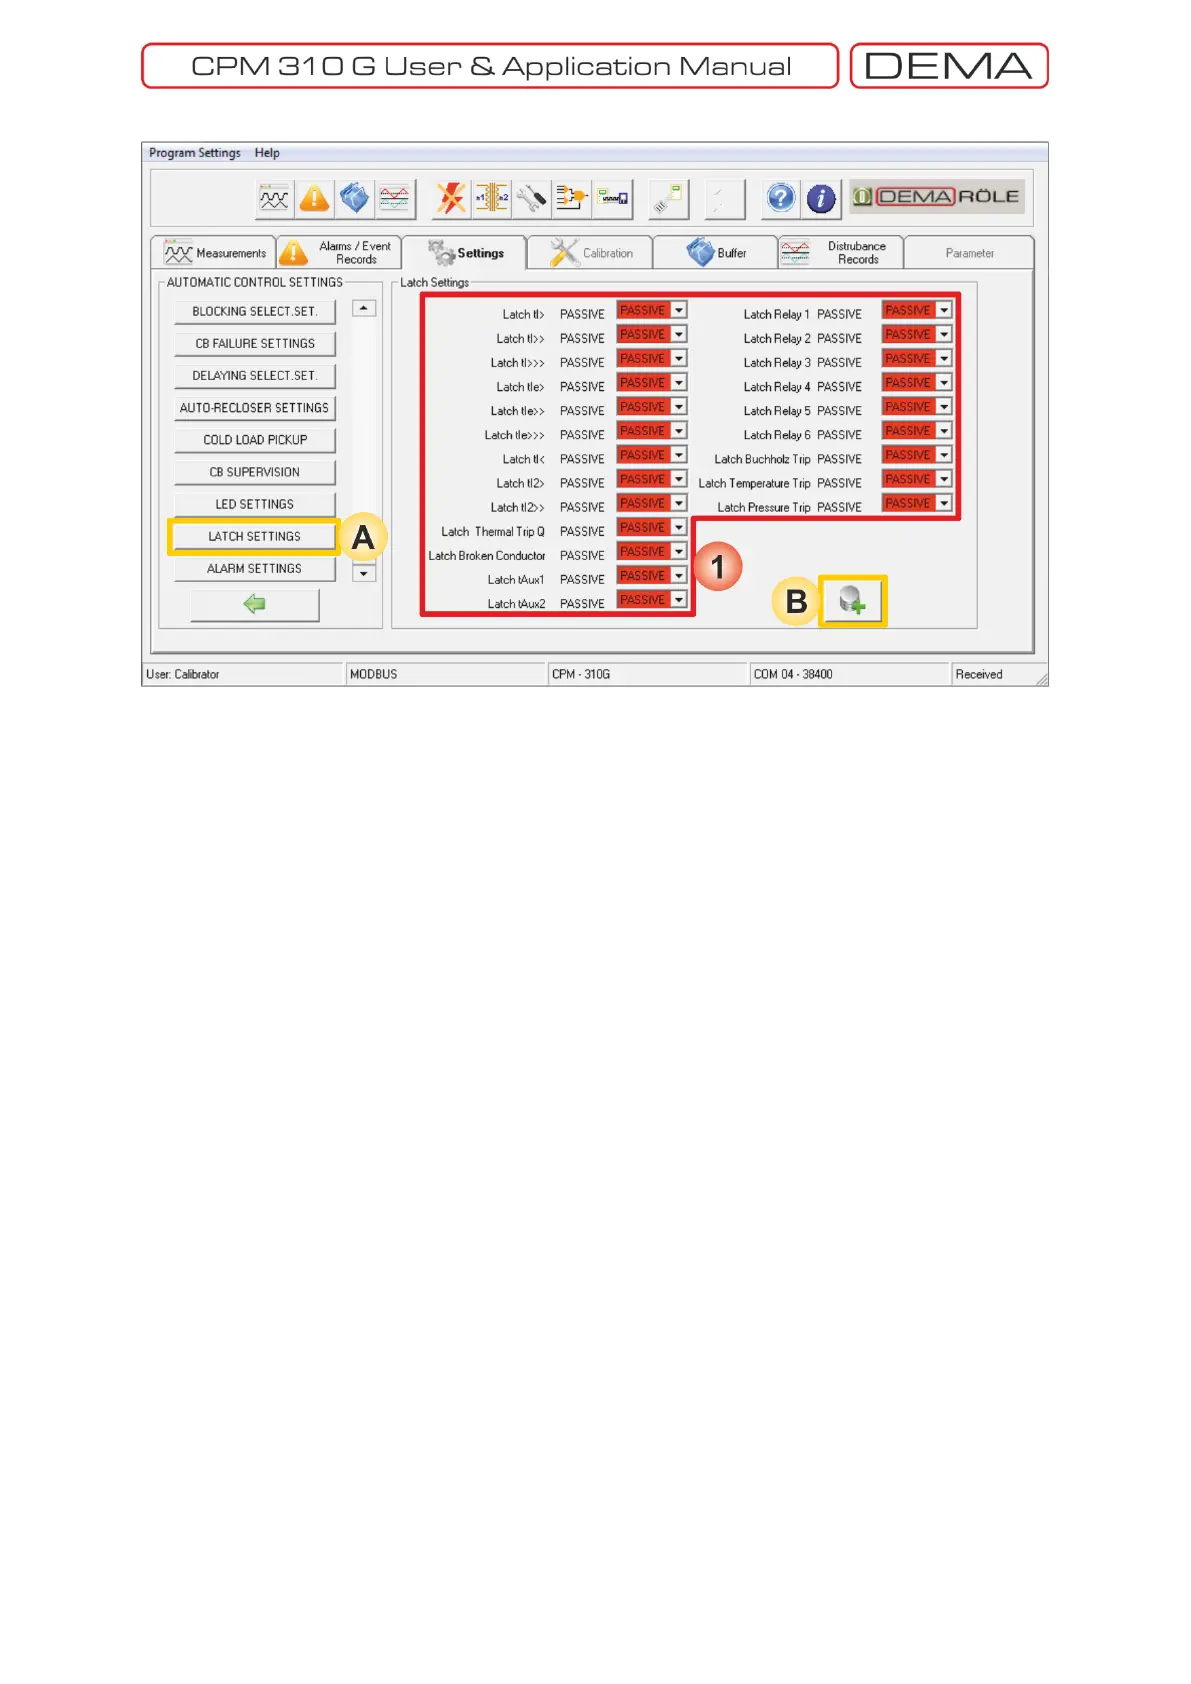
Settings » Automatic Control Settings » Latch Settings
A. Latch Settings window is accessed by clicking the button with the same title in the Automatic Control
Settings window.
B. Save to Buffer button sends the parameter changes to the DigiConnect buffer. When changes are to be
applied to CPM 310 G unit, Save to Device button must be utilized, which is located under the Buffer tab.
1. Latch Settings window gives the users the option to latch:
Any of the programmable relays directly, or
The trip or programmable relays indirectly via appointed functions with latch option enabled.
By default, the trip relay and the programmable relays are set to remain closed only for the pulse duration.
To leave this condition as it is, the latch settings must be left as already set by default, as shown on the
picture above.
If the trip relay or any programmable relays are desired to be latched, the appropriate functions must
be set to Active.
Note that, if any latch settings are done, latching of the related relays will be active until CPM 310 G is
reset. □
 Loading...