- 159 -
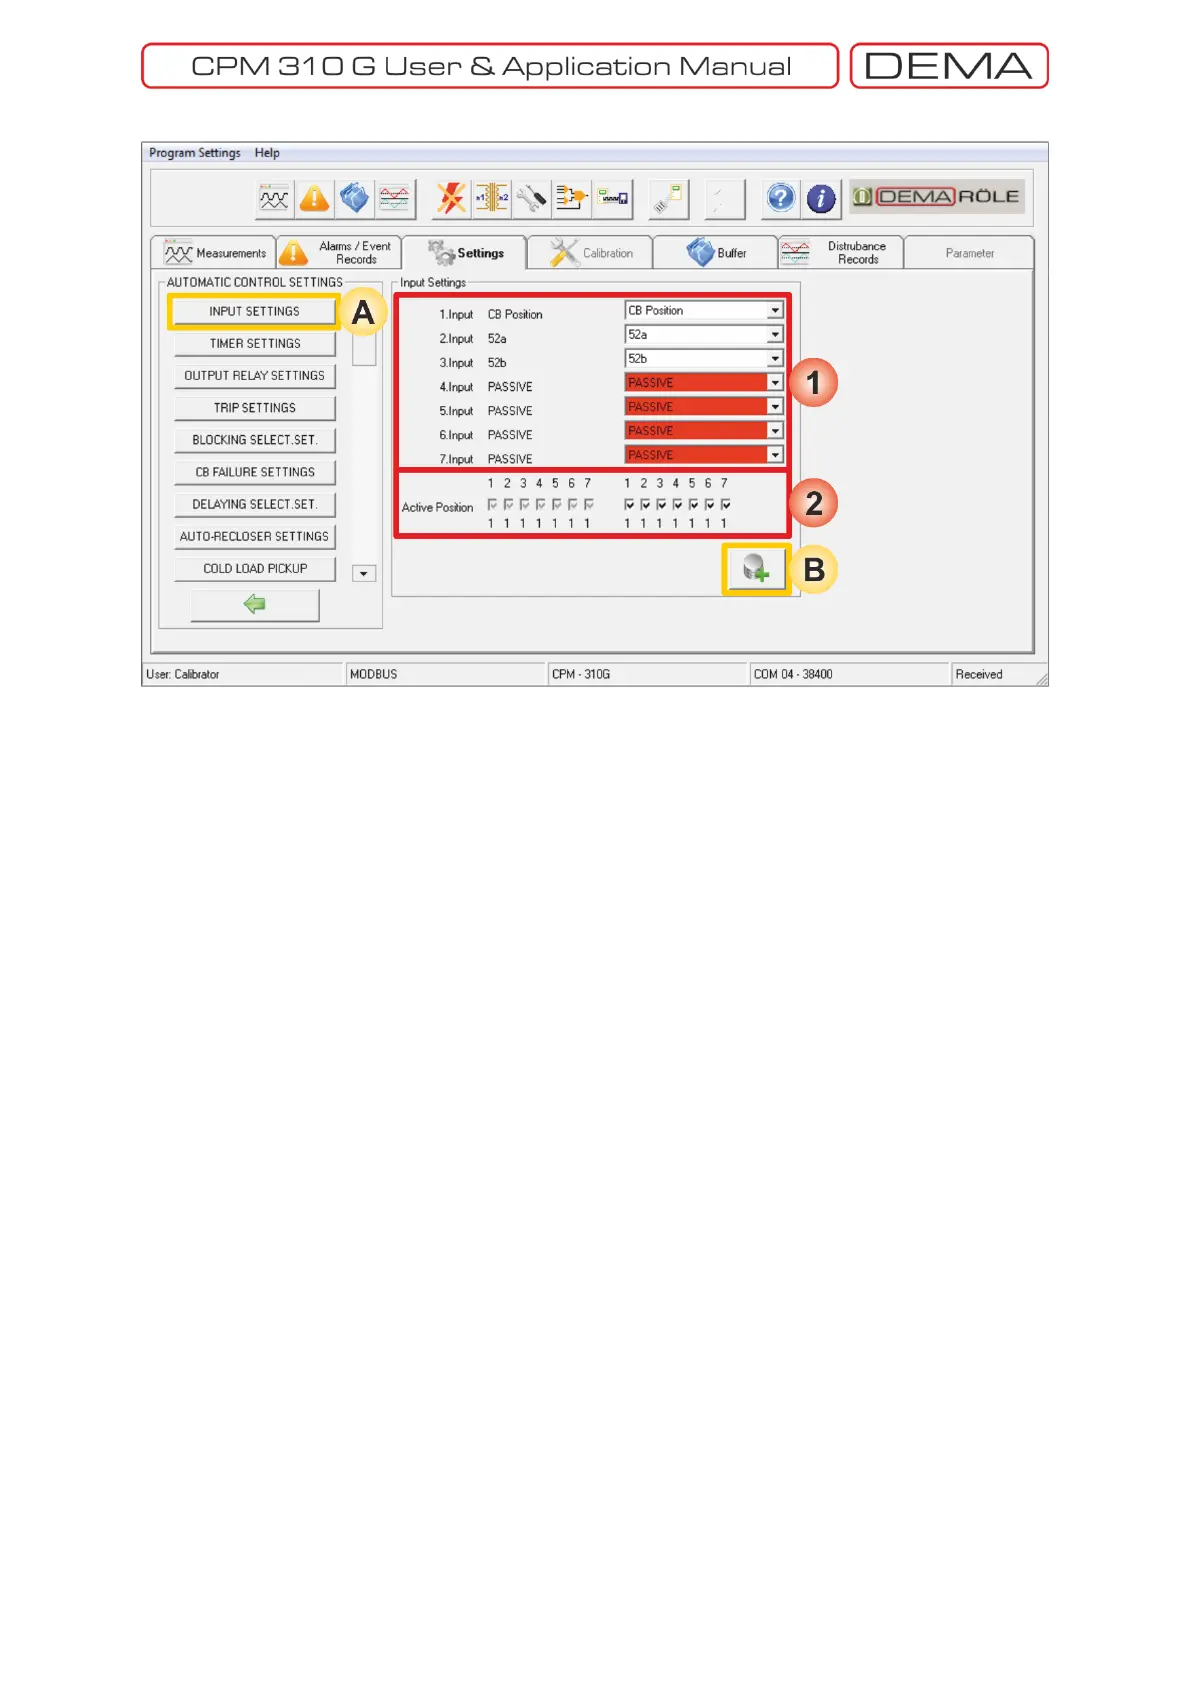
Settings » Automatic Control Settings » Input Settings
A. Input Settings window is accessed by clicking the Input Settings button in the Automatic Control Settings
window.
B. Save to Buffer button sends the parameter changes to the DigiConnect buffer. When changes are to be
applied to CPM 310 G unit, Save to Device button must be utilized, which is located under the Buffer tab.
1. As seen on the picture above, functions can be appointed to the 7 programmable inputs of CPM 310 G via
Input Settings window. The left side of the window shows the input names and current appointments;
while combo boxes of available function appointments take place on the right side of the window.
The Active Positions window is composed by check boxes that determine the way CPM 310 G evaluates the
input signals on the right side of the area, and current settings display on the left side of the area. For the
case shown above, CPM 310 G does evaluate the input to be passive as long as there are no signals at the
inputs. If any boxes are unchecked and these settings are applied to CPM 310 G; inputs with the changed
active position settings will be set to “0”, and will be evaluated as active as long as there are no signals at
their terminals. □
 Loading...