- 161 -
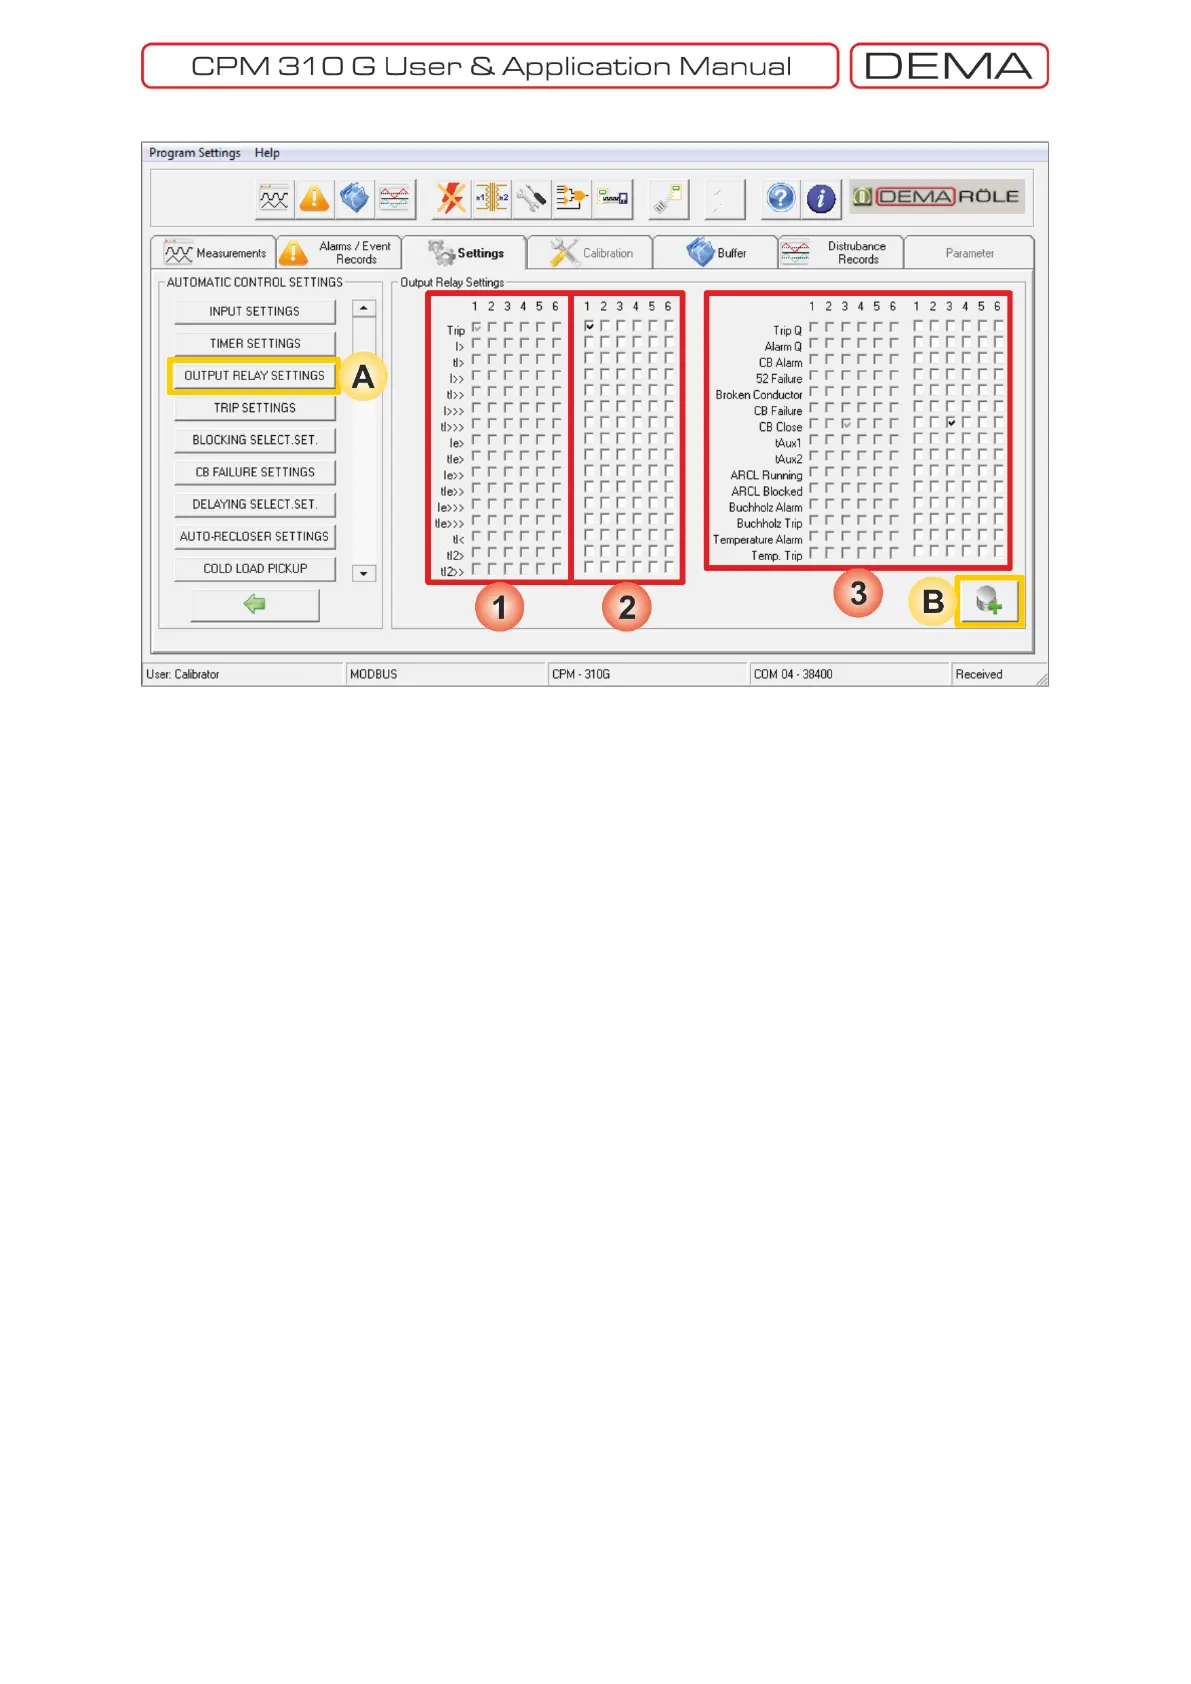
Settings » Automatic Control Settings » Output Relay Settings
A. Output Relay Settings window is accessed by clicking the Output Relay Settings button in the Automatic
Control Settings window.
B. Save to Buffer button sends the parameter changes to the DigiConnect buffer. When changes are to be
applied to CPM 310 G unit, Save to Device button must be utilized, which is located under the Buffer tab.
1. On the very left of these columns; thresholds (e.g. I> and I
e
>), time delay protection functions (e.g. tI> and
tI
e
>), function status (e.g. ARCL running) and CB control functions (e.g. trip and close) are listed; to the right
of this list, current appointments are indicated in columns of boxes, each aligned to the related output
numbers. According to the sample picture above, trip function is appointed to 1
st
programmable output.
2. These boxes let the user to assign or cancel assignment of functions to each of the programmable outputs.
Note that it is possible both to assign more than one function to a single output, and to assign a single
function to more than one outputs.
3. This area is the continuation of the first and second areas, which were just studied on the previous
paragraphs. On the above sample window, it is observed that CB Close function is appointed to output
no.3. □
 Loading...