Operating instructions, SM-110/-111
Servicing and maintenance
38
8
A
1
1
2
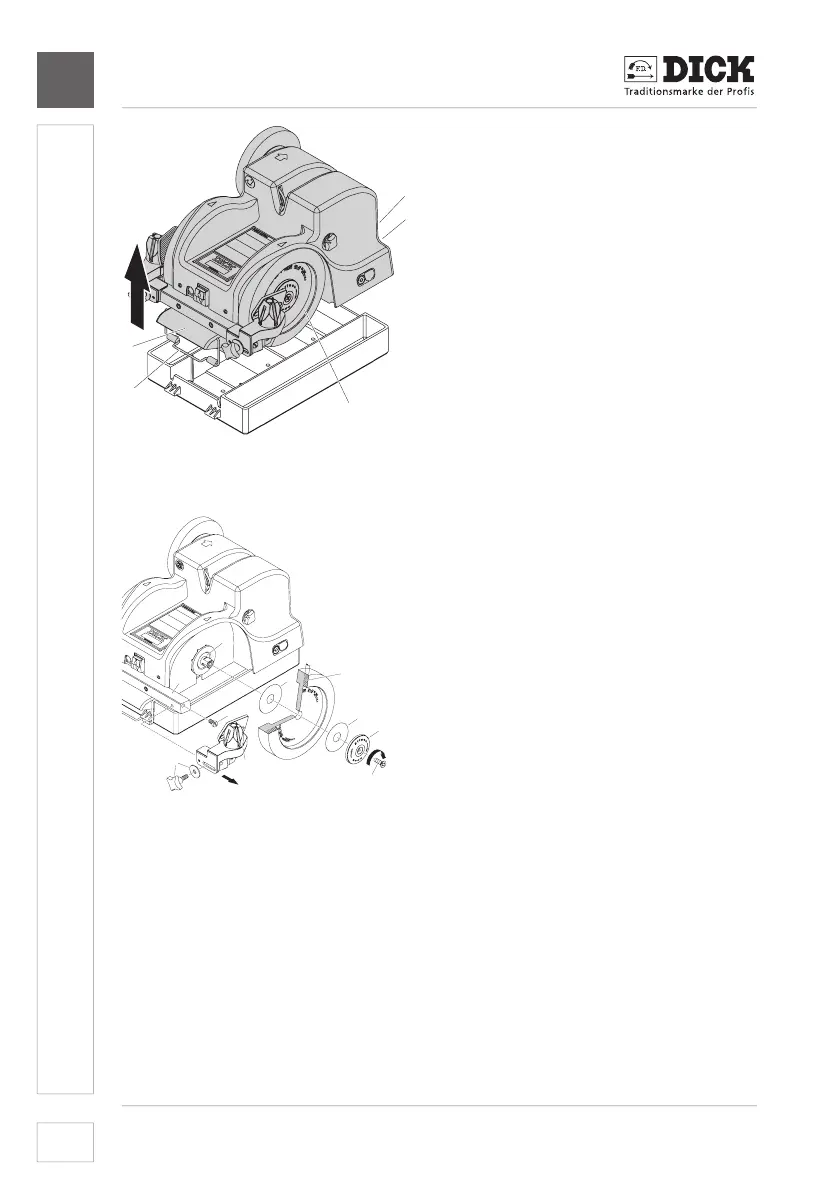
[17-1] Clamp
[17-2] Handles for lifting
out the machine
[17-A] Edge (wear indicator)
Image 17 – Lift the machine out of the water tank by both handles
1
4
2
3
8
7
7
5
6
A
[18-1] Screw plug
[18-2] Guidance
[18-3] Star handle screw and washer
[18-4] Knife guide
[18-5] Fastening screw
[18-6] Flange cover
[18-7] Plastic disc
[18-8]Centringange
[18-A] Edge (wear indicator)
Image 18 – Remove grinding wheels
4. Remove the screw plug [18-1] on the front side of the guide [18-2].
5. Remove the star handle screw and washer [18-3] and pull off knife guide
[18-4].
6. Hold the grinding wheel and loosen the mounting bolt [18-5] with the
enclosed hexagonal spanner size 5 in direction of rotation of the grinding
wheel.
7. Remove ange[18-6] and plastic disc [18-7] and pull off the grinding
wheelfromthecentringange[18-8]. Make sure that the inner plastic
disc [18-7]remainsonthecentringange.
Proceed in the same way for the opposite side.