Operating instructions, SM-110/-111
Servicing and maintenance
40
8
5. Check lateral runout before test run. If necessary, open the screw and turn
the grinding wheel a little further.
6. Repeat the process until the grinding wheel runs, if necessary dress the
grinding wheel. (see 8.2 Dressing the grinding wheel).
8.5 Remove the honing wheels
Damaged honing wheels (e.g. breakage, cracks, nicks) must be replaced.
CAUTION
RISK OF INJURY FROM ROTATING MACHINE PARTS
If the machine is accidentally switched on during maintenance
work, there is a risk of injury due to rotating machine parts.
➾ Always pull the mains plug before carrying out any mainte-
nance work.
1. Pull the mains plug.
2. SM-110: Continue with step 5
1
2
3
4
4
5
Only for SM-111
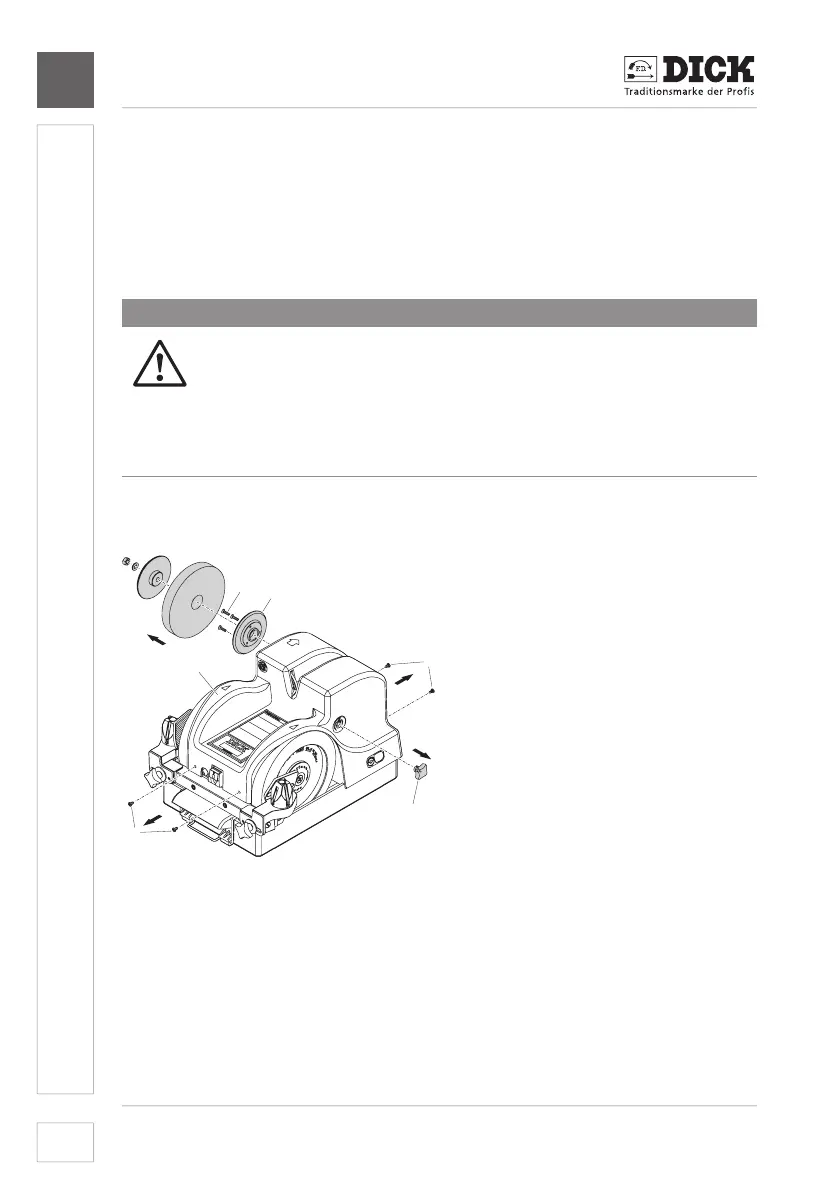
[20-1] Countersunk screws
[20-2]Flangeincl.ttingscrew
[20-3] Star handle
SM-110 and SM-111
[20-4] Screws on the end faces
of the housing
[20-5] Housing
Image 20 – Remove the honing wheels
Only for SM-111:
3. Remove polishing wheel (see 8.7 Replacing the polishing wheel (only for
SM-111)).
4. In addition, unscrew the three countersunk screws [20-1] with the
enclosedPhillipsscrewdriverandremovetheange[20-2]incl.thetting
screw. Pull off the star handle [20-3].