Operating instructions, SM-110/-111
Servicing and maintenance
42
8
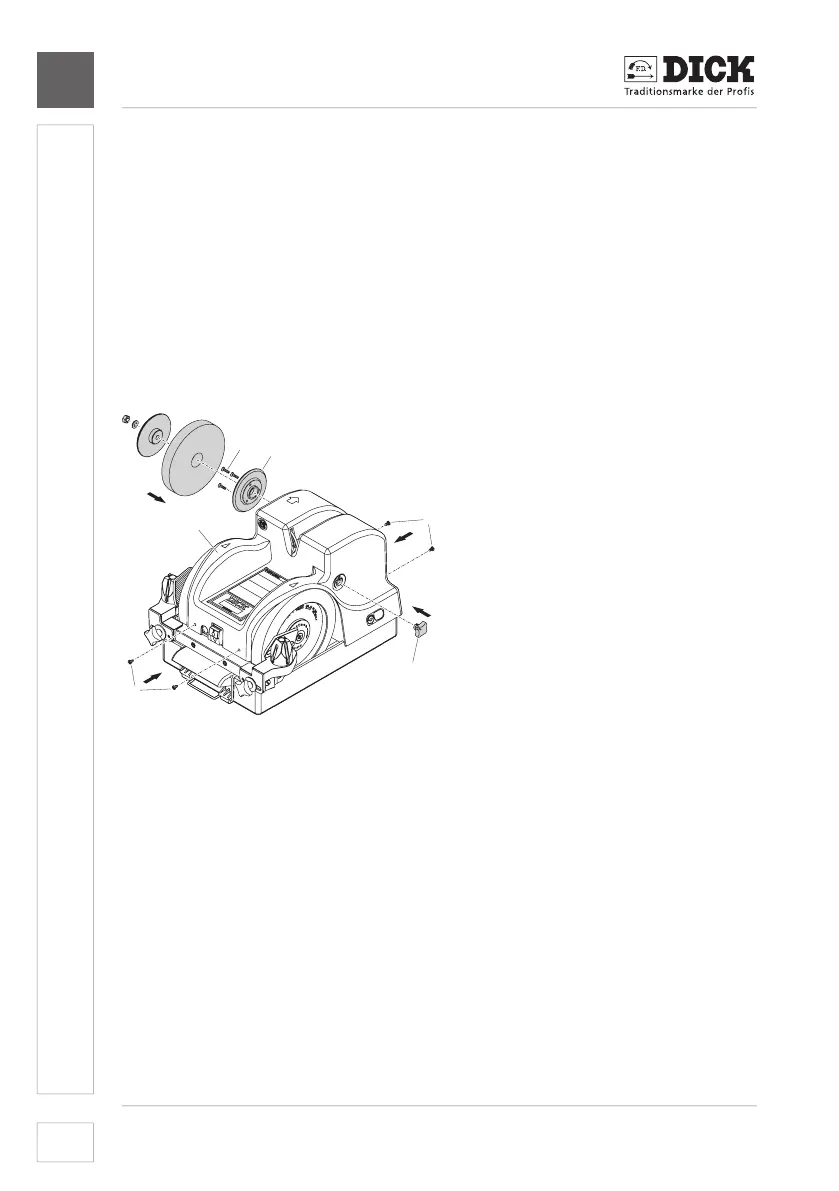
8.6 Installing the honing wheel
1. Puta new honingwheelwith short ange[21-6] onto the right shaft.
Direction of rotation arrow/labelling must point forwards.
2. Puttheangedisc[21-5] onto the shaft and screw on locking nut [21-4].
Hold the shaft in place to prevent it from rotating.
3. Puta new honingwheel withalong ange [21-3] onto the left shaft.
Direction of rotation arrow/labelling must point forwards.
4. Puttheange disc[21-2] onto the shaft and screw on the nut [21-1].
Hold the shaft in place to prevent it from rotating.
5. Put on the housing [22-5] screw in four screws [22-4] on the end faces of
the of the housing with the enclosed Phillips screwdriver.
1
2
3
4
4
5
Only for SM-111
[22-1] Countersunk screws
[22-2]Flangeincl.ttingscrew
[22-3] Star handle
SM-110 and SM-111
[22-4] Screws on the end faces
of the housing
[22-5] Housing
Image 22 – Installing the honing wheel
6. SM-110: Continue with step 11.
Only for SM-111:
7. Inaddition,tstarhandle[22-3].
8. Installange[22-2]incl.ttingscrew.
9. Screw in the three countersunk screws [22-1] with enclosed Phillips
screwdriver.
10. Installing the polishing wheel (see 8.7 Replacing the polishing wheel
(only for SM-111)).
SM-110 and SM-111:
11. Insert the mains plug.
12. Switch on the machine and test run it for one minute. In case of unusual