Operating instructions, SM-110/-111
Servicing and maintenance
41
8
SM-110 and SM-111:
5. Unscrew the four screws [20-4] on the front sides of the housing with the
enclosed Phillips screwdriver and lift the housing [20-5] upwards.
NOTE
REPLACE HONING WHEELS ALWAYS
IN PAIRS.
First remove the left, then the right honing wheel.
The honing wheels are permanently glued to the anges
(angescannotbedismantled).
1
2
4
5
6
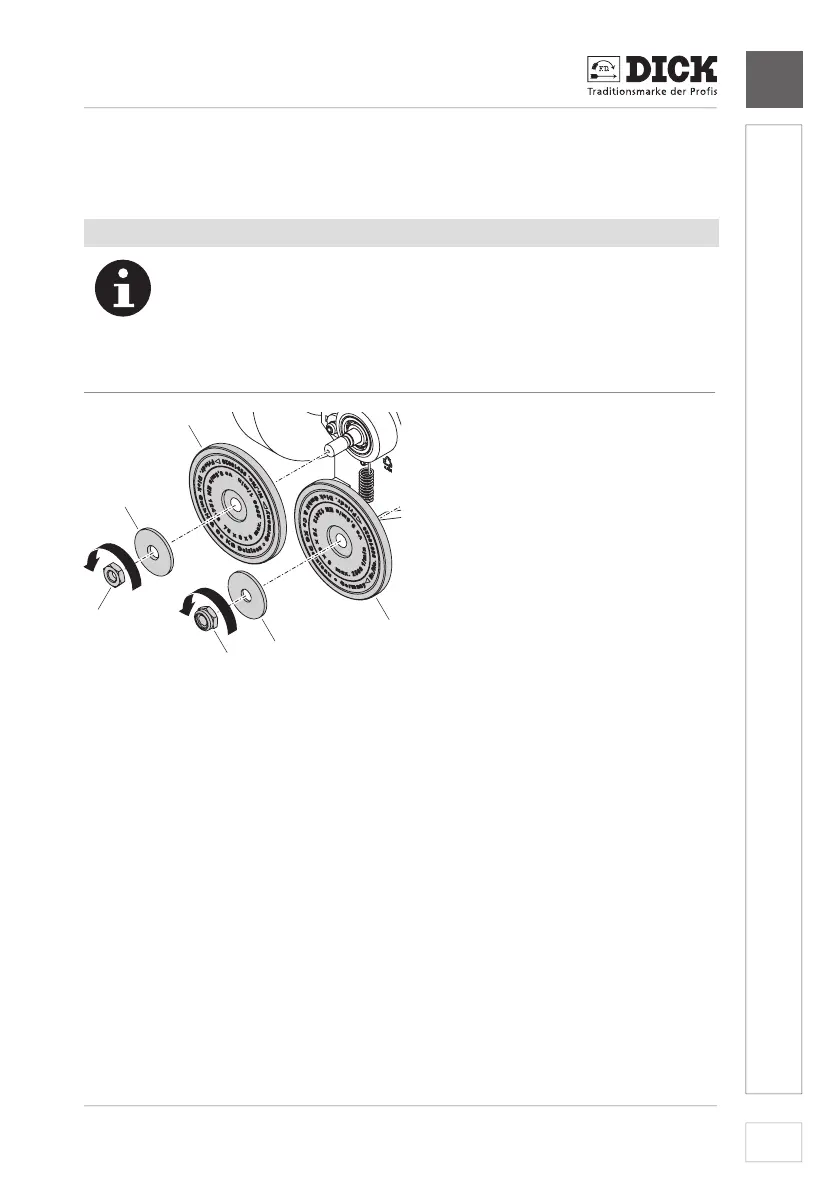
[21-1] Nut
[21-2]leftangedisc
[21-3] left honing wheel
withange
[21-4] Locking nut
[21-5]rightangedisc
[21-6] right honing wheel
withange
Image 21 – Remove the honing wheels
6. Unscrew the nut [21-1] on the honing wheel shaft in the direction of
rotation of the honing wheel using the enclosed ring spanner size 13,
while holding the honing wheel by hand to prevent it from turning.
7. Remove the left ange disc [21-2] and honing wheel [21-3] from the
shaft.
8. Screw the locking nut [21-4] on the honing wheel shaft against the direc-
tion of rotation of the honing wheel, while holding the honing wheel to
prevent it from rotating.
9. Removetherightangedisc[21-5] and honing wheel [21-6] from the
shaft.