Operating instructions, SM-110/-111
Machining workpieces
31
7
1
2
3
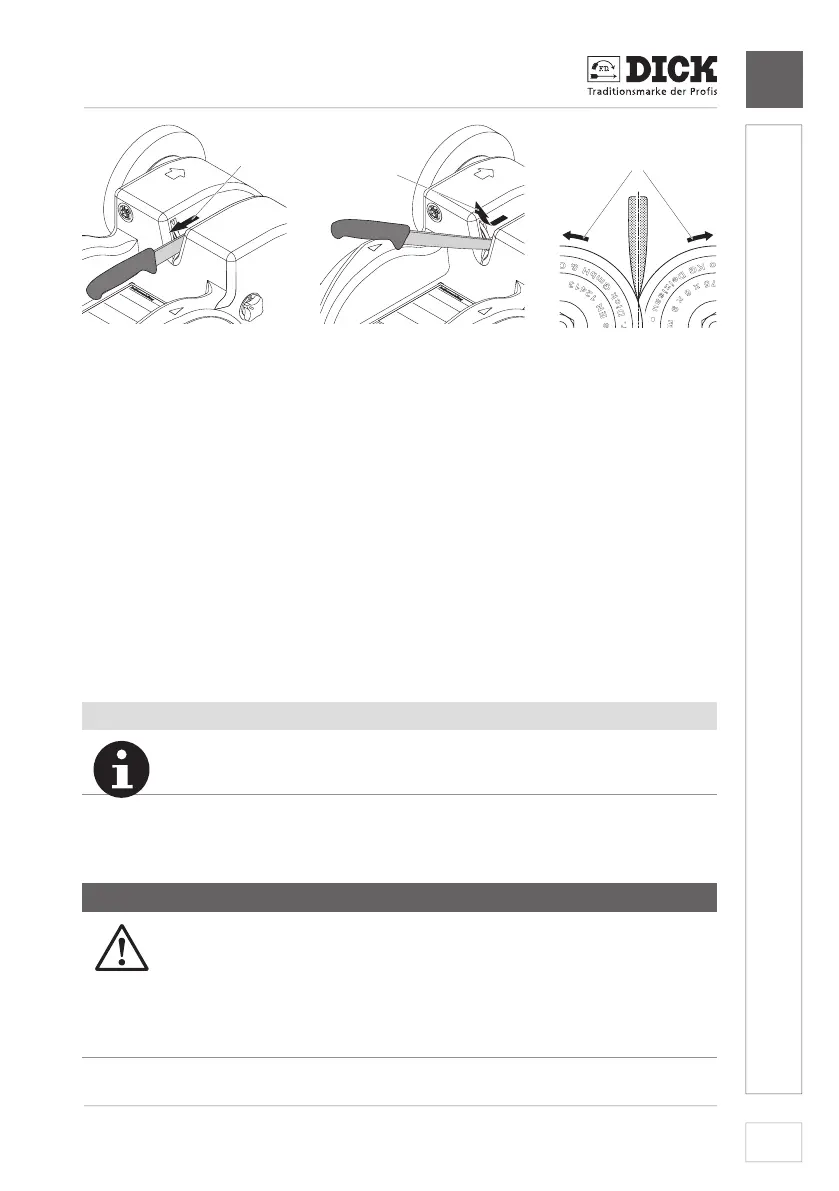
Image 12 – Positioning the knife to the honing wheels
[12-1] Honing direction
[12-2] Lift in the front blade area
[12-3] Direction of rotation of the honing wheels
3. Starting at the handle, pull the knife through the honing wheels with light
pressure and without interruptions [12-1].
4. In the front area of the blade, lift the handle according to the course of
the cutting edge [12-2].
➾ If the pulling movement is interrupted, nicks can form in the cutting
edge.
5. Make two to three more passes with decreasing pressure.
6. Finally,honetwicewithoutpressure-theknife’sownweightissufcient.
7. Clean the knife after honing.
NOTE
If the burr is not removed or the knife is not sharp, the angle has
been set too acute or too little has been ground beforehand.
7.3 Polishing the knife (only SM-111)
Afterhoning,polishtheknifecuttingedgebrieyonthefeltpolishingwheel.
WARNING
RISK OF INJURY DUE TO INCORRECT POSITIONING
When the knives are positioned against the direction of rotation,
theworkpiecescanbecaughtandungfromthemachine.
➾ Never place knives against the direction of rotation on the
polishing wheel.