OPERATOR’S MANUAL
PM200, 200E and 250 Planter Monitors
11001-1444-200702
QUICK START GUIDE / 17
QUICK START GUIDE
IMPORTANT: The monitor is locked at the factory. Prior to using the
monitor, the system MUST be unlocked via the
Password screen before all other screens can be
accessed.
Three inputs are required for monitor operation.
• Number of rows
• Row spacing
• Ground speed constant
Refer to the Menu Screen section for identifying Operate screen functions.
PLANTER CONFIGURATION
NOTE: The Planter Configuration
screen must include the
number of rows and the row
spacing or implement width for
the console to properly display
population.
NUMBER OF ROWS
1. At the Operate screen, use the Arrow keys to highlight the Menu
function line and press Enter.
2. At the Menu Setup screen, highlight the Row Setup icon and press
Enter.
3. At the Number of Rows field, press Enter. The Up Arrow key increases
the value; the Down Arrow key decreases the value. NOTE: The
maximum number of rows that can be selected are 12.
4. Press the Enter key to accept the selection.
5. Continue pressing the ESC key to return to the Operate screen or
proceed to Row Spacing setup.
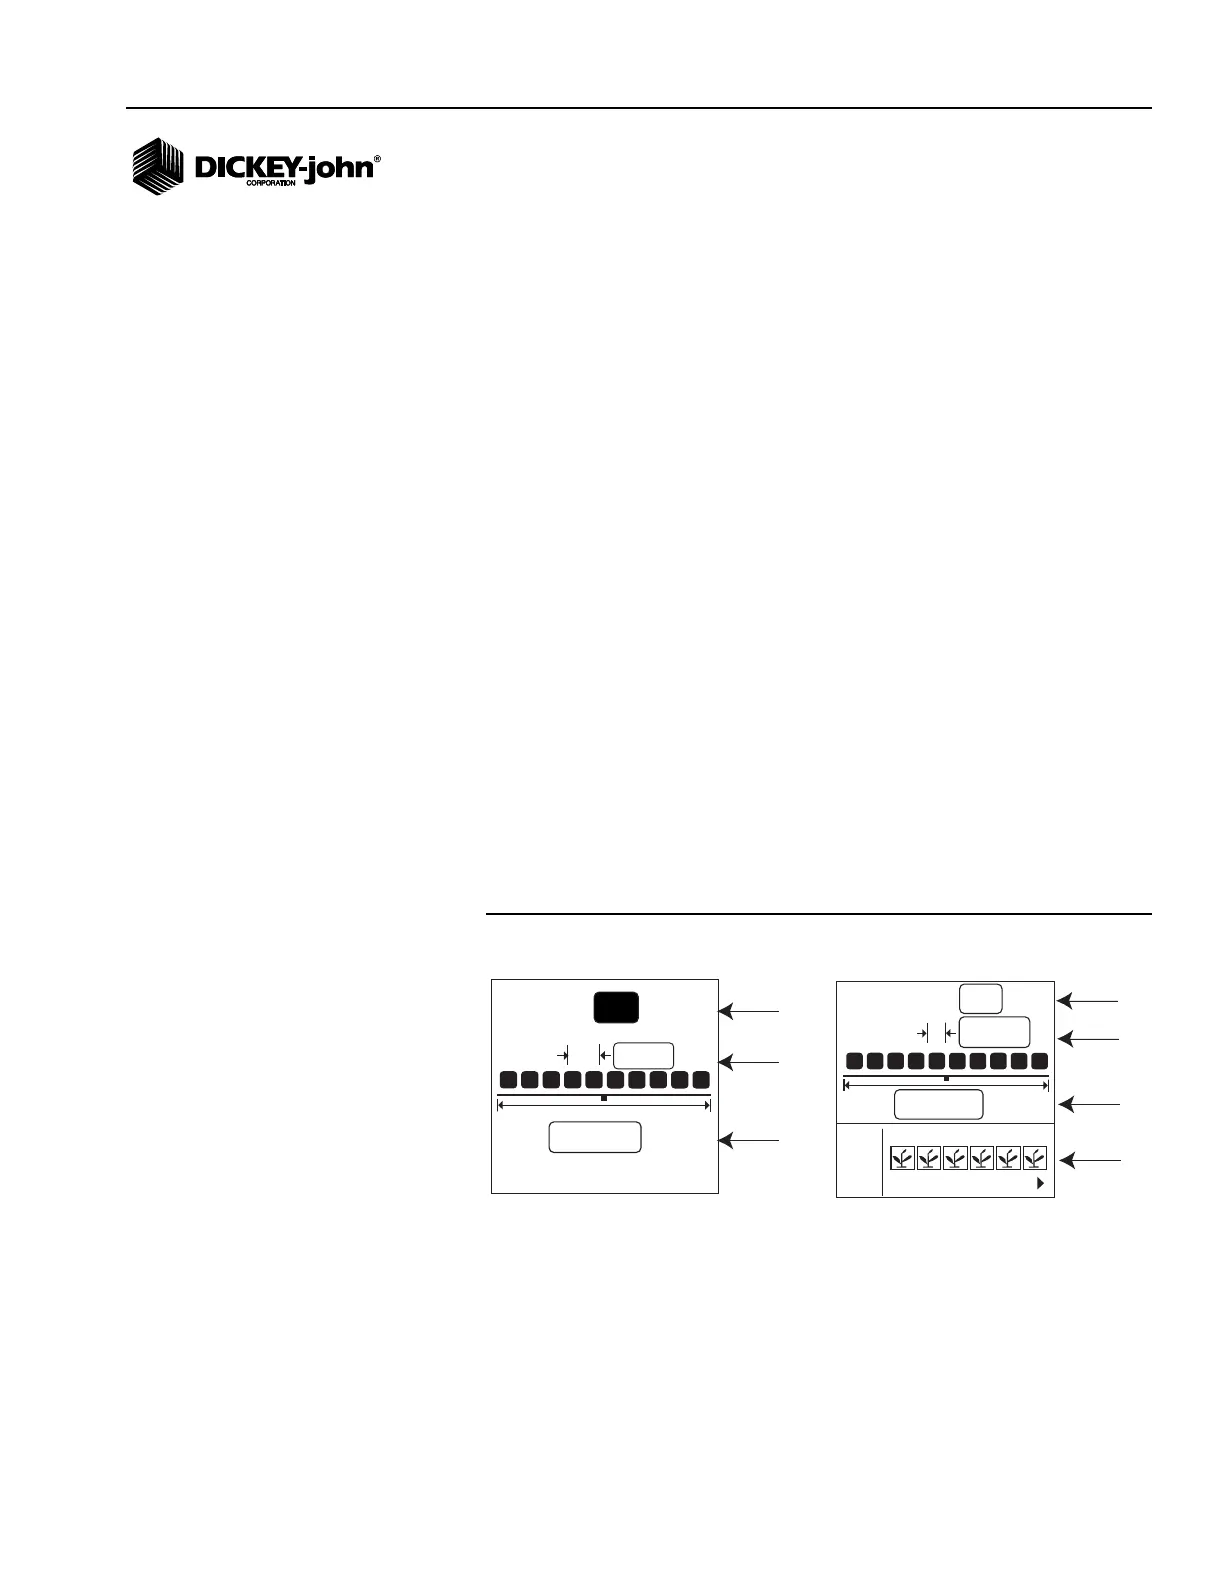
Figure 12
Planter Configuration Screen
ROW SPACING
1. Use the Down Arrow key to highlight the Row Spacing field.
2. Press Enter to modify the field. The Up Arrow key increases the value;
the Down Arrow key decreases the value.
3. Press Enter to confirm the selection. An implement width value will
automatically calculate, but can also be changed manually.
#
20.0
in
20.00
ft
12
# of Rows
Row Spacing
Implement
Width
PM200 and 200E
#
12
20.0
in
20.00
ft
1 2 3 5 6
4
I/O
PM250
# of Rows
Row Spacing
Row Setup
Implement
Width