Hard Drive Configuration and Maintenance 65
5 If the volume is “Unallocated,” do the follow-
ing:
• In the Disk Management window, right-
click the hard drive you will use for audio
and choose New Partition.
• In the New Partition Wizard window, click
Next.
• When prompted, select the partition type.
• Follow the on-screen instructions to select
a partition size and other partition settings.
• When prompted, choose a file system. For
optimum performance, audio drives
should be formatted as NTFS.
• Select “Perform a quick format.”
• Make sure “Enable file and folder compres-
sion” is not selected.
• Set the Allocation unit size to Default.
• Click OK.
Formatting Mac Audio Drives
(Mac Only)
For optimum performance, audio drives should
be formatted as Mac OS Extended (Journaled).
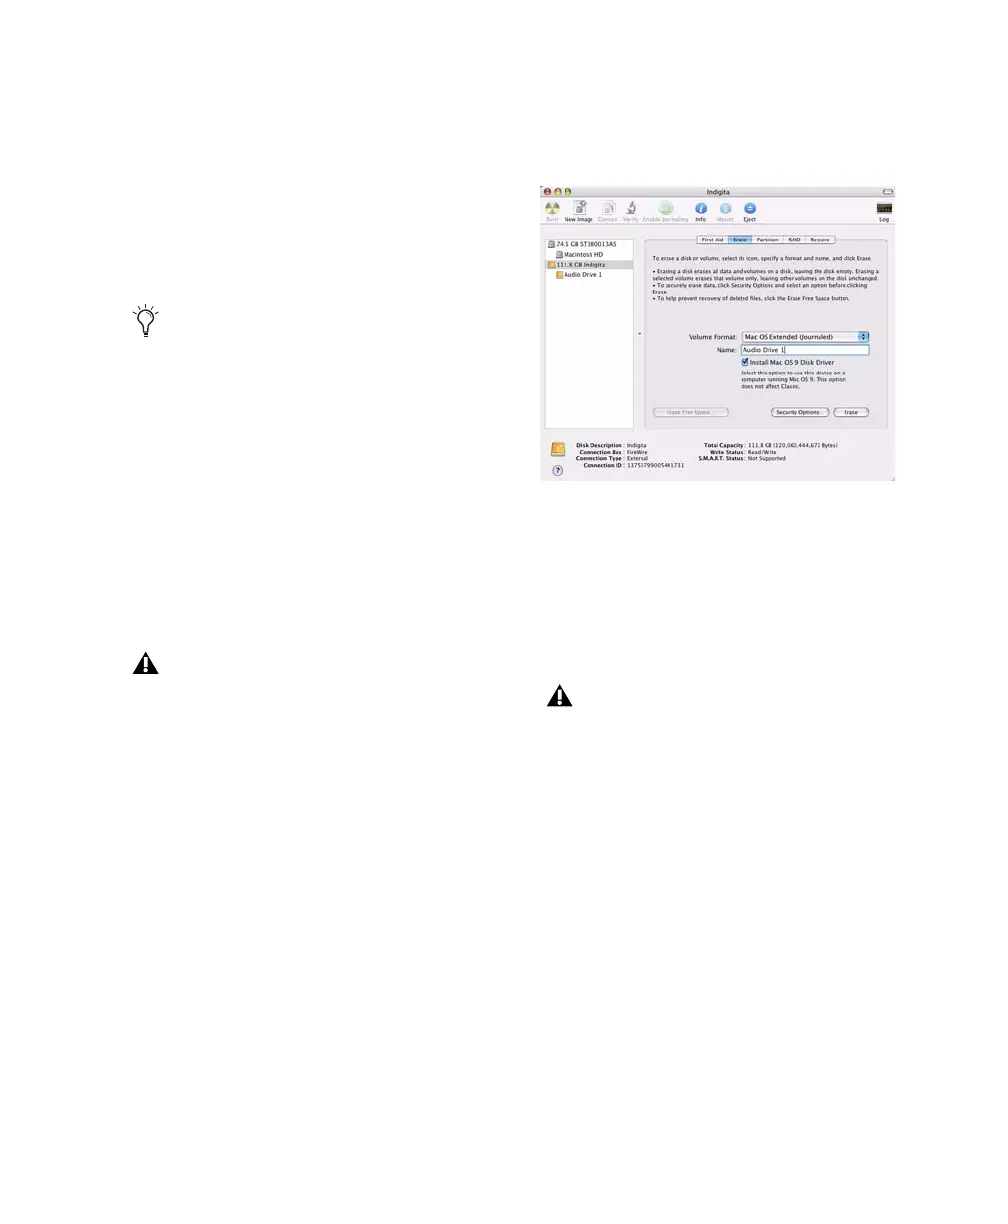
To format an audio drive:
1 Launch the Disk Utility application, located in
Applications/Utilities.
2 Click the Erase tab.
3 Select the drive you want to initialize in the
column on the left side of the window.
4 Choose the Mac OS Extended (Journaled) for-
mat.
5 Type a name for the new volume.
6 If you plan to connect the drive to a Mac OS 9
computer, select Install Mac OS 9 Drivers.
7 Click Erase.
The drive appears on the Desktop with the new
volume name.
Digidesign recommends using Primary par-
titions, instead of Extended partitions.
Pro Tools only supports Basic drive types.
Do not convert the drive to a Dynamic type.
Disk Utility (Mac OS X)
Do not choose the “Case-Sensitive” format
option. Pro Tools will not operate properly
with case-sensitive formatted drives.