The information contained here are property of DIGITAX Automotive Electronics Italy, and extremely confi dential. Any disclosure, copying, distribution to third
party is strictly prohibited.
37
Statistical Memory
How to Erase the Locations Memory Content
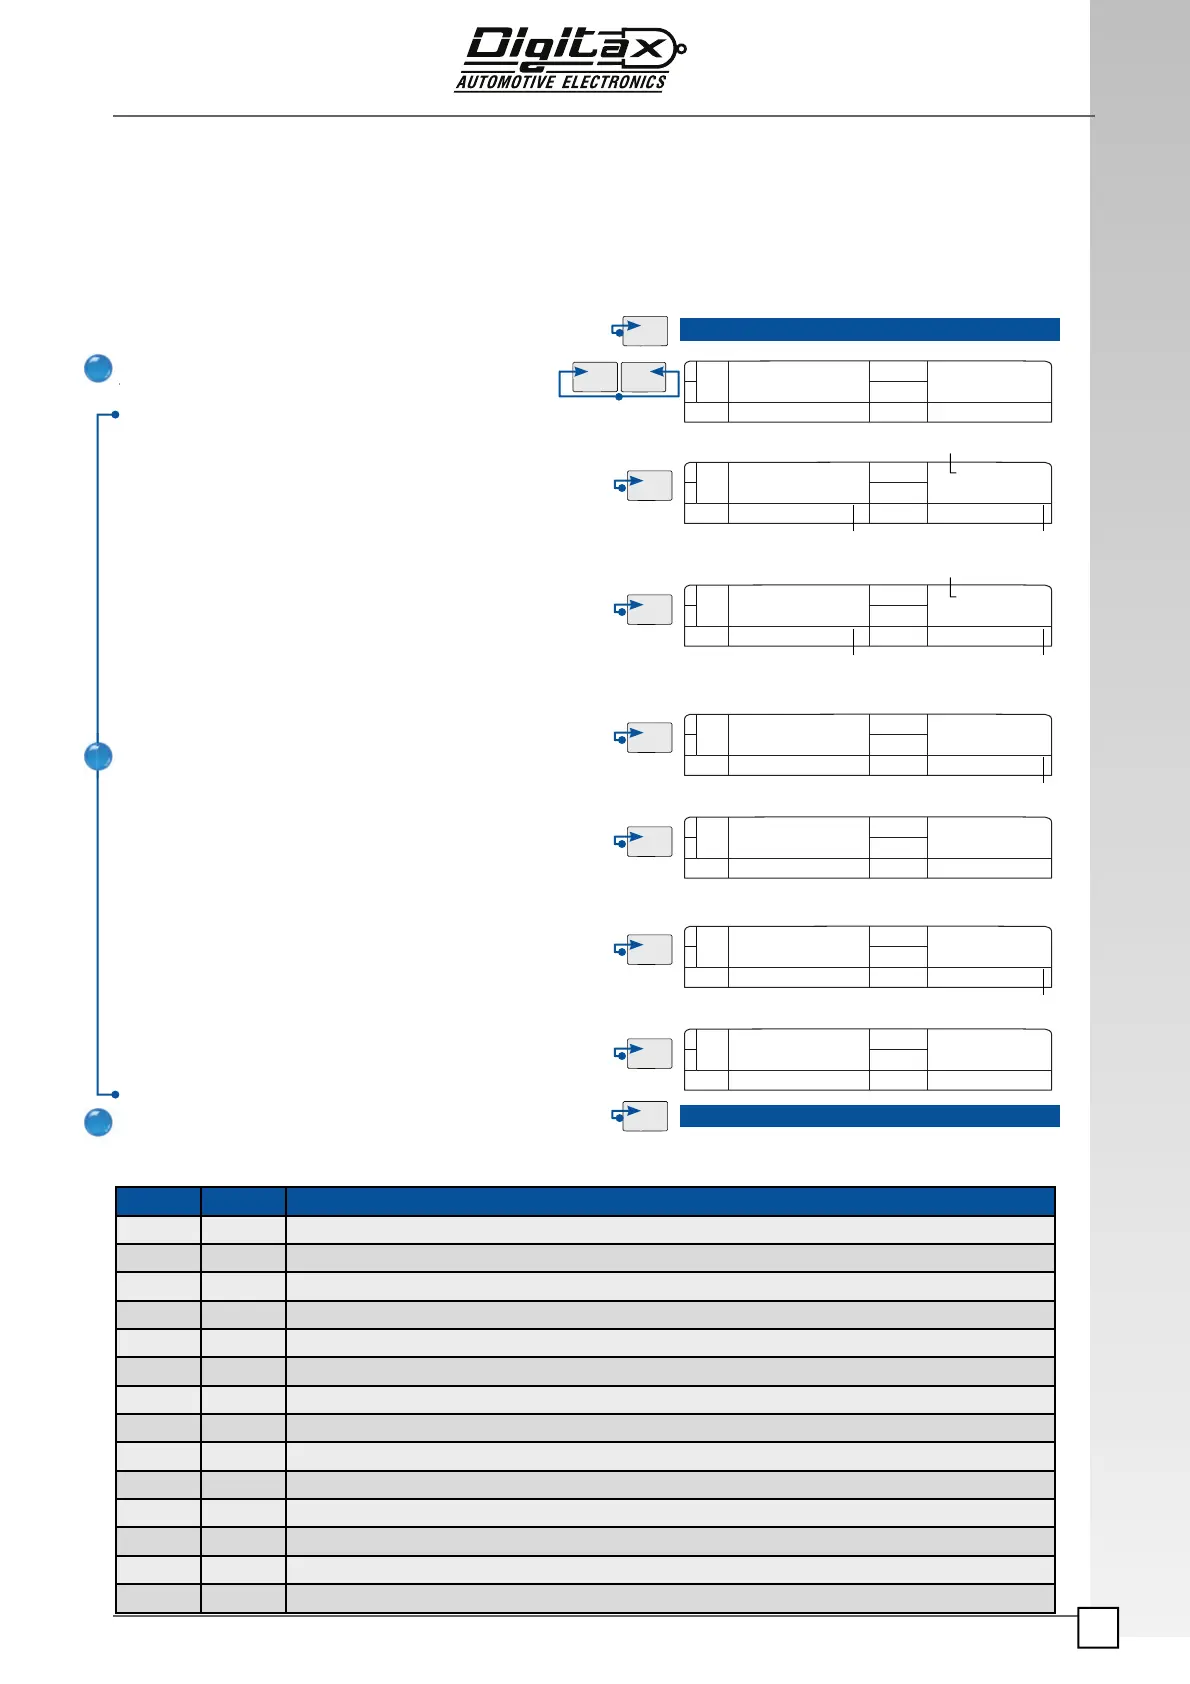
The taximeter records and keeps data in 2 Memory Blocks, each one divided in 45 loca! ons.
The content of both BlocF2 and BlocF3 can be erased (if allowed by the setup).
STATIS
5.00 1 28
FOR HIRE
FOR HIRE
Memory Data
Memory Block
Memory Location
Number
Erasing Procedure
How to erase BlocF3 (if allowed by set up)
Select For Hire position.
Press
F2 and F3 at the same time.
The big display will show “Statis” for a few seconds.
Reach location n. 28 by pressing F3 button.
Reach
location n.28, insert the Service Programming Key 1 and
press
F5 button to erase all information contained in Block 2.
If you want to erase and print, select position
18 instead of 28
(block 1 and block 2 information will be printed)
Reach the memory
location n. 29 by pressing F3 button.
Reach
location n. 29, press F5 button to erase all information
contained in
Block 1.
If you want to erase and print, select position
19 instead of 29
(block 1 and block 2 information will be printed)
Reach the memory
location n. 30 by pressing F3 button.
Insert the service programming key 1, reach
location n. 30
and press
F5 button to erase all information contained in both
Blocks 1 and 2.
If you want to erase and print, select position
20 instead of 30
(block 1 and block 2 information will be printed)
Press
F1 button to end the erasing procedure and go back to
For Hire position.
0.00 1 28
Memory Data
Memory Block
Memory Location
Number
0.00 1 29
Memory Location
Number
5.00 1 29
5.00 1 30
Memory Location
Number
0.00 1 30
How to erase the Block 1 (if allowed by setup)
How to erase both Block 1 and Block 2 (if allowed by setup)
Advanced Functions enabled by pressing F5 with the Service Programming Key 1
Loc. Block Memory Content
4 1 Erase all the “Trip by Trip” Memories (wait a few seconds to complete)
5 1 Reset “driver by driver” bu! er
6 1 Reset the Ticket Number
7 1 Reset and Load the Factory Ticket Header
8 1 Reset and Load the Factory Prog. Date
9 1 Reset the monthly bu! er
10 1 Reset and Load the Factory Tari!
17 2 Total Reset and Load all the Factory Parameters
18 1 Erase Memory Block 2 (even if not allowed by setup) and prints blocks 1 & 2 (if printer is connected and ON)
19 1 Erase Memory Block 1 (even if not allowed by setup) and prints blocks 1 & 2 (if printer is connected and ON)
20 1 Erase Memory Blocks 1-2 (even if not allowed by setup) and prints blocks 1 & 2 (if printer is connected and ON)
28 1 Erase Memory Block 2 (even if not allowed by setup)
29 1 Erase Memory Block 1 (even if not allowed by setup)
30 1 Erase Memory Blocks 1-2 (even if not allowed by setup)
1
2
3
Counters
Counters
Counters
Counters
Counters
Counters
Counters