【3-5】
BRAKE
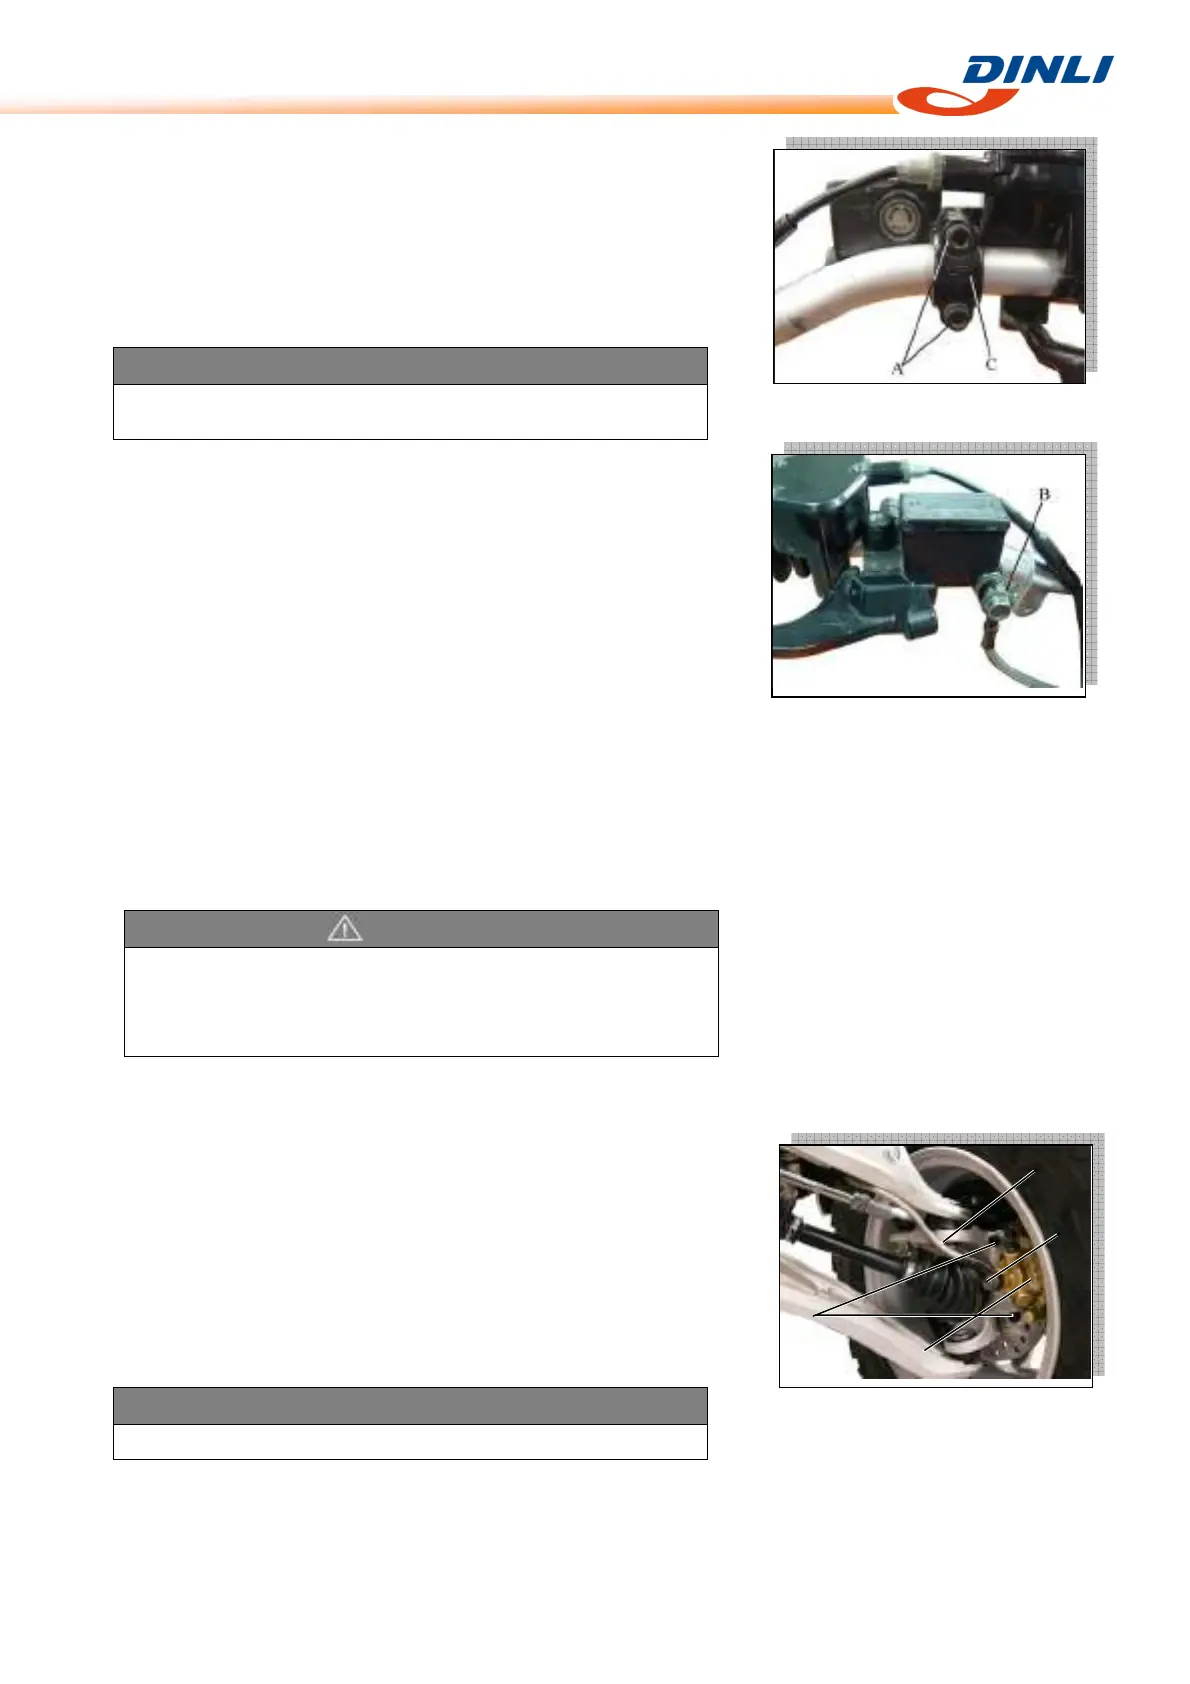
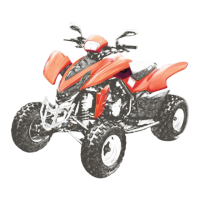
Master Cylinder
Master Cylinder Removal
●Removal:
Brake Hose Banjo Bolt [B]
Master Cylinder Clamp Bolts [A]
Master Cylinder
Master Cylinder Installation
● The master cylinder clamp must be installed with the "UP" mark
[C] upwards.
● Tighten the upper clamp bolt first, and then the lower clamp bolt.
There will be a gap at the lower part of the clamp after tightening.
Torque - Master Cylinder Clamp Bolts:
8.8N-m(0.90kg-m,78in-lb)
● Use a new flat washer on each side of the brake hose fitting, and
tighten the banjo bolt.
Torque - Brake Hose Banjo Bolt:25N-m(2.5kg-m,18.0ft-lb)
● Bleed the brake line after master cylinder installation (see Brake
Line Air Bleeding).
● Check the brake for good braking power and no fluid leakage.
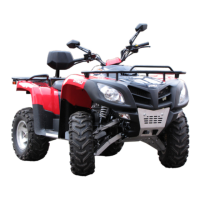
Caliper
Front Caliper Removal
●Remove the front wheel (see Wheels/Tires chapter).
●Loosen the banjo bolt [A] at the brake hose lower end, and tighten
it loosely.
●Unscrew the caliper mounting bolts [B], and detach the caliper [C]
from the disc.
●Unscrew the banjo bolt and remove the brake hose [D] from the
caliper.
CAUTION
Brake fluid quickly ruins painted surface; any spilled fluid
should be completely washed away immediately.
WARNING
Do not attempt to drive the vehicle until a full brake lever is
obtained by pumping the brake lever until the pads are against
each disc. The brakes will not function on the first application of
the lever if this is not done.
D
A
B
C
CAUTION
Immediately wash away any brake fluid that spills.