1802-065-D-10-14
10
1.3 Flush Mount Dimensions
Flush mount units get installed into a wall/kiosk and can be mounted outside exposed to the weather. It is preferred that they
have limited direct exposure to the weather. We suggest that when they are mounted outdoors, it is in a protected area, such as
a lighted-covered kiosk for example. DoorKing offers a self-standing kiosk for the flush mount unit ideal for walk-up pedestrian
applications (P/N 1200-160). Be sure the unit is mounted securely and is not subject to vibration from closing doors or gates.
Bottom View
Bottom View
Side ViewBack View
Rough-In Box
Flush Mount Housing
Back View Front View
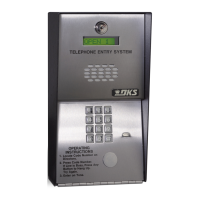
1802EPD
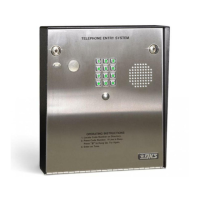
1802
7
8
9
4
5
6
1
2
3
0
OPER
AT
IN
G
INSTRUCTIONS
Locate Code Number on
Directo
ry.
Press Code Number
.
If
Line is Busy
, Pres
s Any
Button to
Hang Up.
Tr
y Again.
E
nt
e
r on
T
one.
1.
2.
3.
7
8
9
4
5
6
1
2
3
0
O
PER
W
X
Y
Z
T
UV
PQ
RS
MN
O
J
KL
G
HI
D
E
F
ABC
SP
A
Z
CALL
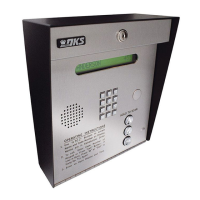
7
8
9
4
5
6
1
2
3
0
OPER
WXYZ
TUV
PQRS
MNO
JKL
GHI
DEF
ABC
SP
CALL
Z
A
12.5”
12”14”
6.875”
8.375”
3.375”
3.25”
1.75”
3”
3”3.875”
1.25” Dia
.875” Dia
.875” Dia
3.875”
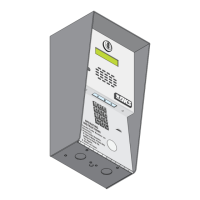
The flush mount installation has
two parts; the rough-in box and
the flush mount housing. The
rough-in box is installed in the
wall first. Use appropriate
hardware (not included) to
secure the box in the wall. Run
all necessary conduit (not
included) to rough-in box. Slide
the flush mount housing into the
rough-in box and secure them
together with the hardware
included.
Rough-In
Box
F
lush
M
ount
H
ousing
Rough-In
Box
Flus
h
M
ount
H
ousing