Digital Monitoring Products XR200/XR2400F Programming Guide
2
1 - INTRODUCTION
Accessing the Programmer
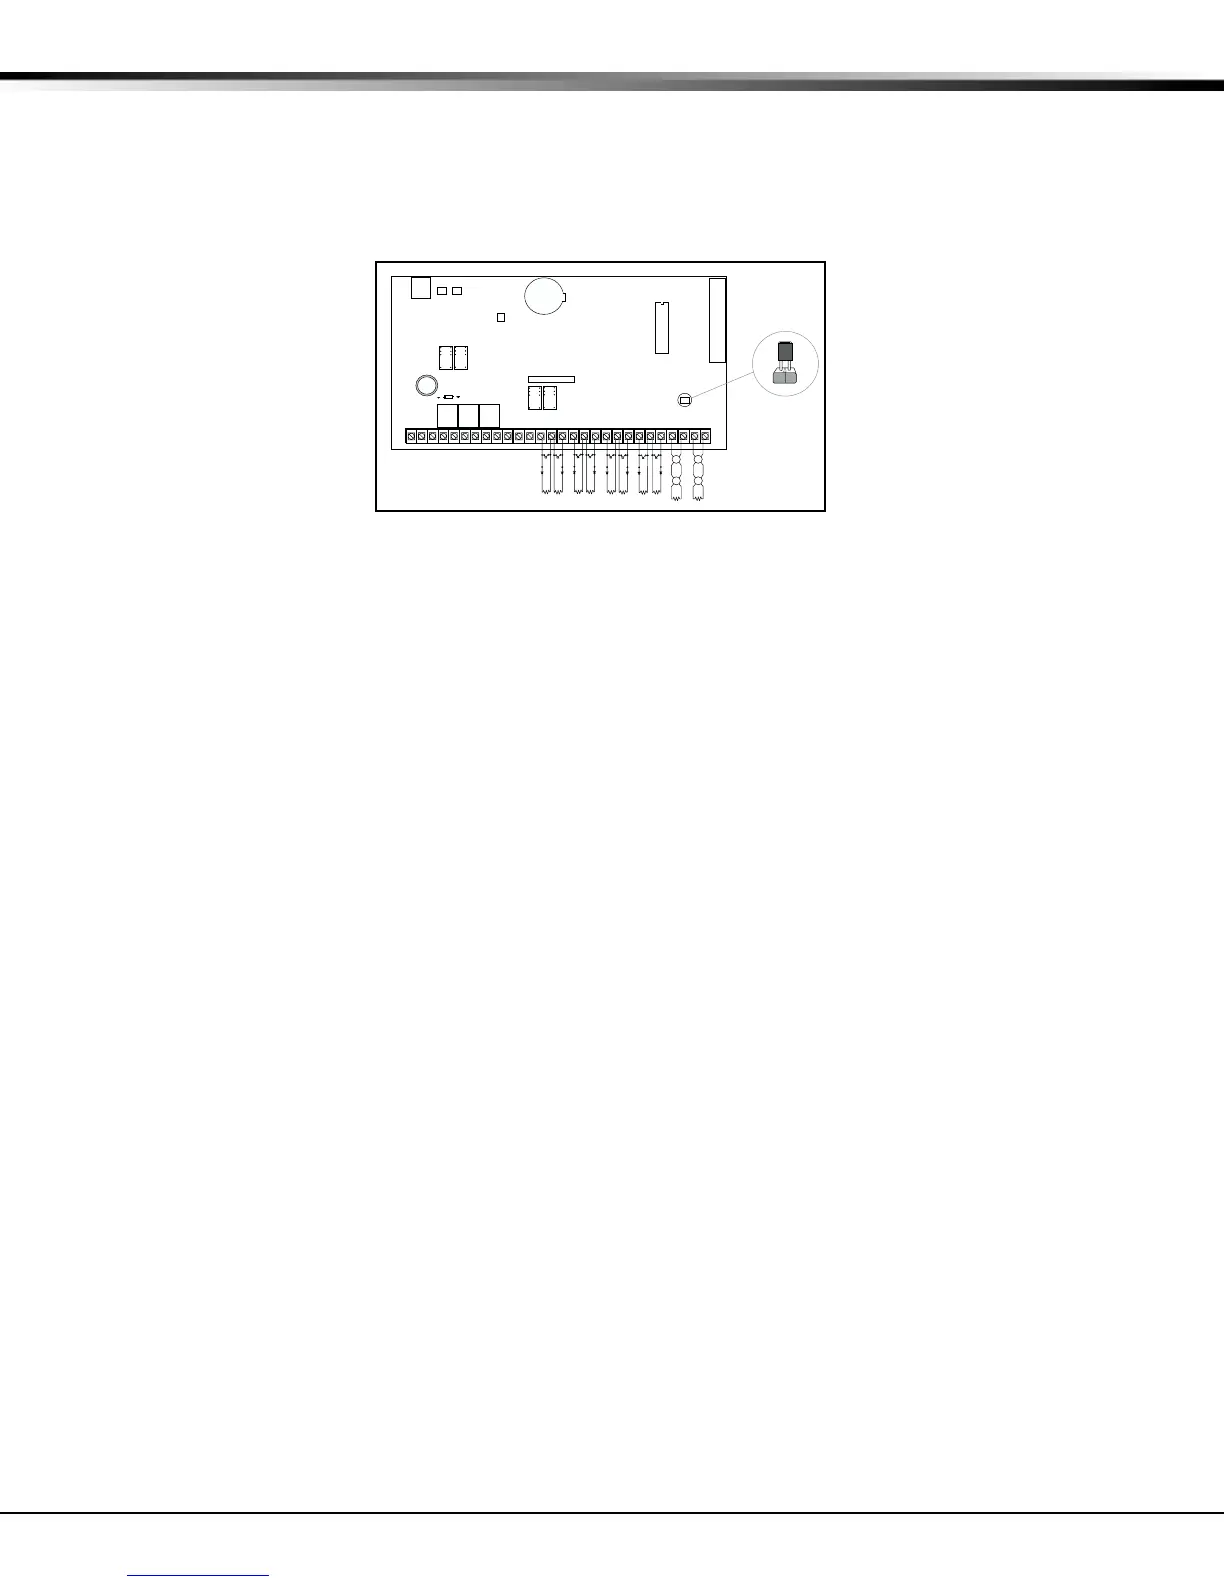
1. Install the reset jumper across the two J16 reset pins for two seconds. See Figure 1.
2. Remove the reset jumper and place it over just one pin for future use.
3. Enter the code 6653 (PROG) into an alphanumeric keypad set to address one. Press COMMAND.
4. The keypad displays PROGRAMMER.
You are now ready to start programming the panel. Pressing the COMMAND key scrolls you through the programming
functions listed in the programmer. Each of these functions are described in detail in sections 2 to 15.
Initializing the Panel
After installing the panel, use the Initialization function to set to defaults the panel's programming. Note: The
default user code is 99. This should be changed as soon as the system is operational.
1.3 Programmer Operation
There are 14 programming sections to choose from:
Menu Item Section Menu Item Section
Initialization 2 Menu Display 9
Communication 3 Status List 10
Device Setup 4 Printer Reports 11
Remote Options 5 Area Information 12
System Reports 6 Zone Information 13
System Options 7 Stop 14
Output Options 8 Set Lockout Code 15
To select a section for programming, press any one of the Select keys when the name of that section is displayed on
the keypad. The detailed instructions for each programming step are found in sections 2 to 15.
1.4 Programmer Lockout Codes
The panel allows you to enter the programming function without entering a lockout code using the steps 1 to 4 listed
in Getting Started. We recommend, however, that you install a Lockout Code that restricts programming to only
those persons your company authorizes. You can do this by using the SET LOCKOUT CODE feature in the
Programmer. Use this new Lockout Code to restrict any unauthorized programming of the panel.
After resetting the panel and entering the code 6653, the keypad displays PROGRAMMER. Press COMMAND to
advance through the programming sections until SET LOCKOUT CODE is displayed (after STOP). Press any top row
Select key. The keypad displays ENTER CODE: – . Enter a 3 to 5 digit Programmer Lockout Code and press
COMMAND. The keypad displays ENTER AGAIN followed by ENTER CODE: –. Enter the same 3 to 5 digit code a
second time and press COMMAND. The keypad displays CODE CHANGED.
Note: The panel will not accept a 5-digit Lockout Code higher than 65535. The new code number must now be
entered before the programmer function can be accessed.
The Lockout Code should be written down and kept in a secure place with access limited to only those persons
authorized by your company to program the panel.
J16
Command Processor Reset
AC
1
234
56
78
10 11 12
13
14
15
16
17
18
19
AC +B -B
BELL
GND SMK
GND
9
RED
YEL GRN BLK
20
21
22 23 24 25
26
27 28
L1 L2
GND
GND
GND
GND
L3
L4 L5 L6 L7 L8 L9- L9+ L10- L10+
Figure 1: J16 Reset Jumper