14 XT30/XT50 User Guide Arming and Disarming
exit delay tone at eight-second intervals until the last 10 seconds
when the keypad beeps at three-second intervals. After exiting the
building, if you re-enter during the countdown the exit countdown
restarts, allowing additional time to then disarm or again exit the
building during the countdown. This restart can occur only one
time. When the exit delay time ex pires, all disarmed zones are
armed. If your system uses a keyswitch to arm an area, the exit
delay time does NOT count down on the keypad display.
When you arm both the Perimeter and Interior to leave the building
but then you do not exit by the time the exit delay ends, the system
automatically arms but the interior area(s) will remain disarmed
because you have not exited.
Should you exit the building and the door does not close properly,
your system may be programmed so that when the exit delay
countdown ends, then the entry delay starts and the bell will sound
to alert you to the situation. Enter your user code to stop the bell
and disarm the system. Rearm the system, exit the building, and
make sure the door is securely closed.
ONE MOMENT . . . Message: If your system is monitored, it
may be programmed to wait for the arming report to be sent to
the monitoring station before displaying the armed mes sage. (See
Arming Report below.) This veries that the arming message was
received by your monitoring station. While the system waits, the
display reads ONE MOMENT.... If the report is received, the keypad
buzzes for one second and displays the armed message. If the
report is not received, the keypad displays LOCAL ALARM ONLY
before displaying the armed message.
Arming Report: Your system may be pre-programmed at installation
to send arming or zone bypass reports to a central station.
Key Fob Arming
Press the key fob button programmed for Arming or Toggle (Arm/
Disarm) button. A Red LED two-second acknowledgement indicates
All System On. A Green/Red two-second acknowledgement indicates
System On with some areas armed.
Key Fob Disarming
Press the key fob button programmed for Disarming or Toggle
(Arm/Disarm) button. A Green LED two-second acknowledgement
indicates All System Off.
Area System Arming
Area Assignment: Your security system is programmed into separate
areas. The number of areas and their names are listed in the back
of this guide.
Arming or Disarming: You can arm and disarm all areas at one time
or each area individually. You can only arm or disarm areas authorized
for your user code.
All or Selective Arming: After entering your user code, the system
allows you to arm either all of the areas to which you have access
or one or more selected areas. If you choose to arm all areas, the
system begins verifying that all zones in those areas are in a good
condition. If you choose to arm selected areas, the system prompts
you to choose the areas you want to arm.
Arming the System
1. Press the CMD key until ARM DISARM displays.
2. Select ARM to turn on all protection.
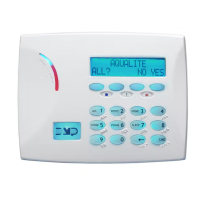
3. Enter your user code if required. The display reads
ALL? NO YES.
4. Select NO to arm only selected areas. Go to step 5. Select
YES to arm all areas authorized for your user code.
 Loading...

