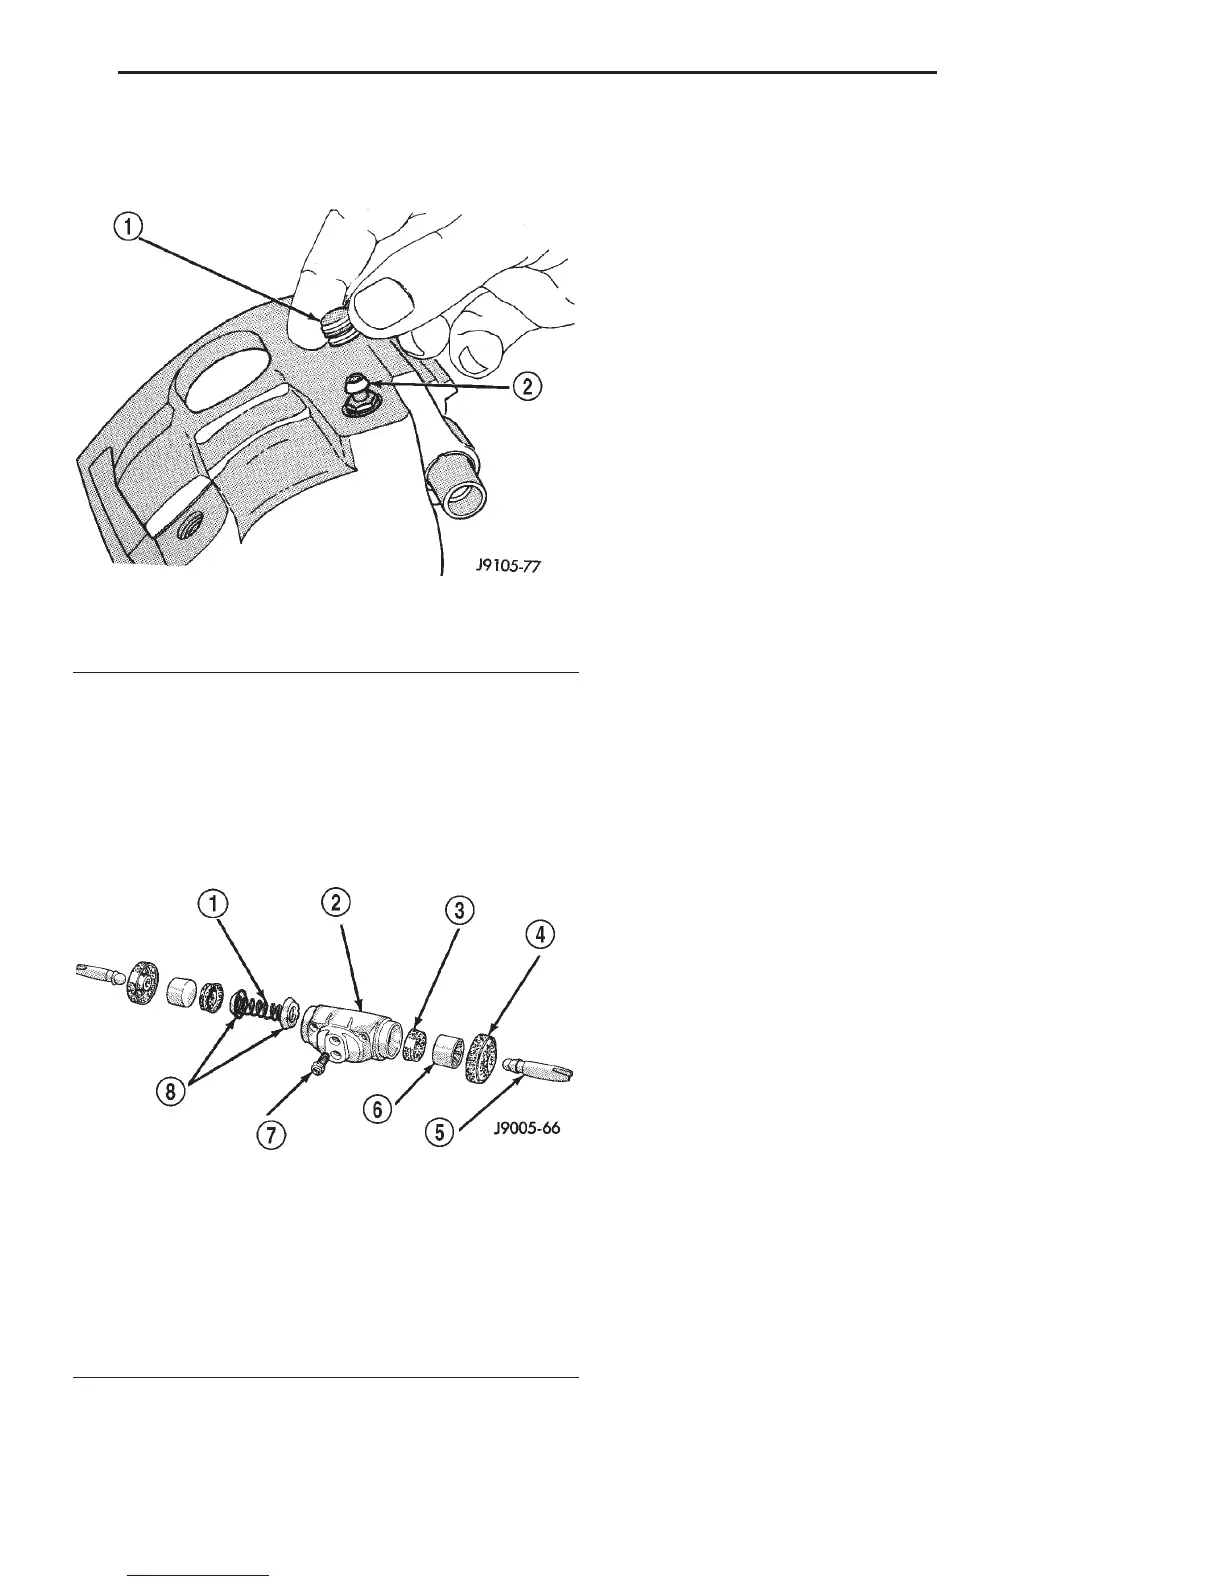
(10) Install caliper bleed screw and bleed screw
cap if removed (Fig. 53).
WHEEL CYLINDER
DISASSEMBLY
(1) Remove push rods and boots (Fig. 54).
(2) Press pistons, cups and spring and expander
out of cylinder bore.
(3) Remove bleed screw.
ASSEMBLY
(1) Lubricate wheel cylinder bore, pistons, piston
cups and spring and expander with clean brake fluid.
(2) Install first piston in cylinder bore. Then
install first cup in bore and against piston. Be sure
lip of piston cup is facing inward (toward
spring and expander) and flat side is against
piston.
(3) Install spring and expander followed by
remaining piston cup and piston.
(4) Install boots on each end of cylinder and insert
push rods in boots.
(5) Install cylinder bleed screw.
CLEANING AND INSPECTION
REAR DRUM BRAKE
CLEANING
Clean the individual brake components, including
the support plate and wheel cylinder exterior, with a
water dampened cloth or with brake cleaner. Do not
use any other cleaning agents. Remove light rust and
scale from the brake shoe contact pads on the sup-
port plate with fine sandpaper.
INSPECTION
As a general rule, riveted brake shoes should be
replaced when worn to within 0.78 mm (1/32 in.) of
the rivet heads. Bonded lining should be replaced
when worn to a thickness of 1.6 mm (1/16 in.).
Examine the lining contact pattern to determine if
the shoes are bent or the drum is tapered. The lining
should exhibit contact across its entire width. Shoes
exhibiting contact only on one side should be
replaced and the drum checked for runout or taper.
Inspect the adjuster screw assembly. Replace the
assembly if the star wheel or threads are damaged,
or the components are severely rusted or corroded.
Discard the brake springs and retainer components
if worn, distorted or collapsed. Also replace the
springs if a brake drag condition had occurred. Over-
heating will distort and weaken the springs.
Inspect the brake shoe contact pads on the support
plate, replace the support plate if any of the pads are
worn or rusted through. Also replace the plate if it is
bent or distorted (Fig. 55).
CALIPER
CLEANING
Clean the caliper components with clean brake
fluid or brake clean only. Wipe the caliper and piston
dry with lint free towels or use low pressure com-
pressed air.
Fig. 53 Installing Caliper Bleed Screw And Cap
1 – BLEED SCREW CAP
2 – BLEED SCREW
Fig. 54 Wheel Cylinder Components–Typical
1 – SPRING
2 – CYLINDER
3 – PISTON CUP
4 – BOOT
5 – PUSH ROD
6 – PISTON
7 – BLEED SCREW
8 – CUP EXPANDERS
DN BRAKES 5 - 27
DISASSEMBLY AND ASSEMBLY (Continued)