INSTALLATION
(1) Position the ash receiver flame shield to the
instrument panel lower bezel.
(2) Squeeze the ash receiver lamp and hood
bracket and engage the unit to the mounting hole in
the flame shield.
(3) Insert the two retaining tabs on the top of the
ash receiver flame shield into the mounting holes in
the instrument panel lower bezel, then push the
shield forward to engage the tabs with the bezel.
(4) Install and tighten the two screws that secure
the ash receiver flame shield to the instrument panel
lower bezel. Tighten the screws to 2.2 N·m (20 in.
lbs.).
(5) Align the pivot receptacles on each side of the
ash receiver with the pivot pins in the instrument
panel lower bezel.
(6) Push the ash receiver forward onto the pivot
pins in the instrument panel lower bezel until the
spring retainer in the center of the open ash receiver
snaps into place.
(7) Reconnect the battery negative cable.
INSTRUMENT PANEL LOWER BEZEL
WARNING: ON VEHICLES EQUIPPED WITH AIR-
BAGS, REFER TO GROUP 8M - PASSIVE
RESTRAINT SYSTEMS BEFORE ATTEMPTING ANY
STEERING WHEEL, STEERING COLUMN, OR
INSTRUMENT PANEL COMPONENT DIAGNOSIS OR
SERVICE. FAILURE TO TAKE THE PROPER PRE-
CAUTIONS COULD RESULT IN ACCIDENTAL AIR-
BAG DEPLOYMENT AND POSSIBLE PERSONAL
INJURY.
REMOVAL
(1) Disconnect and isolate the battery negative
cable.
(2) Remove the cluster bezel from the instrument
panel. Refer to Cluster Bezel in the Removal and
Installation section of this group for the procedures.
(3) Open the glove box.
(4) Remove the two screws that secure the lower
edge of the lower bezel to the instrument panel (Fig.
14).
(5) Remove the four screws that secure the upper
edge of the lower bezel to the instrument panel.
(6) Pull the lower bezel away from the instrument
panel far enough to access the instrument panel wire
harness connectors.
(7) Disconnect the instrument panel wire harness
connectors from the ash receiver lamp, the cigar
lighter, the power outlet and the rear window switch
module.
(8) Remove the lower bezel from the instrument
panel.
INSTALLATION
(1) Position the lower bezel to the instrument
panel.
(2) Reconnect the instrument panel wire harness
connectors to the ash receiver lamp, the cigar lighter,
the power outlet and the rear window switch module.
(3) Align the mounting holes in the lower bezel
with the screw holes in the instrument panel.
(4) Install and tighten the four screws that secure
the upper edge of the lower bezel to the instrument
panel. Tighten the screws to 2.2 N·m (20 in. lbs.).
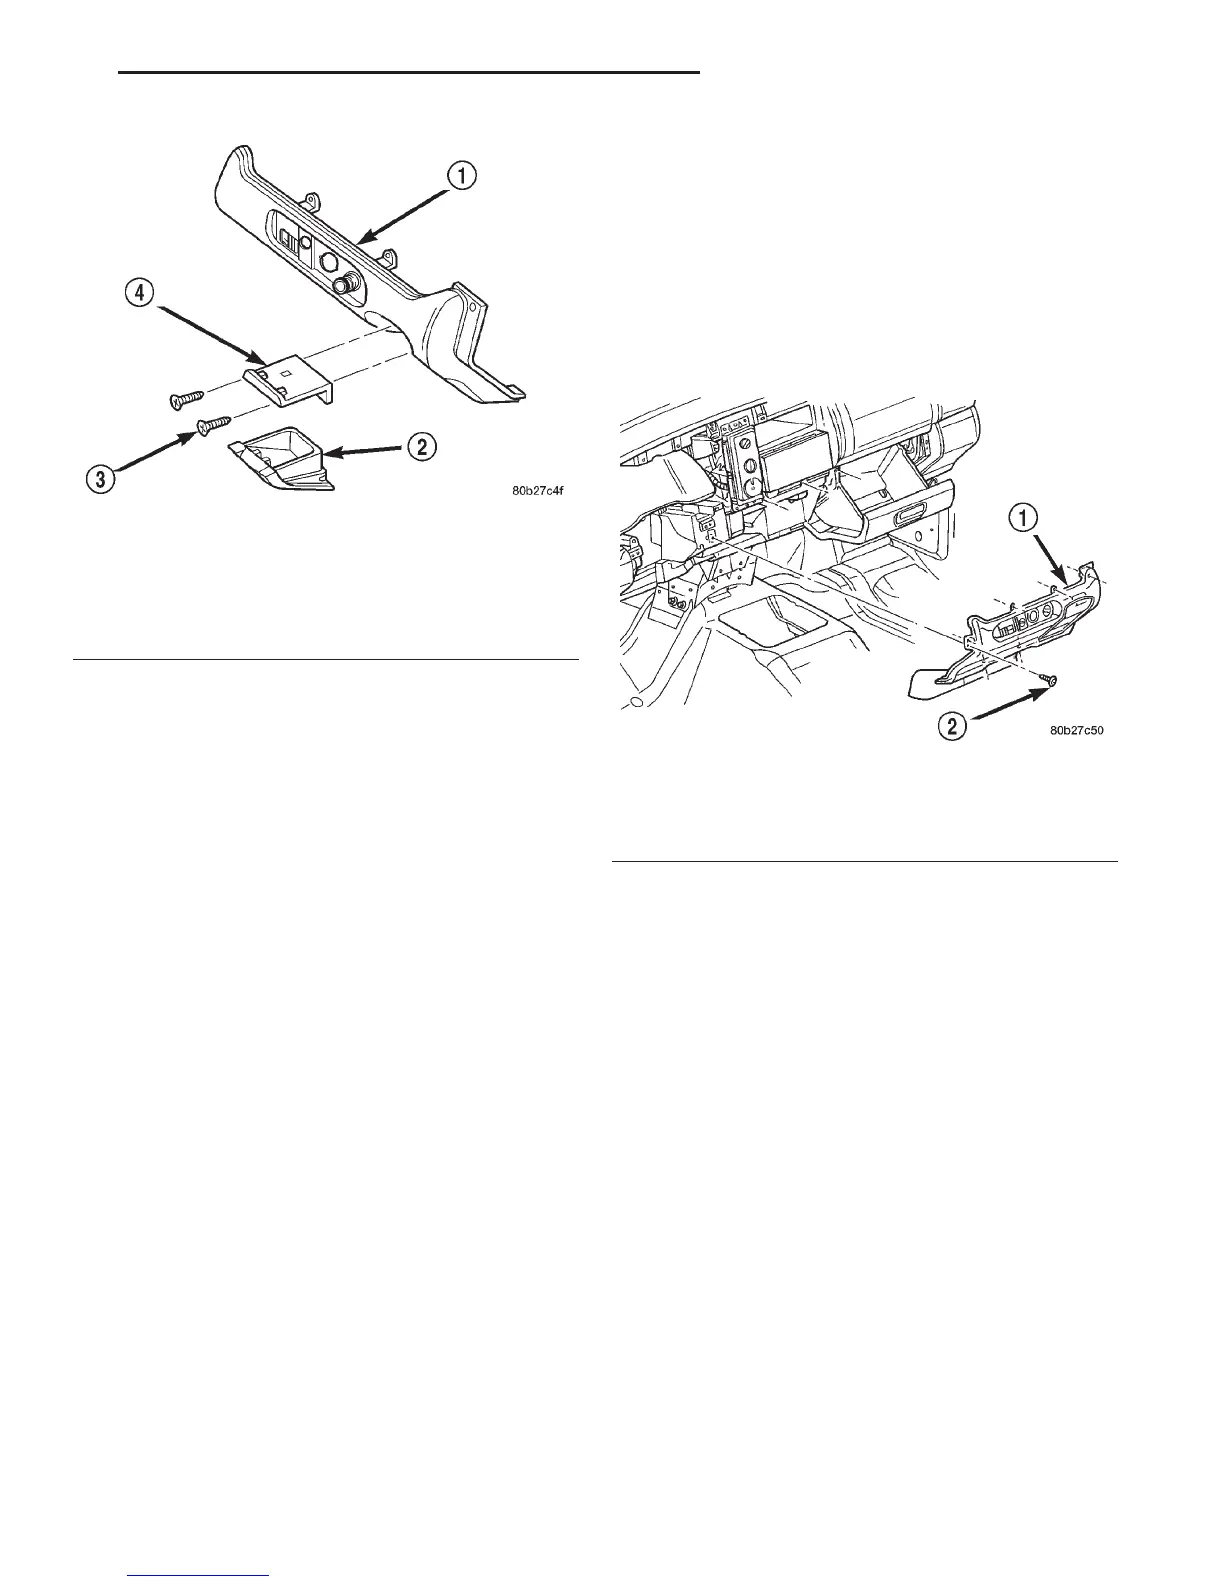
Fig. 13 Instrument Panel Ash Receiver Remove/
Install
1 – INSTRUMENT PANEL LOWER BEZEL
2 – ASH RECEIVER
3 – SCREW
4 – FLAME SHIELD
Fig. 14 Instrument Panel Lower Bezel Remove/
Install
1 – INSTRUMENT PANEL LOWER BEZEL
2 – SCREW
DN INSTRUMENT PANEL SYSTEMS 8E - 21
REMOVAL AND INSTALLATION (Continued)