(11) Remove the cowl plenum cover/grille panel
from the vehicle and set it aside.
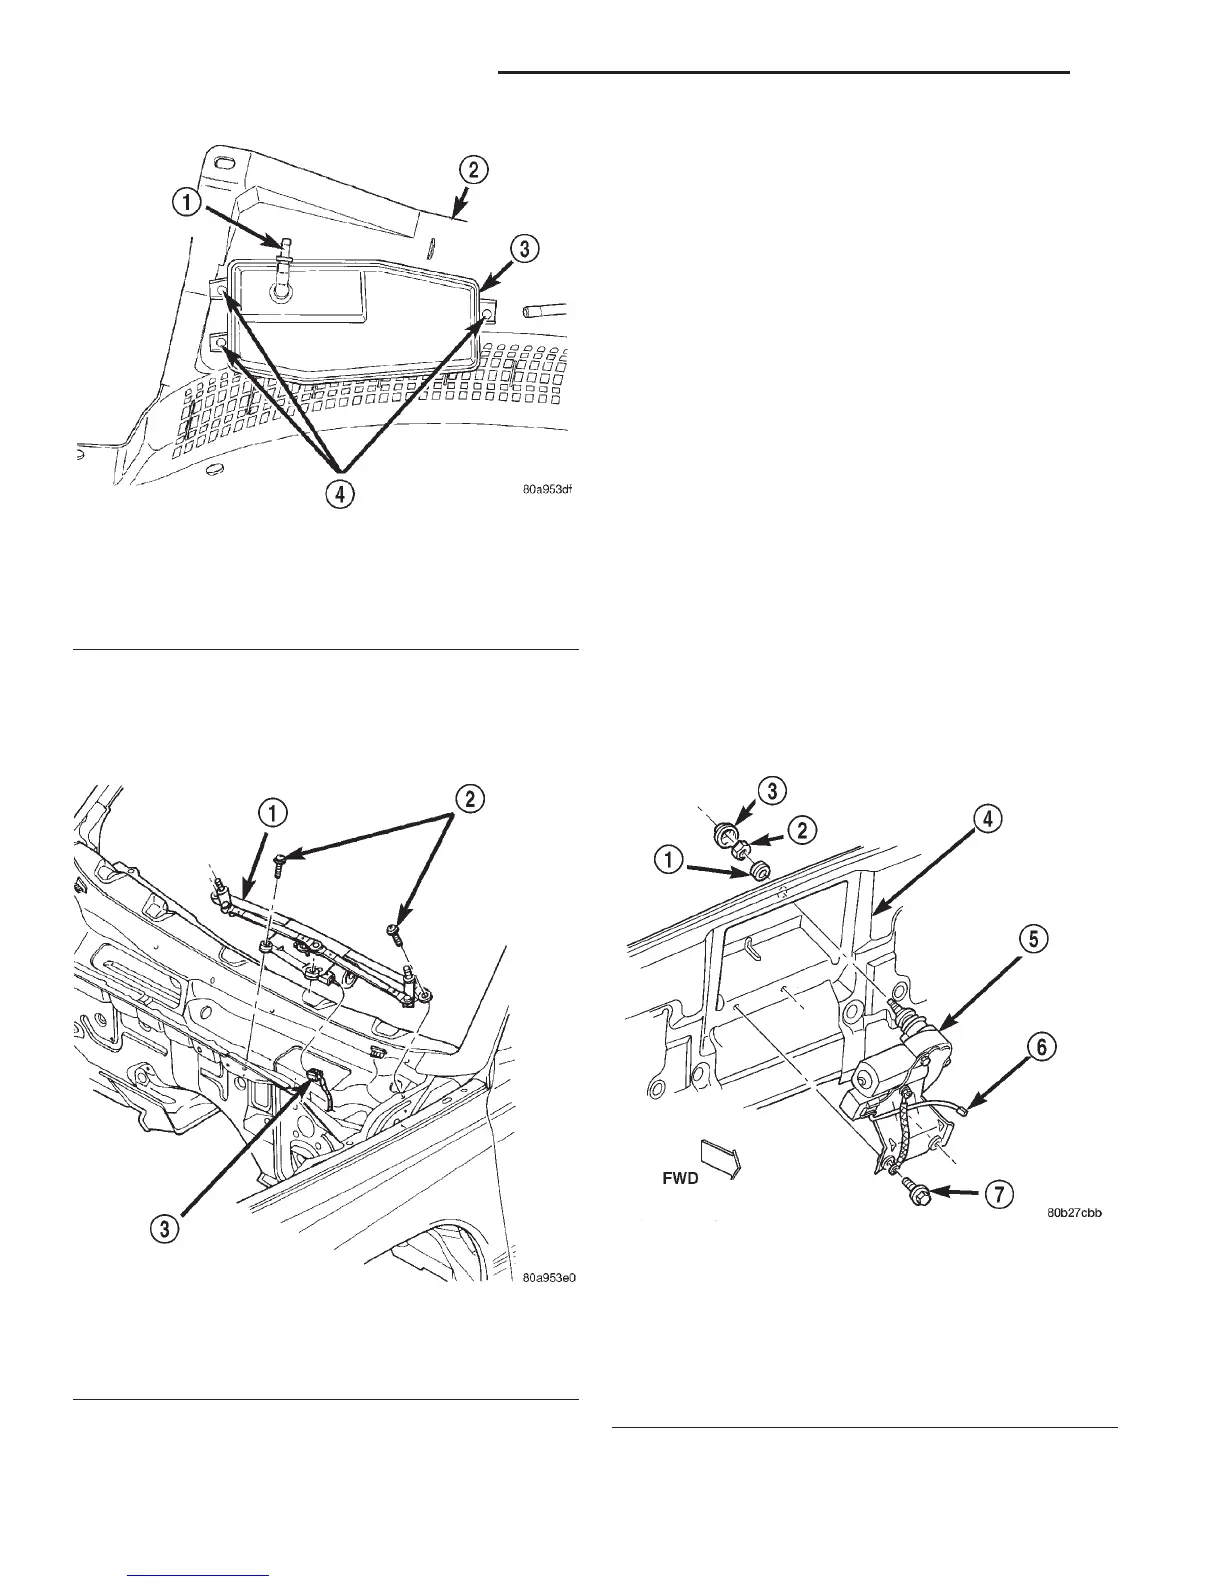
(12) Remove the four screws that secure the wiper
module to the cowl plenum panel (Fig. 14).
(13) Move the wiper module as required to access
the wiper motor wire harness connector.
(14) Unplug the wiper motor wire harness connec-
tor from the wiper motor.
(15) Remove the wiper module from the cowl ple-
num.
(16) Reverse the removal procedures to install. Be
certain that the washer nozzle hoses are correctly
routed and installed in the retainers on the under-
side of the cowl plenum cover/grille panel. Tighten
the mounting screws to 8 N·m (72 in. lbs.).
REAR
(1) Disconnect and isolate the battery negative
cable.
(2) From the outside of the liftgate, remove the
rear wiper arm from the rear wiper motor output
shaft. See Wiper Arm in the Removal and Installa-
tion section of this group for the procedures.
(3) Use a door trim panel removal tool to gently
pry at the base of the nut cover where it meets the
wiper motor output shaft bezel and grommet on the
outer liftgate panel until it unsnaps from the rear
wiper motor output shaft (Fig. 15). Be certain to use
proper caution to protect the outer liftgate panel and
its paint finish from damage during this procedure.
Fig. 13 Vacuum Reservoir
1 – VACUUM SUPPLY CONNECTOR
2 – COWL PLENUM COVER/GRILLE PANEL
3 – VACUUM RESERVOIR
4 – SCREWS
Fig. 14 Wiper Module Remove/Install
1 – WIPER MODULE
2 – SCREWS
3 – CONNECTOR
Fig. 15 Rear Wiper Motor Remove/Install
1 – BEZEL AND GROMMET
2 – NUT
3 – NUT COVER
4 – LIFTGATE INNER PANEL
5 – REAR WIPER MOTOR
6 – WIRE HARNESS CONNECTOR
7 – SCREW
8K - 14 WIPER AND WASHER SYSTEMS DN
REMOVAL AND INSTALLATION (Continued)