INSTALLATION
(1) Clean Gasket Maker residue and sealant from
the cylinder block and rear cap mating surface. Do
this before applying the Mopart Gasket Maker and
the installation of rear cap.
(2) Lightly oil the new upper seal lips with engine
oil.
(3) Install the new upper rear bearing oil seal with
the white paint facing towards the rear of the engine.
(4) Position the crankshaft into the cylinder block.
(5) Lightly oil the new lower seal lips with engine
oil.
(6) Install the new lower rear bearing oil seal into
the bearing cap with the white paint facing towards
the rear of the engine.
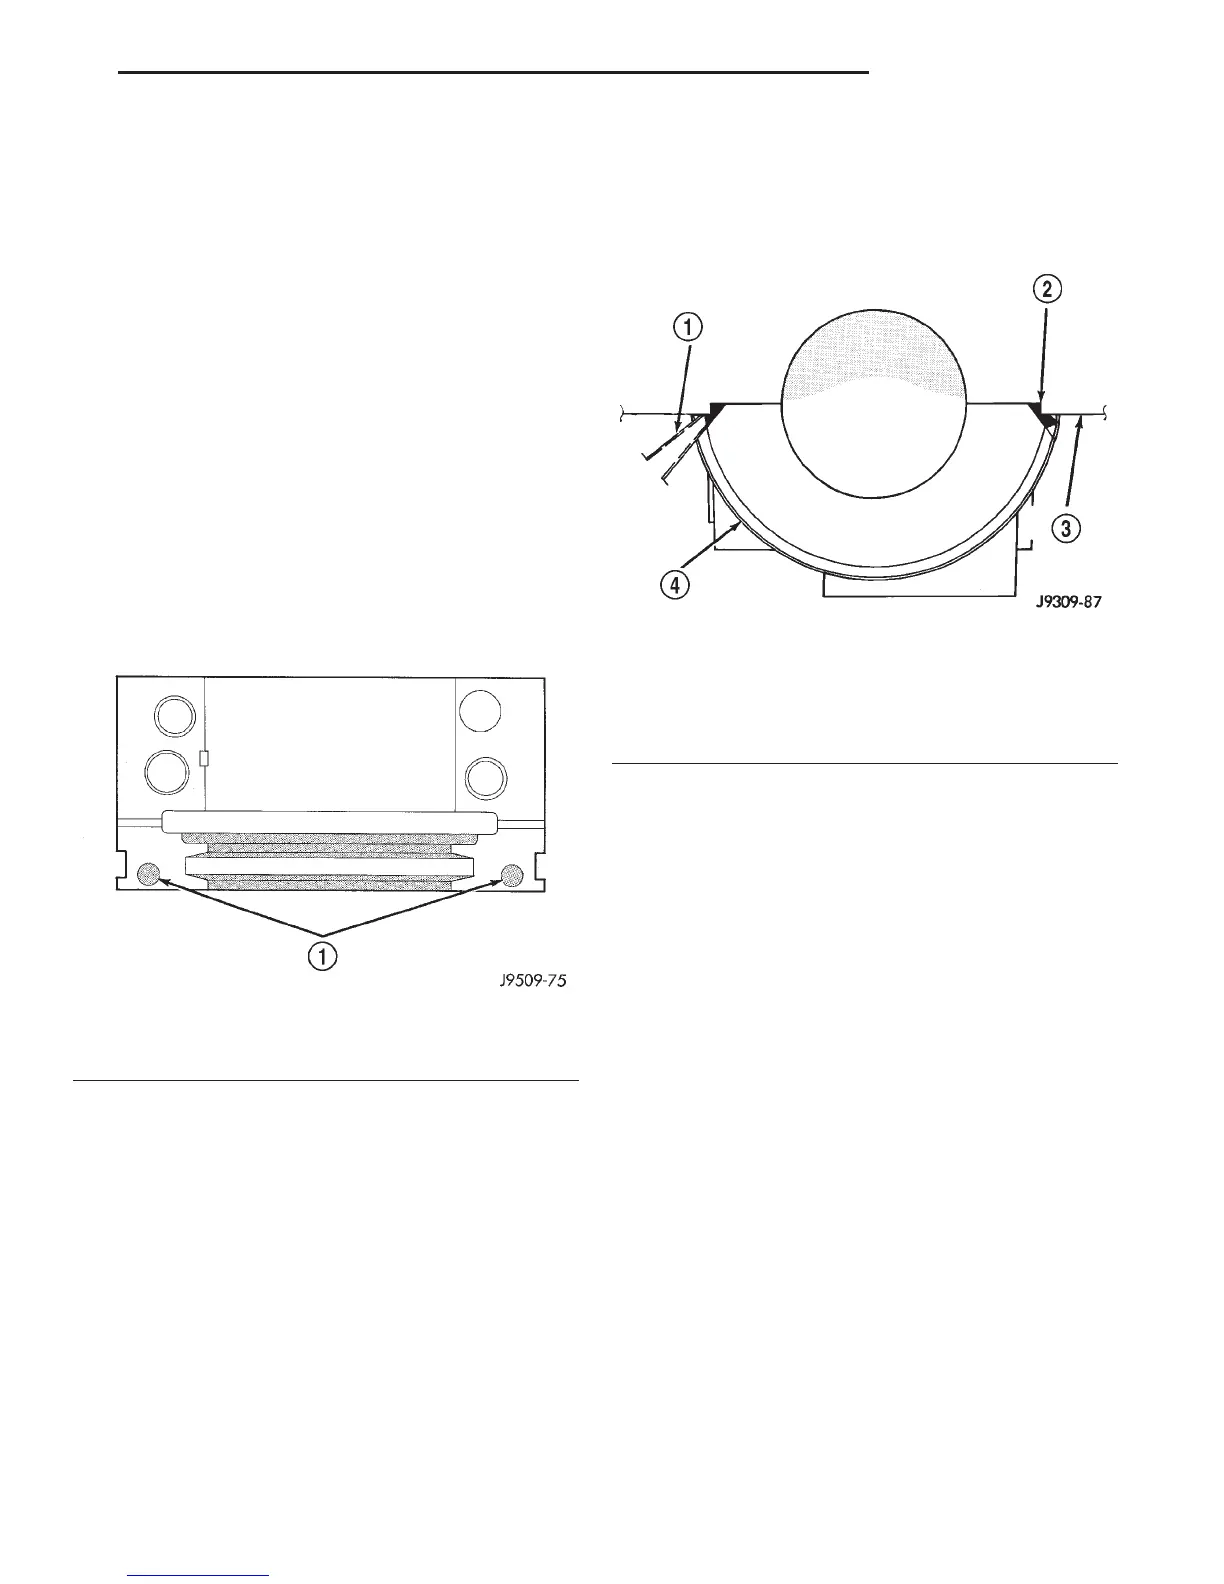
(7) Apply 5 mm (0.20 in) drop of Mopart Gasket
Maker, or equivalent, on each side of the rear main
bearing cap (Fig. 66). DO NOT over apply sealant or
allow the sealant to contact the rubber seal. Assem-
ble bearing cap to cylinder block immediately after
sealant application.
(8) To align the bearing cap, use cap slot, align-
ment dowel and cap bolts. DO NOT remove excess
material after assembly. DO NOT strike rear cap
more than 2 times for proper engagement.
(9) Clean and oil all cap bolts. Install all main
bearing caps. Install all cap bolts and alternately
tighten to 115 N·m (85 ft. lbs.) torque.
(10) Install oil pump.
(11) Install the timing chain cover.
(12) Install the vibration damper.
(13) Position the connecting rods onto the crank-
shaft and install the rod bearing caps. Tighten the
nuts to 61 N·m (45 ft. lbs.).
(14) Apply Mopart Silicone Rubber Adhesive Seal-
ant, or equivalent, at bearing cap to block joint to
provide cap to block and oil pan sealing (Fig. 67).
Apply enough sealant until a small amount is
squeezed out. Withdraw nozzle and wipe excess seal-
ant off the oil pan seal groove.
(15) Install new front crankshaft oil seal.
(16) Immediately install the oil pan.
(17) If the transmission was removed, install the
transmission.
OIL PUMP
REMOVAL
(1) Remove the oil pan.
(2) Remove the oil pump from rear main bearing
cap.
INSTALLATION
(1) Install oil pump. During installation slowly
rotate pump body to ensure driveshaft-to-pump rotor
shaft engagement.
(2) Hold the oil pump base flush against mating
surface on No.5 main bearing cap. Finger tighten
pump attaching bolts. Tighten attaching bolts to 41
N·m (30 ft. lbs.) torque.
(3) Install the oil pan.
CRANKSHAFT OIL SEAL—FRONT
The oil seal can be replaced without removing the
timing chain cover provided the cover is not mis-
aligned.
(1) Disconnect the negative cable from the battery.
(2) Remove vibration damper.
(3) If front seal is suspected of leaking, check front
oil seal alignment to crankshaft. The seal installa-
tion/alignment tool 6635, should fit with minimum
Fig. 66 Sealant Application to Bearing Cap
1 – .25 DROP OF LOCTITE 515 ON BOTH SIDES OF REAR
MAIN CAP
Fig. 67 Apply Sealant to Bearing Cap to Block Joint
1 – MOPAR SILICONE RUBBER ADHESIVE SEALANT NOZZLE
TIP
2 – SEALANT APPLIED
3 – CYLINDER BLOCK
4 – REAR MAIN BEARING CAP
DN 5.2L ENGINE 9 - 117
REMOVAL AND INSTALLATION (Continued)