TRANSFER CASE SKID PLATE
REMOVAL
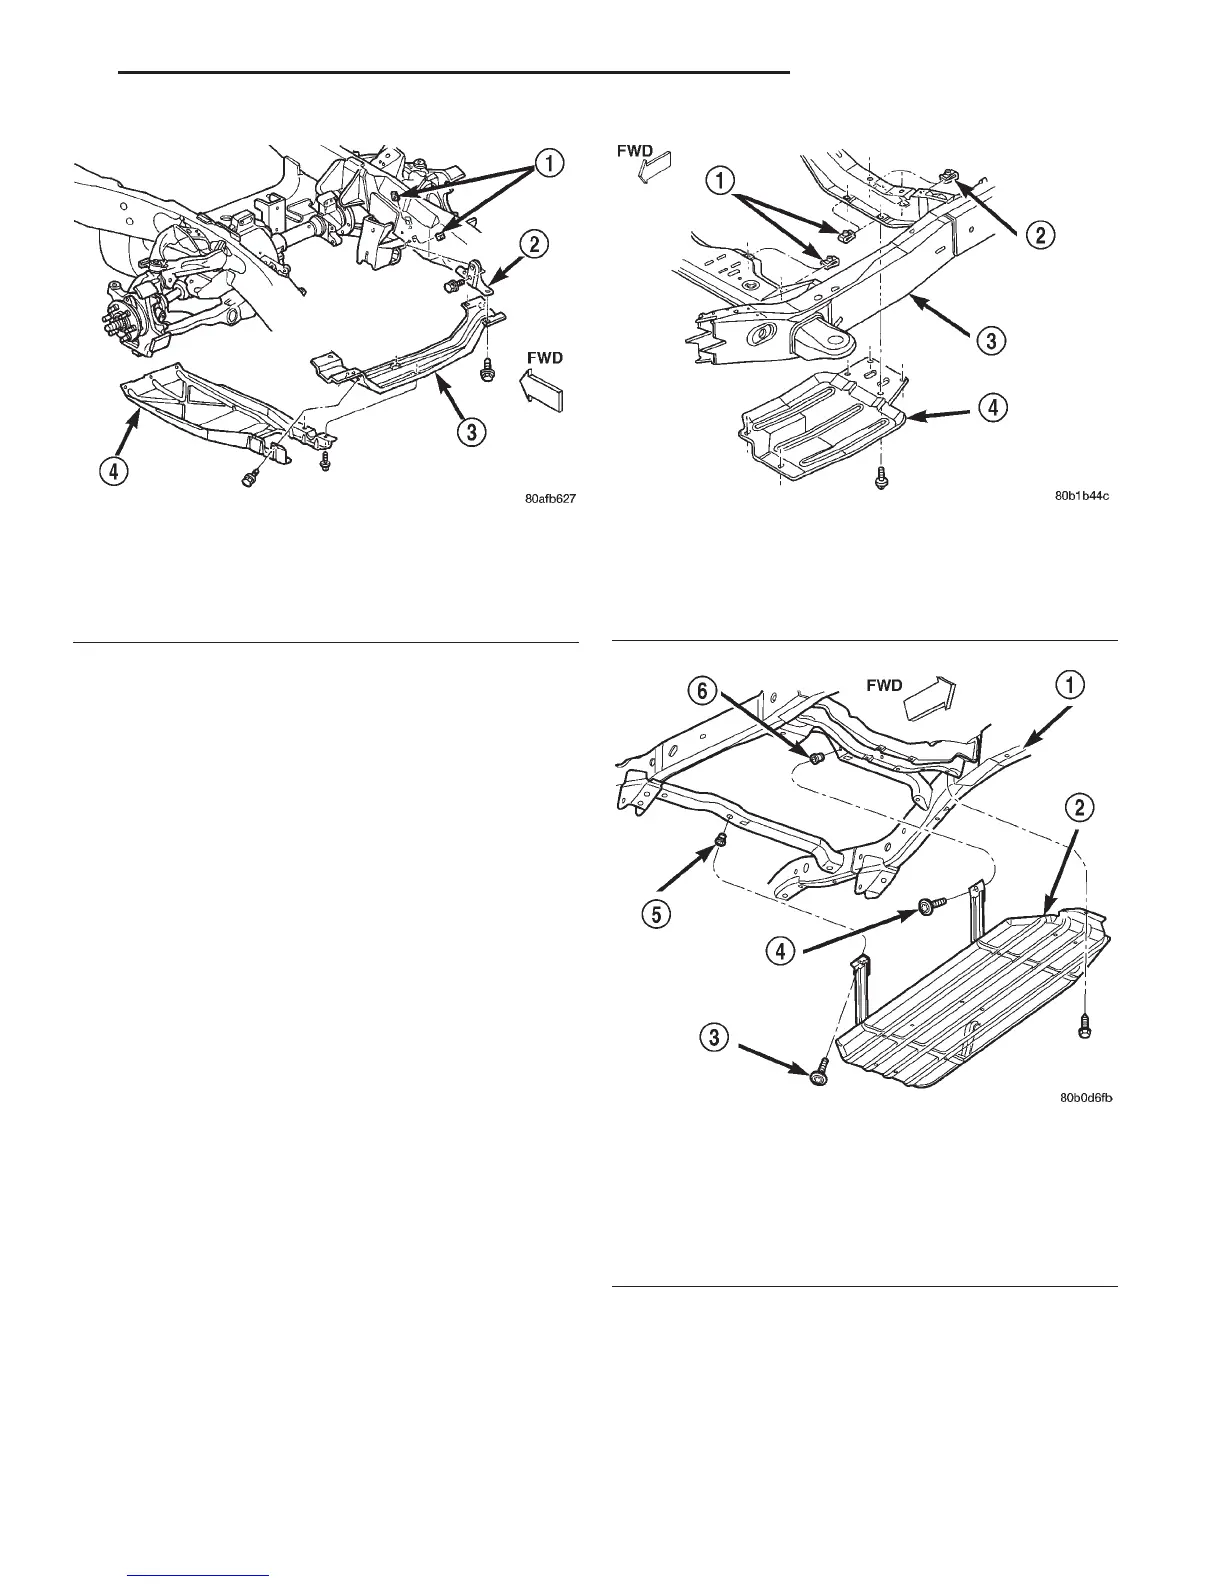
(1) Hoist and support vehicle on safety stands.
(2) Remove bolts attaching skid plate to crossmem-
bers (Fig. 4).
(3) Separate skid plate from vehicle.
INSTALLATION
(1) Position skid plate on vehicle.
(2) Install bolts attaching skid plate to crossmem-
bers. Tighten to 23 N·m (17 ft. lbs.) torque.
(3) Remove safety stands and lower vehicle.
FUEL TANK SKID PLATE—4WD VEHICLES
REMOVAL
(1) Position a support under skid plate.
(2) Remove inboard screws that attach skid plate
to crossmember.
(3) Remove bolts that attach skid plate to frame
side rail (Fig. 5).
(4) Remove support and skid plate from vehicle.
INSTALLATION
(1) Position and support skid plate under fuel
tank.
(2) Install inboard screws attaching skid plate to
crossmember. Tighten screws to 41 N·m (30 ft. lbs.)
torque.
(3) Install bolts attaching skid plate to frame side
rail. Tighten bolts to 23 N·m (17 ft. lbs.) torque.
(4) Remove support from under skid plate.
SPARE TIRE WINCH
CAUTION: Do not use impact wrench when winch-
ing spare tire.
Fig. 3 Front Axle Skid Plate
1 – U-NUT
2 – BRACKET
3 – SKID PLATE CROSSMEMBER
4 – SKID PLATE
Fig. 4 Transfer Case Skid Plate
1 – U—NUT
2 – U—NUT
3 – FRAME
4 – SKID PLATE
Fig. 5 Fuel Tank Skid Plate—4WD Vehicles
1 – FRAME
2 – SKID PLATE
3 – SCREW
4 – SCREW
5 – RIV—NUT
6 – RIV—NUT
DN FRAME AND BUMPERS 13 - 7
REMOVAL AND INSTALLATION (Continued)