FINAL ASSEMBLY
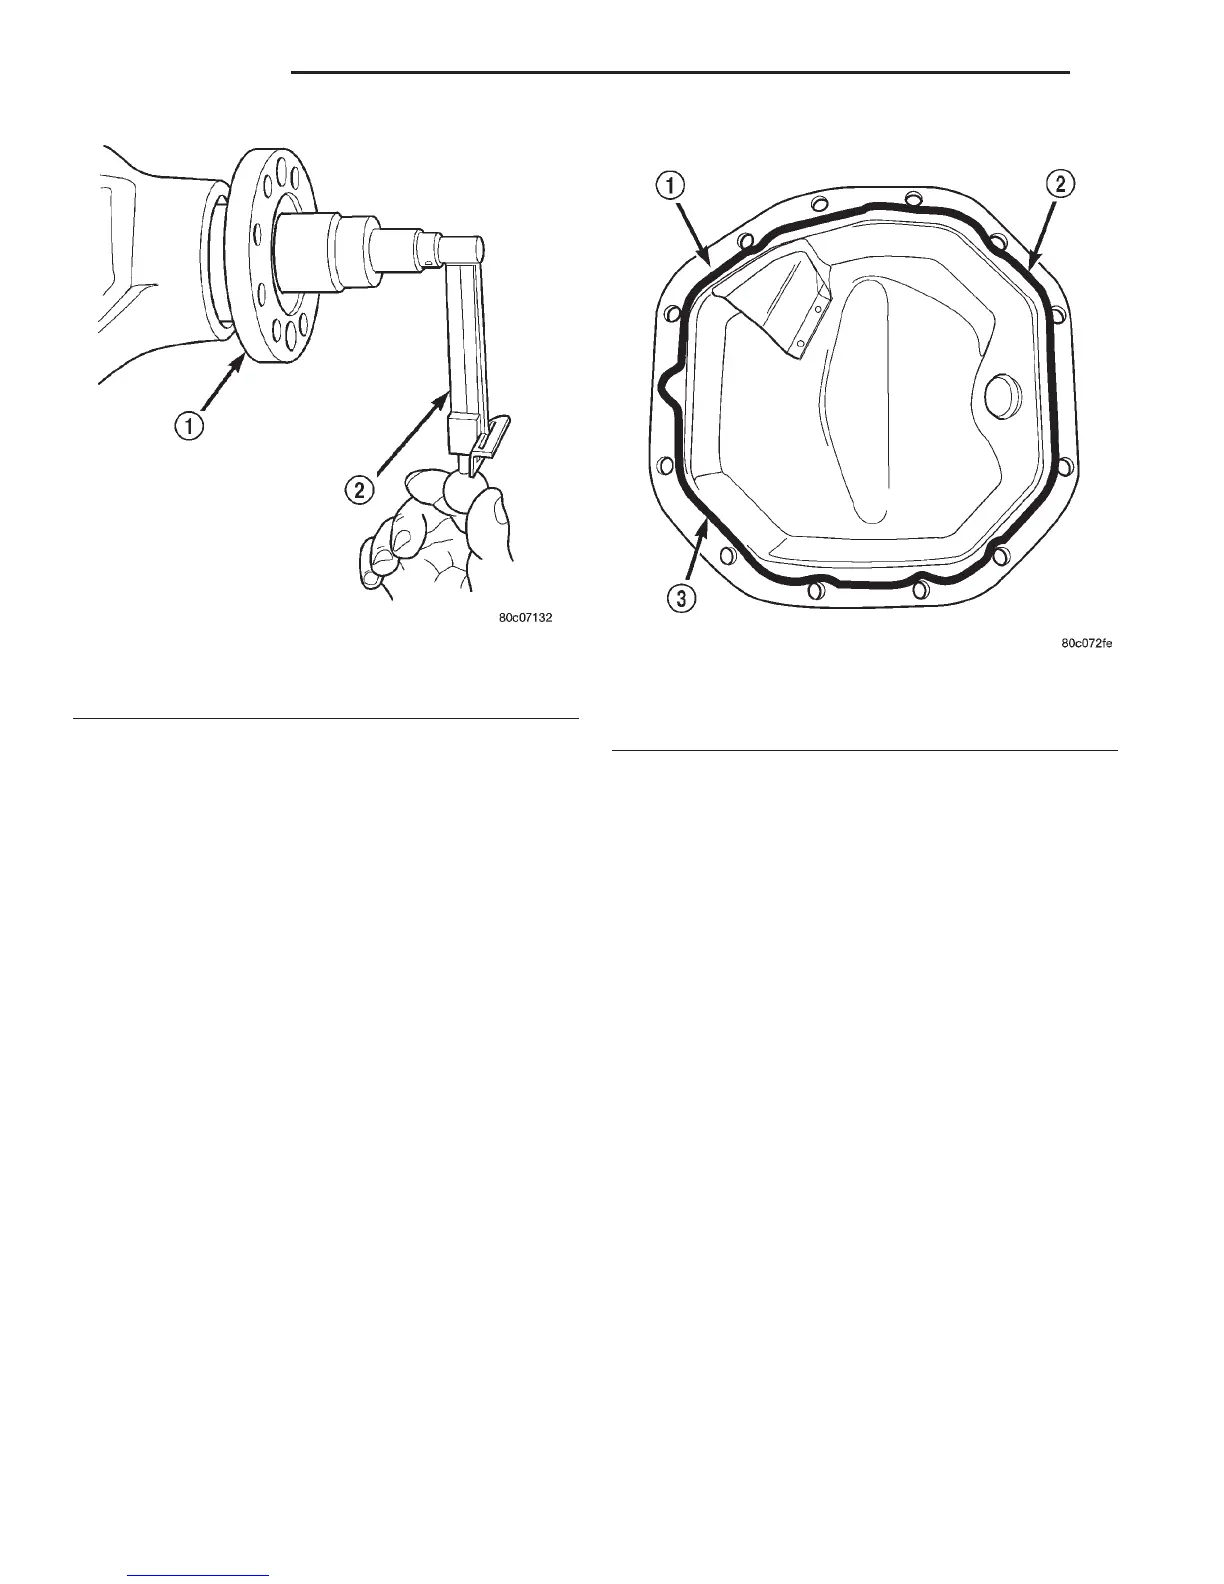
(1) Scrape the residual sealant from the housing
and cover mating surfaces. Clean the mating surfaces
with mineral spirits. Apply a bead of Mopart Silicone
Rubber Sealant, or equivalent, on the housing cover
(Fig. 32).
Install the housing cover within 5 minutes
after applying the sealant.
(2) Install the cover on the differential with the
attaching bolts. Install the identification tag. Tighten
the cover bolts to 23 N·m (17 ft. lbs.) torque.
CAUTION: Overfilling the differential can result in
lubricant foaming and overheating.
(3) Refill the differential housing with gear lubri-
cant. Refer to the Lubricant Specifications section of
this group for the gear lubricant requirements.
(4) Install the fill hole plug.
DISASSEMBLY AND ASSEMBLY
STANDARD DIFFERENTIAL
DISASSEMBLY
(1) Remove ring gear.
(2) Remove roll-pin holding mate shaft in housing.
(3) Remove pinion gear mate shaft (Fig. 33).
(4) Rotate the differential side gears and remove
the pinion mate gears and thrust washers (Fig. 34).
(5) Remove the differential side gears and thrust
washers.
ASSEMBLY
(1) Install the differential side gears and thrust
washers.
(2) Install the pinion mate gears and thrust wash-
ers.
(3) Install the pinion gear mate shaft.
Fig. 31 Check Pinion Rotating Torque
1 – COMPANION FLANGE
2 – INCH POUND TORQUE WRENCH
Fig. 32 Typical Housing Cover With Sealant
1 – SEALING SURFACE
2 – CONTOUR OF BEAD
3 – BEAD THICKNESS 5.0mm (3/16”)
3 - 46 C205F AXLE DN
REMOVAL AND INSTALLATION (Continued)