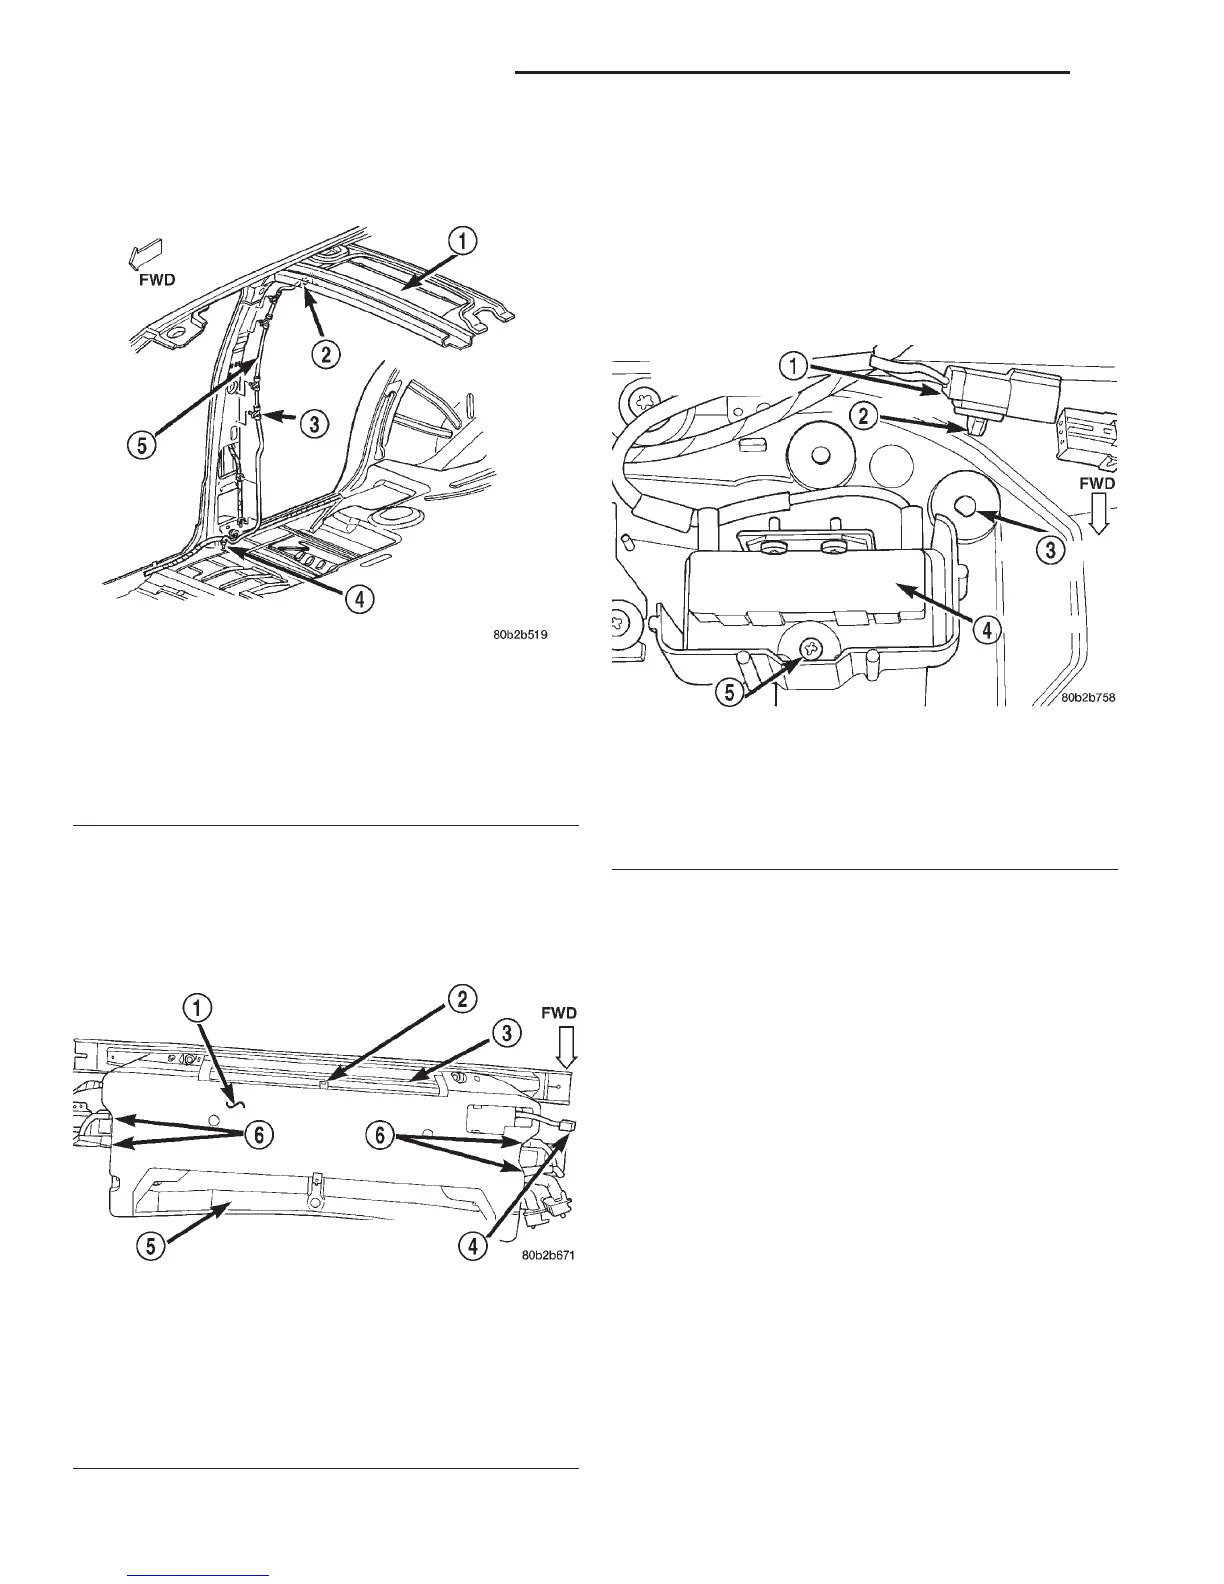
(3) Disconnect the B-pillar drain hoses from the
wye fittings on each side of the rear overhead A/C
unit (Fig. 22).
(4) Remove the nine screws that secure the lower
housing cover to the rear overhead A/C unit.
(5) Release the lower housing cover snap retainer
near the center of the outlet side (rear) of the rear
overhead A/C unit (Fig. 23).
(6) Feed the rear blower motor switch wire har-
ness and connector through the hole in the right end
of the rear overhead A/C unit lower housing cover
while removing the cover from the unit.
(7) Disengage the rear blower motor resistor wire
harness connector retainer from the mounting hole in
the right rear corner of the rear overhead A/C unit
upper housing cover (Fig. 24).
(8) Unplug the rear blower motor resistor wire
harness connector.
(9) Remove the screw that secures the rear blower
motor resistor bracket to the rear overhead A/C unit
upper housing cover.
(10) Remove the rear blower motor resistor and
bracket as a unit from the rear overhead A/C unit.
INSTALLATION
(1) Position the rear blower motor resistor and
bracket in the right rear corner of the rear overhead
A/C unit upper housing cover and secure it with the
mounting screw. Tighten the mounting screw to 2.2
N·m (20 in. lbs.).
(2) Plug in the rear blower motor resistor wire
harness connector.
(3) Engage the rear blower motor resistor wire
harness connector retainer to the mounting hole in
the right rear corner of the rear overhead A/C unit
upper housing cover.
(4) Feed the rear blower motor switch wire har-
ness and connector through the hole in the right end
of the rear overhead A/C unit lower housing cover
while positioning the cover to the unit.
Fig. 22 Rear Overhead A/C Drain Hose Remove/
Install
1 – REAR OVERHEAD A/C UNIT
2 – WYE FITTING
3 – CLIP
4 – GROMMET
5 – DRAIN HOSE
Fig. 23 Rear Overhead A/C Unit Lower Housing
Cover Remove/Install
1 – REAR OVERHEAD A/C UNIT LOWER HOUSING COVER
2 – SNAP RETAINER
3 – OUTLET SIDE
4 – BLOWER MOTOR SWITCH WIRE HARNESS CONNECTOR
5 – INLET SIDE
6 – DRAIN HOSES
Fig. 24 Rear Blower Motor Resistor Remove/Install
1 – WIRE HARNESS CONNECTOR
2 – RETAINER
3 – MOUNTING HOLE
4 – RESISTOR
5 – SCREW
24 - 36 HEATING AND AIR CONDITIONING DN
REMOVAL AND INSTALLATION (Continued)