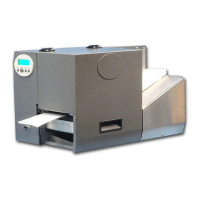
Thermaprint 64 User Manual
11
ribbon onto the ribbon supply mandrel so that the ribbon will unwind with the coated side
facing down. Place an empty ribbon core on the ribbon take-up mandrel. For coated side
in ribbons, the ribbon roll will unwind in a counter-clockwise direction and the ribbon
will come off the top side of the roll. For coated side out ribbons, these directions will be
opposite.
Peel the leader from the roll of ribbon, draw it underneath the ribbon guide and print
head, and then up and over the ribbon drive platen. Ensure that the supply and take-up
cores are aligned on their respective mandrels. Use the adhesive on the ribbon leader to
apply itself to the empty core on the ribbon take-up mandrel. While doing this process,
remove any wrinkles from the ribbon. After adhering the ribbon leader to the empty core,
you can hand rotate the take-up mandrel to advance the ribbon and remove any persistent
wrinkles. Moving the ribbon back and forth gently along the length of the ribbon guide,
print head, or ribbon drive platen will help remove any major wrinkles.
Turn the printer on using the power switch on the back of the machine. Adjust the outside
guide to the desired product width. Rotate the separator gap control knob clockwise as
viewed from the top to loosen the gap until there is an easily visible gap shown. Place a
single product into the magazine and ensure the front edge is between the gray separator
wheel and the white product drive wheel. Press the online button, to take the machine
into offline mode and then press the feed button. At this point, the separator gap should
be too wide to effectively feed the product through the machine, so decrease the separator
gap by rotating the separator gap control knob counter-clockwise to reduce the gap
between the two wheels. If the machine times out looking for the product to feed, simply
acknowledge the error by pressing the online button and then the feed button to have the
product drive wheel turn. Gently hold the back end of the product between two fingers,
and keep tightening the gap while the product drive wheel turns until the separator pulls
the product out from your fingers.
Fill the magazine the rest of the way with identical product, making sure that the bottom
of the stack is pushed forward. Next, manually adjust the material length setting to the
length provided by the labeling software under the print parameter sub-menu. When this
is done, press feed a few times to ensure that the products are feeding through
appropriately with no double feeds or jams. This paragraph should be done every time the
printer is powered on or the length of the product is changed.
NOTE: Every time the machine is powered on or the product length is changed, the
printer will need to have product fed through it until it senses a gap between two
products. This is the case even if the product length changes from 155.5 mm to 155.6
mm. To avoid this after setting up the machine, ensure that the number you enter into the
print parameter submenu option of “materiallength” is identical to the material length that
the computer sends to the printer. Also, every time you change the material length or
power on the machine, take the machine into offline mode and press the feed button once.
The machine will feed through two products, the first to find a gap between two products
and the second because a feed command has been received. If you do not do this, the first
time the printer prints, it will feed through one pouch without printing, and then print on
the second pouch.