Thermaprint 64 User Manual
14
turn the beeper off, but leave the error displayed, and pressing the enter button will
acknowledge the error and return the machine to the state it was in when the error was
interrupted. It may be necessary to press the feed button to resume printing if that is when
the error occurred. Error messages tend to relate directly to the mechanics of the printer
itself rather than the label images sent to it from a computer.
If an error message persists on start-up or during every print, turn the machine off,
disconnect the communications cable, and let it sit for 30 seconds. Then turn the machine
back on and reconnect the communications cable after the initialization sequence has
finished. If the error continues to persist, please note any messages the screen displays,
and call a service technician.
Below are some simple troubleshooting tips for common problems encountered with the
Thermaprint 64.
IF the printer will not print:
Are there any status messages or error reports that are shown on the display
screen when a print job is sent, or when the printer feeds a pouch through the
machine?
Is the ribbon properly threaded, with the coated side facing down as it passes
under the print head?
Will an info print-out work correctly? To do so, enter the menu system, enter the
PRINT INFO submenu, and then press enter on any of the print outs available. It
should print a status report. There must be product and ribbon in the machine for
it to print.
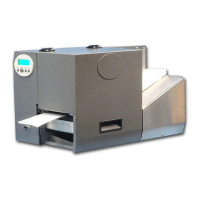
Does the printer feed pouches through completely? Ensure the separator is
correctly aligned. The Gap Adjustment (see Figure 1) knob allows for proper
separation adjustment. Clockwise rotation, as viewed from above, increases the
separator gap which makes feeding easier, but can cause double feeding to occur
if increased significantly. Counter-clockwise rotation, as viewed from above,
decreases the separator gap which makes double feeding less likely to occur, but
can cause the product to crinkle or jam if decreased significantly.
IF the print is skewed on the product:
Adjust the feed assembly so that it has a very minor skew (less than 5 degrees)
towards the back wall, so that the products are very gently pressed against the
wall, but not enough to cause them to crinkle, or corners to flip up.
Adjust the position of the red press roller along the shaft with the green lever.
Ensure the roller presses on the feed belts, otherwise it will not allow product to
pass and will cause jams.
IF the print is incorrectly positioned along the length of the pouch: