Thermaprint 64 User Manual
10
Introduction
This user manual will introduce you to the Thermaprint 64, describe how to setup,
operate, troubleshoot problems, and maintain the print head, sensors, and belts of the
Thermaprint 64. Also included in Appendix A is a full description of the menu system
with detailed descriptions of the parameters, options, and functions accessible through it.
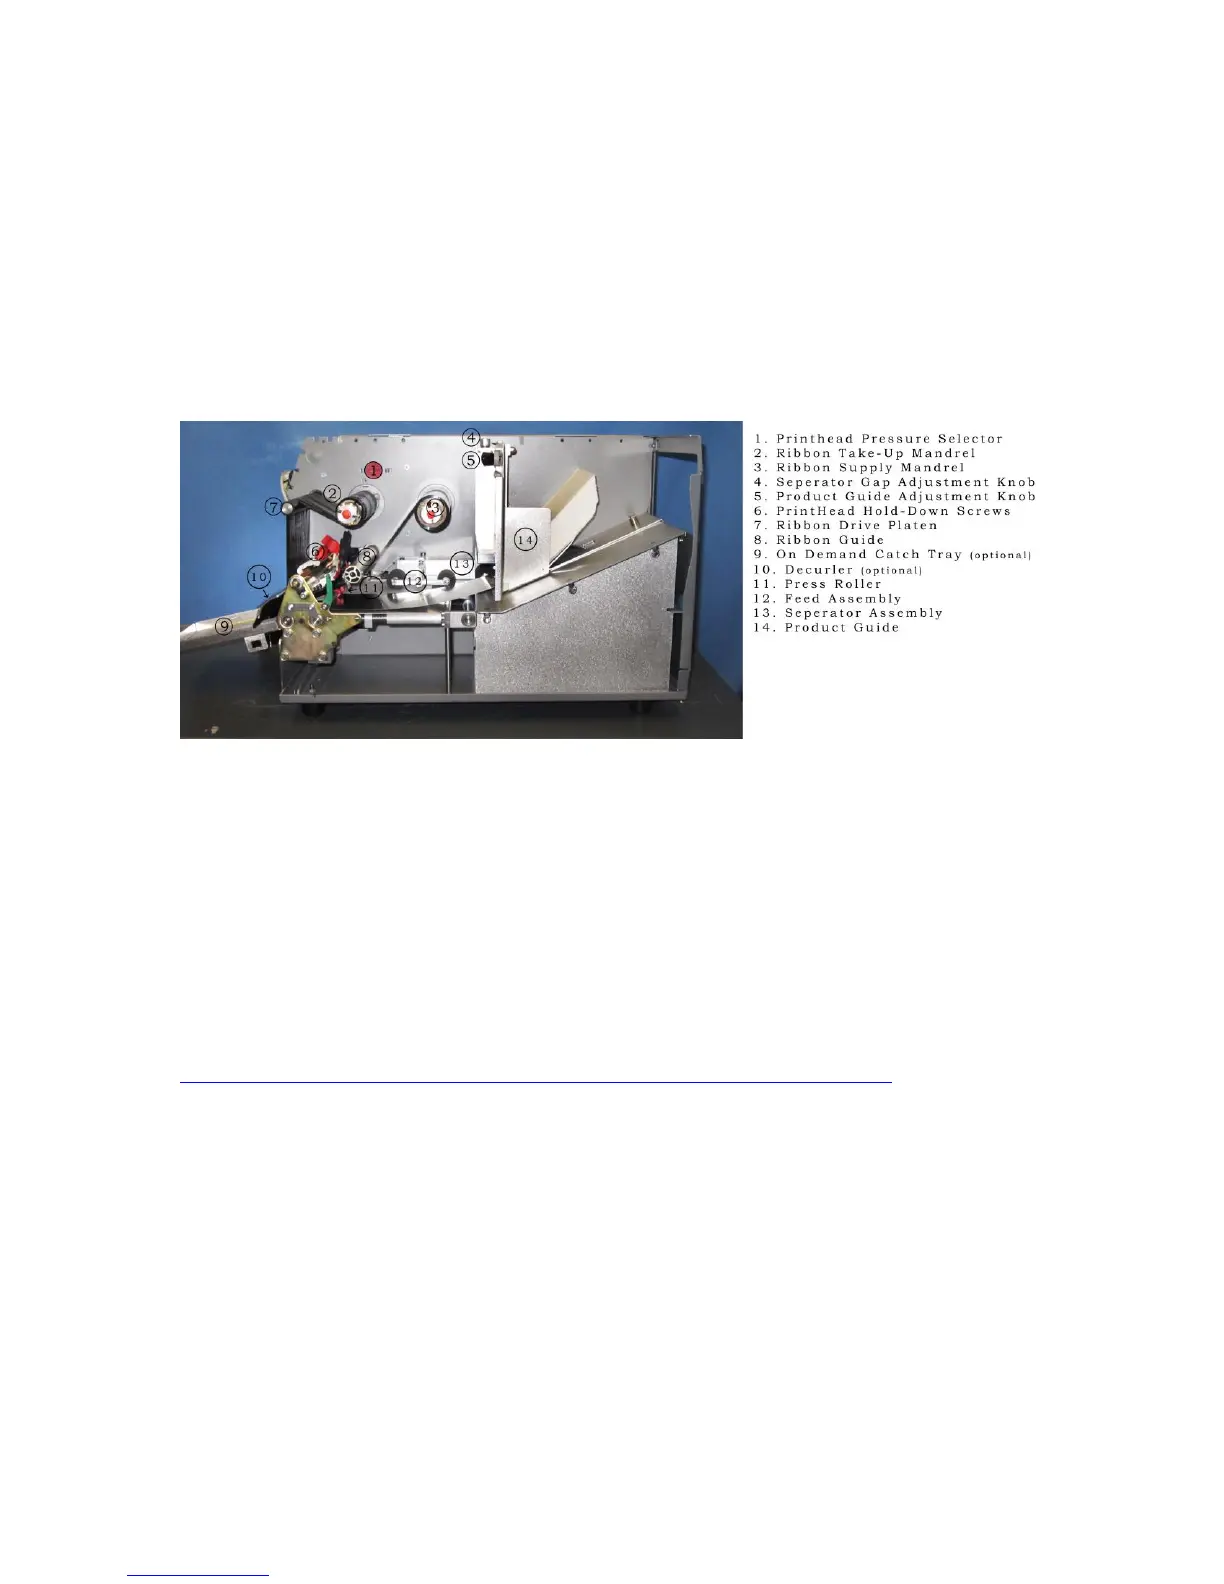
Below, in Figure 1, is a picture of the Thermaprint 64 with the cover opened, and
provides a detailed call out of the various components and modules. The terms provided
in Figure 1 will be used throughout the rest of this manual for consistency.
Figure 1: Thermaprint 64 Part description
Setup
Unpack the printer, setting aside and saving the shipping box and packing material. Plug
the printer into a standard 120V 50-60 Hz wall outlet using the provided printer power
cord. Connect the printer to a computer using the provided cable.
To download and install the Thermaprint 64 driver go to:
http://www.monarch.averydennison.com/emea/support/printer-drivers.asp
and download the zip file that contains Avery's standard installer for all of their drivers.
You will need to unzip it and run the installer executable on the computer that will
manage the printer. Click next and agree to the license agreement. The printer driver you
will need to install is the Avery Dennison 64-xx, where xx is the size of the print head in
inches (4, 5, 6 or 8). On the next page select the port that the printer is attached to, be it
USB001 for USB, or LPT1 for the Centronics, or COM1 for rs-232. For an Ethernet
connection a few additional steps are required, so if that is the desired method of
communication, for now select one of the other options and further instructions will be
include in an addendum. After you have selected the desired port, and optionally changed
the name of the printer driver to whatever you like, click Finish. The driver should be
ready to use.
Attach any other optional accessories, following the instructions in the provided
addendums. Open the cover and place a roll of near-edge wax/resin thermal transfer